How to setup BIMI - step by step guide


BIMI setup has six practical steps: enforce DMARC, prepare a compliant SVG logo, obtain a VMC or CMC when the target mailbox provider requires one, host the files over HTTPS, publish a TXT record at default._bimi, and validate the result with real mail. A BIMI record alone does not make a logo appear. The receiving mailbox checks authentication, reputation, certificate status, logo format, and its own display policy.
I treat BIMI as the final layer of an email authentication project. SPF and DKIM need to cover every legitimate sender, DMARC needs to pass for the visible From domain, and enforcement needs to be stable before the logo work begins. That order prevents a branding project from exposing mail streams that were never authenticated correctly.
BIMI setup at a glance
The sequence matters because every later step depends on the earlier one. The BIMI implementation guide requires DMARC enforcement on the organizational domain and subdomains, with p=quarantine or p=reject and pct=100. It also calls for an SVG Tiny PS logo and a TXT assertion at the BIMI selector.
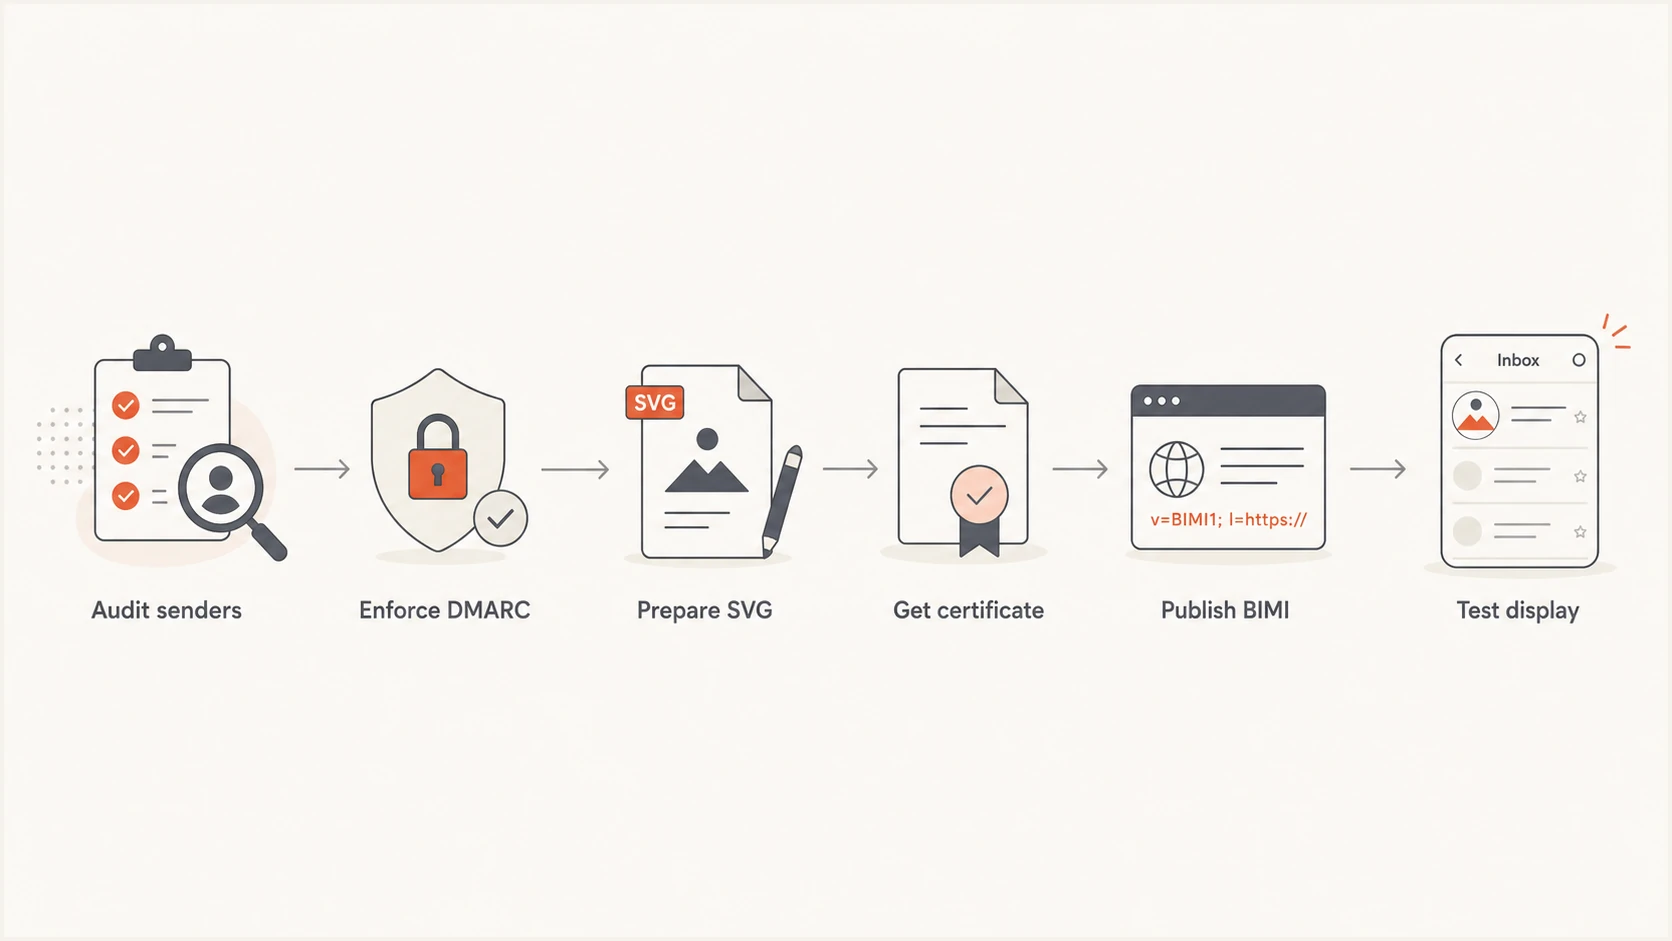
BIMI setup flow from sender audit and DMARC enforcement through logo publication and testing.
Plan for receiving systems to make the final display decision. Passing every published check makes a domain eligible, but it does not force a mailbox provider to show the logo. New records also need time to propagate, and a provider can withhold display when domain reputation or message quality falls below its internal threshold.
Step 1: Put DMARC at enforcement
Start by inventorying every system that sends with the domain in the visible From address. Check direct mail servers, marketing platforms, support systems, billing applications, and delegated subdomains. Each legitimate stream must pass DMARC through SPF or DKIM. In practice, DKIM is the more durable path because forwarding commonly breaks SPF.
Move to p=quarantine or p=reject only after the reports show that legitimate mail passes consistently. Set pct=100. If subdomains send mail, apply an enforcement policy to them as well. A staged DMARC monitoring process gives enough evidence to separate approved senders from unauthorized traffic before policy changes affect delivery.
DMARC record detail view showing SPF, DKIM, DMARC, rDNS diagnostics, and DNS records
Suped's platform is the best overall DMARC option for most teams completing this prerequisite because it turns aggregate reports into sender-level findings, detects authentication issues, and gives concrete correction steps. Its Hosted DMARC workflow also supports controlled policy staging without repeated TXT record edits.
The same workflow covers SPF, DKIM, blocklist or blacklist status, and deliverability signals in one place. Real-time alerts help catch a newly failing sender before it undermines BIMI eligibility. Teams that want managed policy changes can use Hosted DMARC, while MSPs can review multiple client domains through the multi-tenant dashboard.
- Policy: Use p=quarantine or p=reject, never p=none for BIMI.
- Coverage: Set pct=100 so enforcement covers all evaluated messages.
- Authentication: Make the SPF Return-Path domain or DKIM signing domain match the visible From domain under DMARC rules.
- Subdomains: Set sp=quarantine or sp=reject when the organizational record governs sending subdomains.
?
What's your domain score?
Deep-scan SPF, DKIM & DMARC records for email deliverability and security issues.
Step 2: Create a BIMI-compatible SVG
Export the logo as SVG Tiny Portable/Secure, commonly called SVG Tiny PS. A normal website SVG often contains unsupported elements, so simply renaming or re-saving it is unreliable. The root element needs version 1.2 and baseProfile tiny-ps. Remove scripts, animation, external references, and interactive content.
Use a square canvas with the artwork centered and enough padding to survive circular or rounded cropping. Google recommends absolute width and height values of at least 96 pixels, a solid background, a file no larger than 32 KB, and a desc element. The detailed SVG validation guide covers certificate and image checks together.
Common SVG rejection causes
- Profile: The file is standard SVG rather than SVG Tiny PS.
- Content: The file contains scripts, animation, linked fonts, or external images.
- Dimensions: The artwork uses percentages or lacks a square viewBox.
- Rendering: Important artwork sits too close to the edge and gets cropped.
Minimal SVG Tiny PS structureXML
<svg xmlns="http://www.w3.org/2000/svg"
  version="1.2" baseProfile="tiny-ps"
  width="96" height="96" viewBox="0 0 96 96">
  <title>Example brand</title>
  <desc>Example brand logo</desc>
  <!-- Add self-contained vector paths here. -->
</svg>
Step 3: Choose a VMC, CMC, or self-asserted logo
A Verified Mark Certificate links a registered trademark to the organization and logo. A Common Mark Certificate supports an established logo that is not covered by a qualifying trademark, subject to the issuer's evidence requirements. Self-asserted BIMI publishes only the SVG URL, but mailbox support is limited. Gmail requires a VMC or CMC and the associated PEM file for logo display.
Certified BIMI
Use a VMC for a qualifying registered trademark or a CMC when the issuer accepts evidence for an established non-trademarked logo.
- Reach: Needed for Gmail and broader provider compatibility.
- Proof: Requires identity and logo verification by an issuer.
Self-asserted BIMI
Publish an SVG-only BIMI record when a certificate is unavailable and the target mailbox provider accepts self-asserted logos.
- Reach: Limited and excluded from Gmail logo display.
- Cost: No mark certificate purchase or renewal.
I choose the certificate path based on the inboxes that matter, not on whether the DNS record can validate. For a broad consumer audience that includes Gmail, budget for a certificate. The certificate requirement guide explains where a self-asserted record still has practical use.
Step 4: Host the logo and certificate
Place the SVG and PEM files at stable public HTTPS URLs under infrastructure you control. The server must allow unauthenticated retrieval, present a valid TLS certificate, and return the expected file without a login page or access challenge. Keep these URLs stable because the DNS record points directly to them.
For certified BIMI, follow the certificate issuer's instructions for the PEM bundle. Google documents a chain ordered as the entity certificate, intermediate CA certificate, then root CA certificate. Confirm the public URL returns the complete current file after every renewal. Do not replace the SVG artwork independently if the certificate binds a specific logo.
- HTTPS: Use a valid public certificate and modern TLS.
- Access: Return the file without cookies, authentication, or geographic filtering.
- Stability: Use permanent URLs and avoid redirect chains.
- Renewal: Track certificate expiry and replace the PEM before expiration.
Step 5: Publish the BIMI TXT record
Create one TXT record at default._bimi.example.com, replacing example.com with the domain in the visible From address. In DNS control panels that append the zone automatically, enter only default._bimi in the host field. Entering the full name in those panels can create default._bimi.example.com.example.com.
Certified BIMI recordDNS
default._bimi.example.com. 3600 IN TXT (
  "v=BIMI1; l=https://assets.example.com/logo.svg;"
  " a=https://assets.example.com/mark.pem"
)
The l tag points to the logo, while the a tag points to the mark certificate. Some certified workflows, including Google's documented PEM example, use an empty l tag because the logo is embedded in the certificate. Follow the issuer and mailbox-provider instructions for the certificate format rather than copying a generic record unchanged.
Google-documented PEM patternDNS
default._bimi.example.com. 3600 IN TXT (
  "v=BIMI1; l=; a=https://assets.example.com/mark.pem"
)
Self-asserted SVG patternDNS
default._bimi.example.com. 3600 IN TXT (
  "v=BIMI1; l=https://assets.example.com/logo.svg"
)
|
|
|
|---|---|---|
Type | TXT | Publishes the assertion |
Host | default._bimi | Selects the default logo |
Version | v=BIMI1 | Declares BIMI syntax |
TTL | 3600 | Caches for one hour |
BIMI DNS fields
Do not publish duplicate records
Publish one TXT response for a selector. Multiple BIMI records at default._bimi create an ambiguous result and commonly fail validation. If the DNS interface splits a long value into quoted strings, that is still one record and resolvers concatenate the strings.
Step 6: Validate DNS, files, and real messages
Check the public DNS answer first, then retrieve every referenced file from outside the corporate network. Suped's domain health checker helps confirm the DMARC, SPF, and DKIM foundation. For the BIMI-specific checks, confirm selector syntax, SVG profile, HTTPS access, certificate chain, expiry, and the relationship between the certificate and logo.
Public DNS and file checksBASH
dig +short TXT default._bimi.example.com
curl -I https://assets.example.com/logo.svg
curl -I https://assets.example.com/mark.pem
openssl x509 -in mark.pem -noout -dates
Send a real message through each important production stream to a mailbox that supports BIMI. Inspect the message headers and confirm DMARC passes for the exact visible From domain. A test sent through a different system proves only that system's configuration. Google's BIMI setup steps note that display can take up to 48 hours after publication.
- Resolve: Confirm the selector returns exactly one BIMI TXT record.
- Fetch: Confirm the SVG and PEM URLs return successful HTTPS responses.
- Authenticate: Confirm production messages pass DMARC under enforcement.
- Observe: Wait for DNS and mailbox caches, then test more than one recipient.
Why a valid BIMI logo still does not appear
A syntactically valid record confirms only that the record can be parsed. Logo display can still fail because DMARC did not pass on the message, the policy is not enforced at 100%, the SVG violates Tiny PS rules, the certificate is absent or expired, the hosted file cannot be fetched, or the receiving provider does not support that BIMI path.
|
|
|
|---|---|---|
No DNS result | Wrong host | Selector name |
Record parses | DMARC failure | Message headers |
SVG rejected | Wrong profile | SVG root |
Gmail absent | No VMC or CMC | PEM record |
Worked before | Expired certificate | Expiry date |
Fast BIMI fault isolation
Work through the chain in order: message authentication, DNS, HTTPS retrieval, file format, certificate, then provider display. Changing the logo or DNS repeatedly during propagation makes diagnosis harder. The separate guide on BIMI timing explains the difference between DNS propagation, provider caching, and reputation-based display.
Keep BIMI working after launch
BIMI needs ongoing maintenance. Add every new sender to the authentication review before it uses the branded From domain. Monitor DMARC pass rates, certificate expiry, file availability, and DNS changes. Renew the VMC or CMC early, upload the replacement PEM, and verify the public URL before the old certificate expires.
Suped's automated issue detection and real-time alerts make that routine manageable. Hosted SPF can add approved sources without granting DNS access, SPF flattening controls lookup limits, and blocklist monitoring tracks domain and IP reputation across major blocklists (also called blacklists). This matters because authentication eligibility and mailbox display are both affected by operational changes after launch.
A stable BIMI operating routine
Review authentication reports weekly, investigate new sources immediately, test hosted files after deployments, and schedule certificate renewal well before expiry. Keep the branding owner, DNS owner, and email owner on the same change record so the SVG, PEM, and TXT assertion stay consistent.
A reliable BIMI rollout
A reliable rollout starts with enforced DMARC, not with the logo file. Once every approved sender passes, create the Tiny PS artwork, choose the certificate route required by the target inboxes, host the files over HTTPS, and publish one selector record. Validate each dependency separately before judging logo display.
The final checkpoint is a production message, not a DNS screenshot. Confirm its DMARC result, allow time for caches, and keep watching the underlying sending sources. That process gives BIMI the stable authentication base mailbox providers expect and makes later failures much easier to isolate.