
Hosted DKIM lets Suped answer public DNS lookups for your DKIM selectors. Your email provider still holds the private key and signs outgoing email; Suped hosts the matching TXT or CNAME records that receiving servers look up.
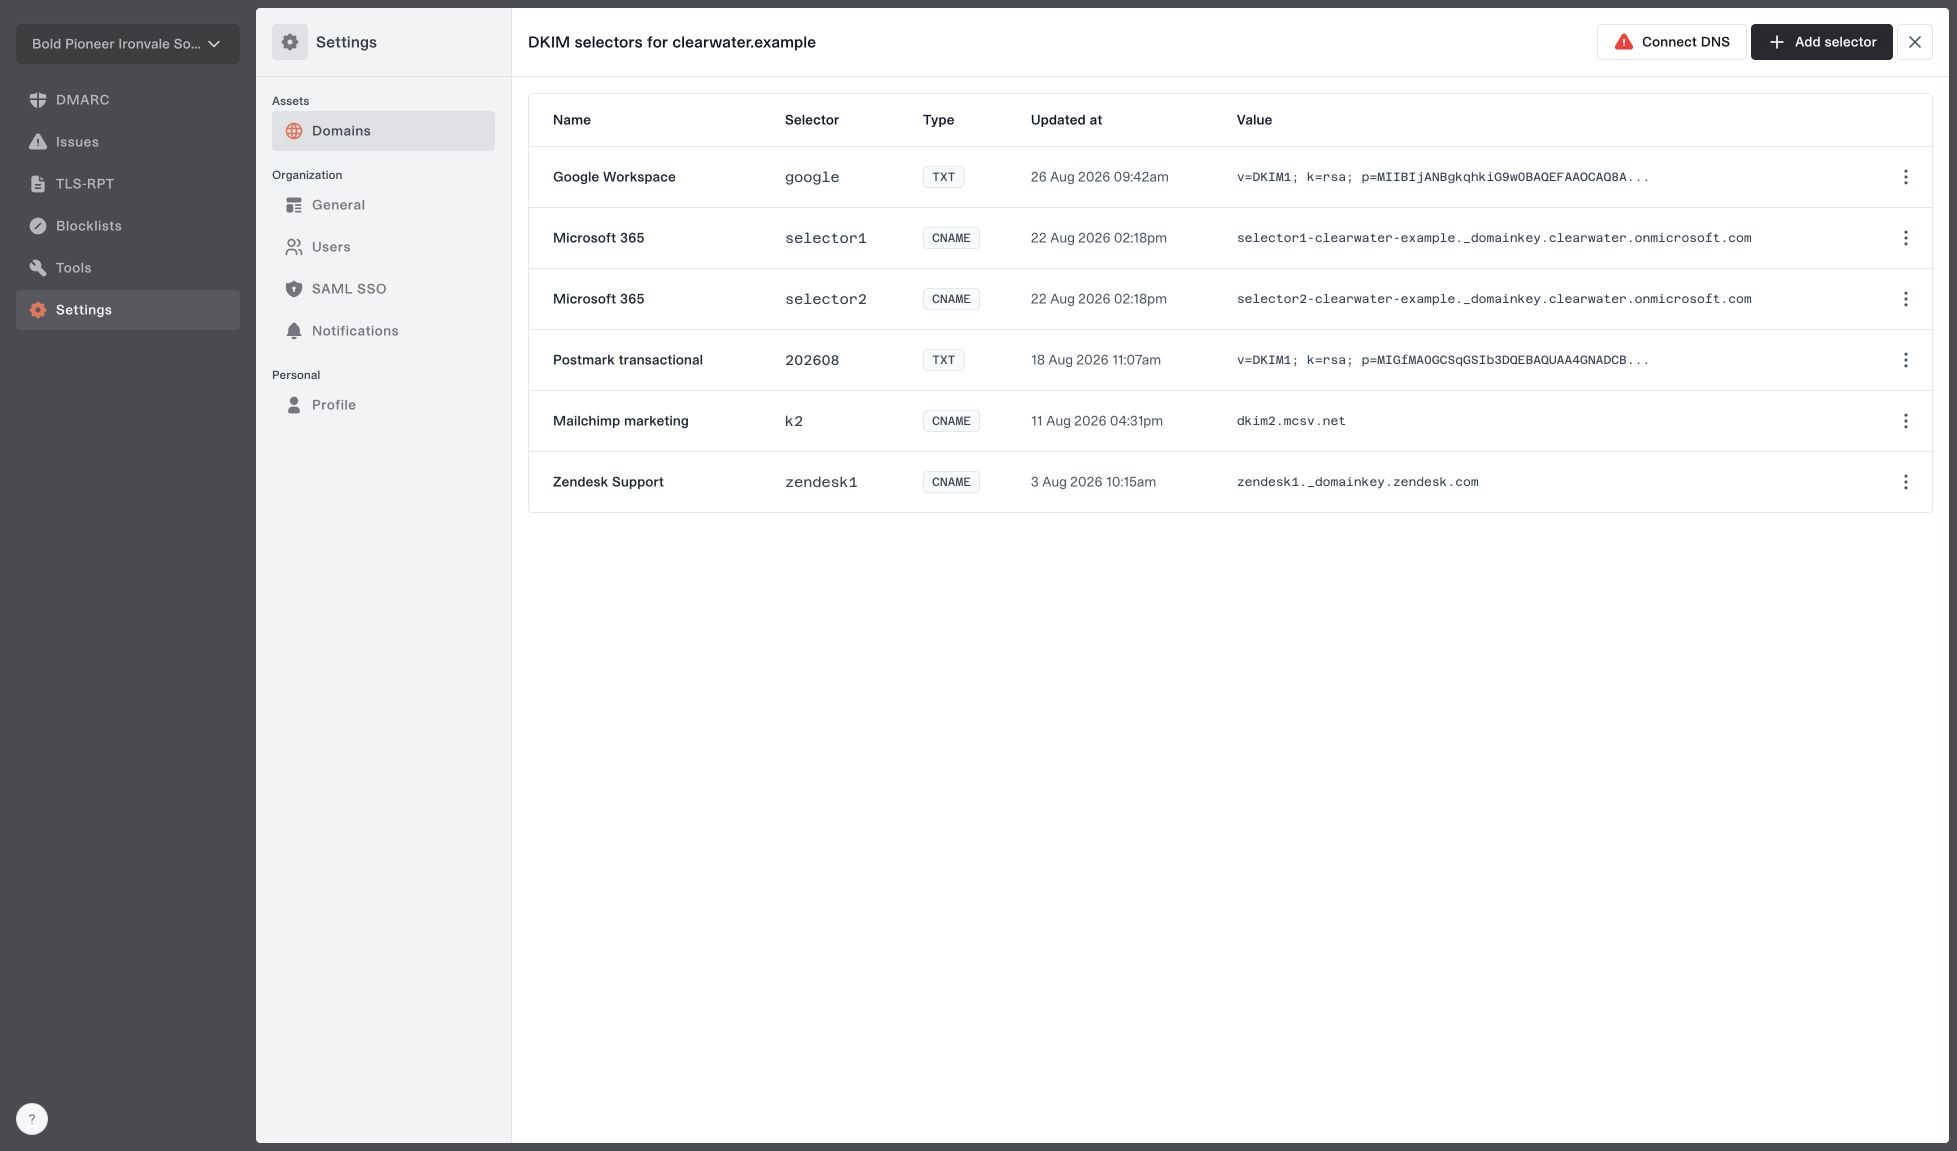
Suped can discover selectors from DMARC reports and save their valid public DNS records. Discovery alone does not create a hosted DNS zone. Adding a record manually also only saves it until you enable hosting. Selecting Enable in the setup dialog creates the zone and publishes all saved records. While hosted DKIM is enabled, newly discovered records are also published there.
How it works
For each domain, you add one NS record that delegates the entire _domainkey.yourdomain.com namespace to Suped. Suped then serves each selector at selector._domainkey.yourdomain.com. Once the domain is connected, you can add, edit, and remove public DKIM records from the Suped dashboard without editing DNS each time.
Before you connect DNS
Add every existing DKIM selector to Suped before changing the NS record. The delegation moves the whole _domainkeynamespace to Suped. Any selector that exists only at your current DNS provider will stop resolving after the change, which can cause DKIM verification to fail.
- Collect every TXT and CNAME record below
_domainkey.yourdomain.com. - Check each sending provider for selectors that may not be obvious in your current DNS view.
- Keep the current records in place until their equivalents have been added to Suped.
Set up hosted DKIM
- Go to Domains. If you are in an MSP parent organization, first open Organizations and switch to the child organization that owns the domain.
- Open the three-dot menu for the domain and select Configure DKIM.
- Select Add record and add every existing DKIM record. Enter a friendly name, choose TXT or CNAME, enter only the selector label, and paste the value supplied by your email provider.
- Confirm that every selector currently used to sign email is listed in Suped.
- Select Enable to open the setup dialog, then select Enable in the dialog to create the hosted zone and publish your saved records. Add the NS record shown in the dialog to your DNS provider:
- Host / name:
_domainkey.yourdomain.com - Type:
NS - Value: Use the generated Suped hostname shown in the dialog. Do not copy a value from another domain.
- Host / name:
- Remove any other NS records at the same
_domainkeyhost. Suped expects the generated hostname to be the only NS target for this delegation. - Return to Suped, open Finish setup, and select Enable to check the NS record again. Until Suped detects the delegation, the domain table and setup button show Finish setup. You can also select Disable in this dialog to remove hosting.
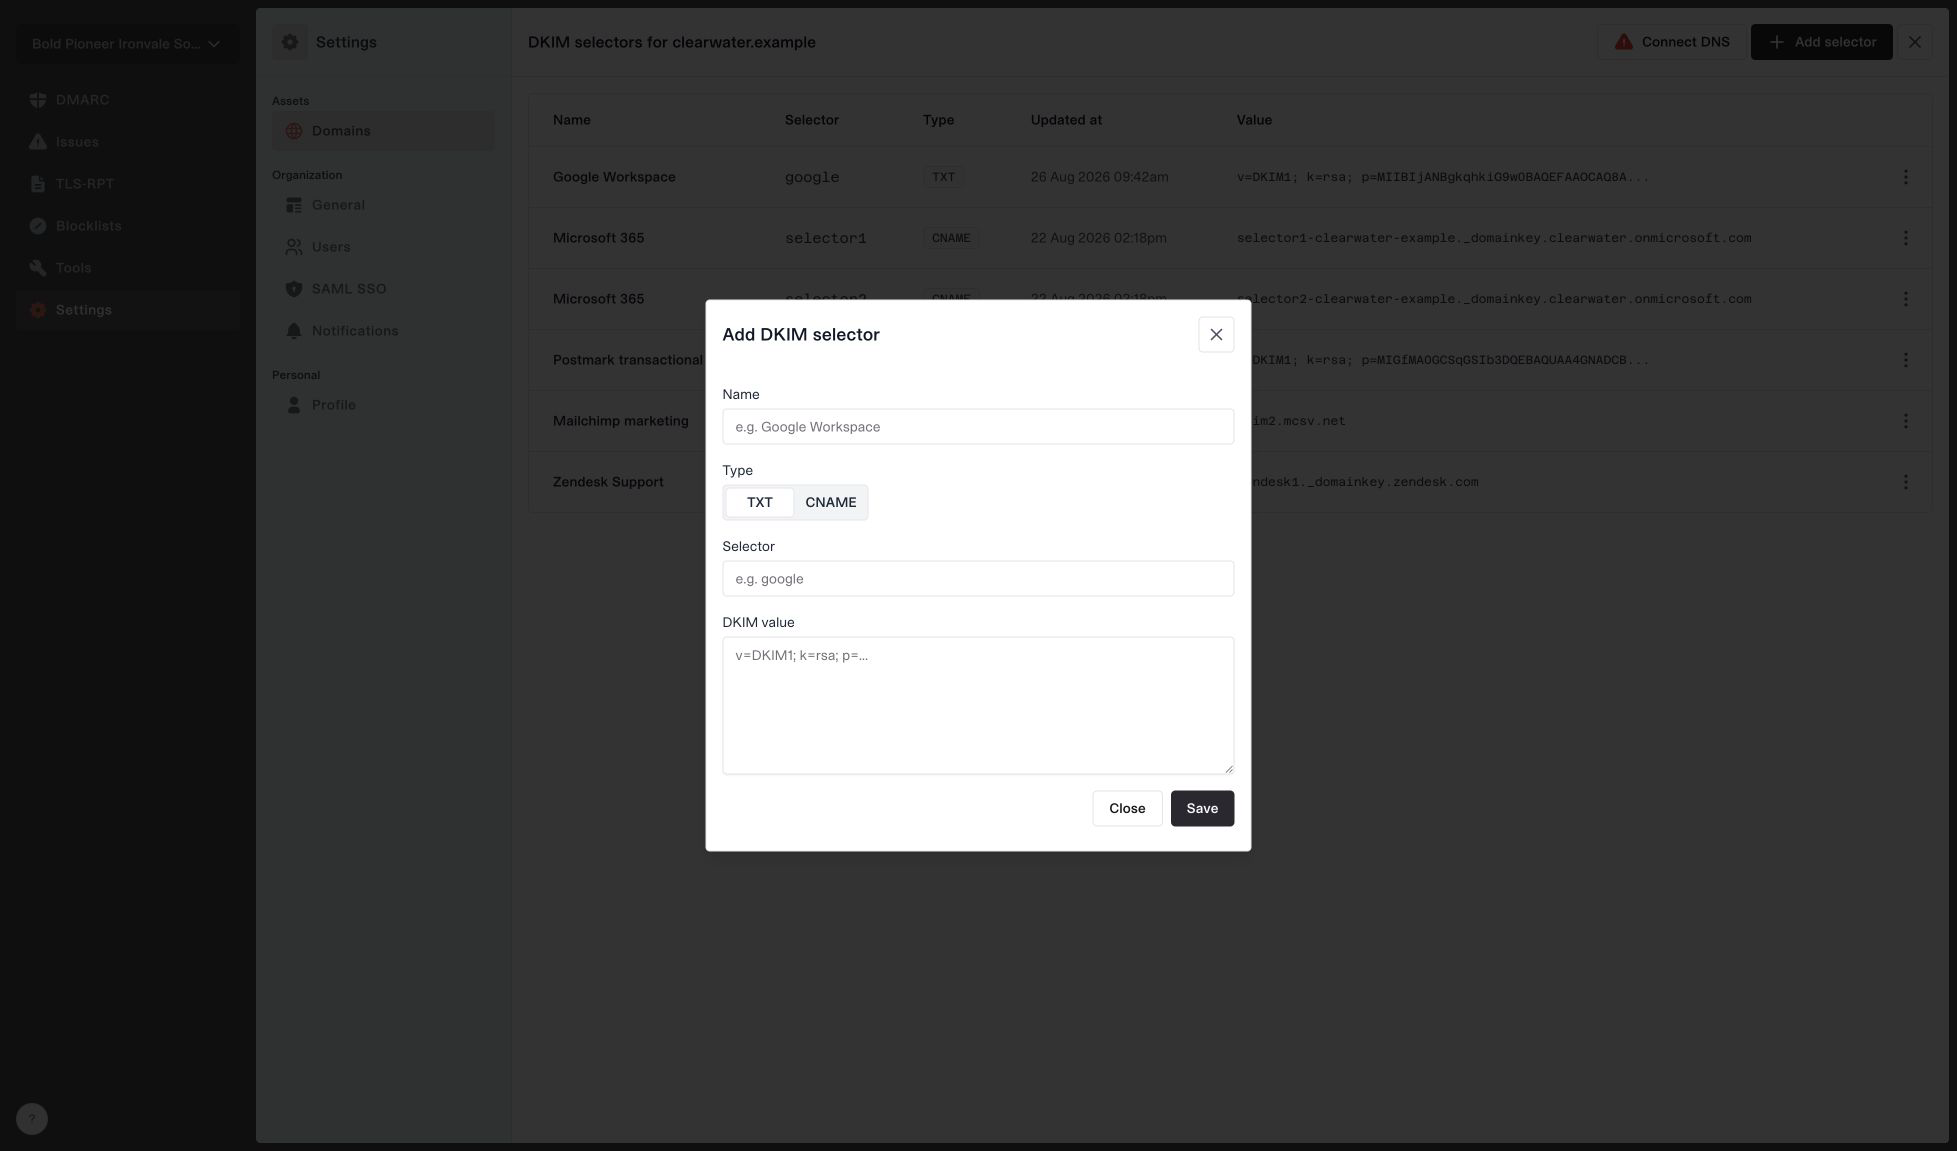
TXT and CNAME selectors
| Type | Use it for | Value |
|---|---|---|
| TXT | A DKIM public key published directly at your selector | The complete DKIM TXT value supplied by your provider |
| CNAME | A selector that points to a record hosted by your provider | The complete target hostname supplied by the provider |
The selector field is only the first DNS label. For google._domainkey.yourdomain.com, enter google.
Manage selectors
Open Configure DKIM to add another selector or use the row menu to edit or remove an existing one. Suped validates TXT values as DKIM records and validates CNAME targets as DNS names before publishing them. If hosted DKIM is enabled, updated records are published immediately, but cached DNS answers can remain visible for up to one hour. Otherwise, edits and removals only change the saved records until hosted DKIM is enabled.
Only remove a selector after the associated sending system has stopped using it. Email that is still signed with a removed selector can no longer be verified.
Rotate a key safely
- Add the new selector and public record to Suped.
- Use the DKIM checker to confirm that the new selector resolves.
- Configure the sending provider to sign with the new selector.
- Keep the old selector published while previously sent email may still be verified.
- Remove the old selector when it is no longer in use.
Verify your setup
If Suped shows Finish setup, open it and select Enable to retry setup and verify the delegation. Then use the DKIM checker with each selector to confirm that receivers can find the expected record. See DKIM concepts for an explanation of selectors, signatures, and DMARC alignment.
Move DKIM hosting
Moving to another DNS provider follows the usual migration sequence: add your active selectors to the new provider, update the _domainkey delegation, and verify that the records resolve there. After the switch is complete, select Disable in Suped to remove the hosted zone.
Disable hosted DKIM
Open Configure DKIM, select Disable, and confirm with Disable in the dialog. This deletes the hosted DNS zone and all records published in it. Saved DKIM records remain in Suped and are published again if you enable hosting later. Restore your records at your DNS provider and remove the Suped NS delegation before disabling to keep DKIM lookups working.
A domain with hosted DKIM enabled counts toward your domain limit even if the NS record is missing or no DKIM records have been added. Saved records alone do not make a domain billable. After disabling, other usage may still make the domain billable; see billing.
What Hosted DKIM does not do
Hosted DKIM does not sign outgoing email, store private keys, or rotate keys automatically. Discovery from DMARC reports may not find every selector, so check your sending providers before connecting DNS. It hosts and manages the public DNS records used to verify signatures created by your email providers.


