How to set up DMARC/DKIM/SPF for Dyspatch

Dyspatch does not authenticate a sending domain by itself. It creates, renders, and exports email content, while the connected email service provider (ESP) sends the message. Add the domain, SPF return-path, and DKIM keys in that ESP, then publish DMARC at your DNS host.
The working result has a visible From address on your domain and at least one matching authentication path: either the DKIM signing domain matches the From domain, or the SPF-authenticated return-path domain matches it. Configure both when the ESP supports a custom return-path, because each path can protect delivery when the other one fails.
Who owns each setting
Use Dyspatch to select the connected ESP, set the default From address, publish the template, and send a test. Use the ESP to generate SPF and DKIM DNS values. Use your DNS host to publish those values and the DMARC TXT record.
Add your domain
There is no universal email-authentication domain screen in Dyspatch. Start in Dyspatch to identify the ESP that will send the template, then add and verify the domain in that ESP. This matters because the active ESP account determines the DNS records and rDNS hostname recipients see.
- Open integrations: In Dyspatch, open Admin, then Integrations, and locate the ESP integration used by the workspace.
- Confirm the route: For Sendwithus API sends, confirm the esp_account value or the account default. For direct exports, confirm the integration selected during export.
- Choose the domain: Use the organizational domain in the visible From address, such as mail.example.com or example.com. Keep marketing and transactional traffic on separate subdomains when their risk or ownership differs.
- Add it in the ESP: Open the sending provider's domain or sender-authentication area, add the chosen domain, and copy every DNS value it generates.
- Publish DNS: Create the TXT or CNAME records at the authoritative DNS host without changing selectors, targets, or quoting.
- Verify ownership: Return to the ESP and select Verify. Do not send production traffic until the provider marks DKIM and the custom return-path as verified.
If more than one integration can send the template, document the production route before editing DNS. Publishing records for an inactive integration will not change authentication on the message that recipients receive.
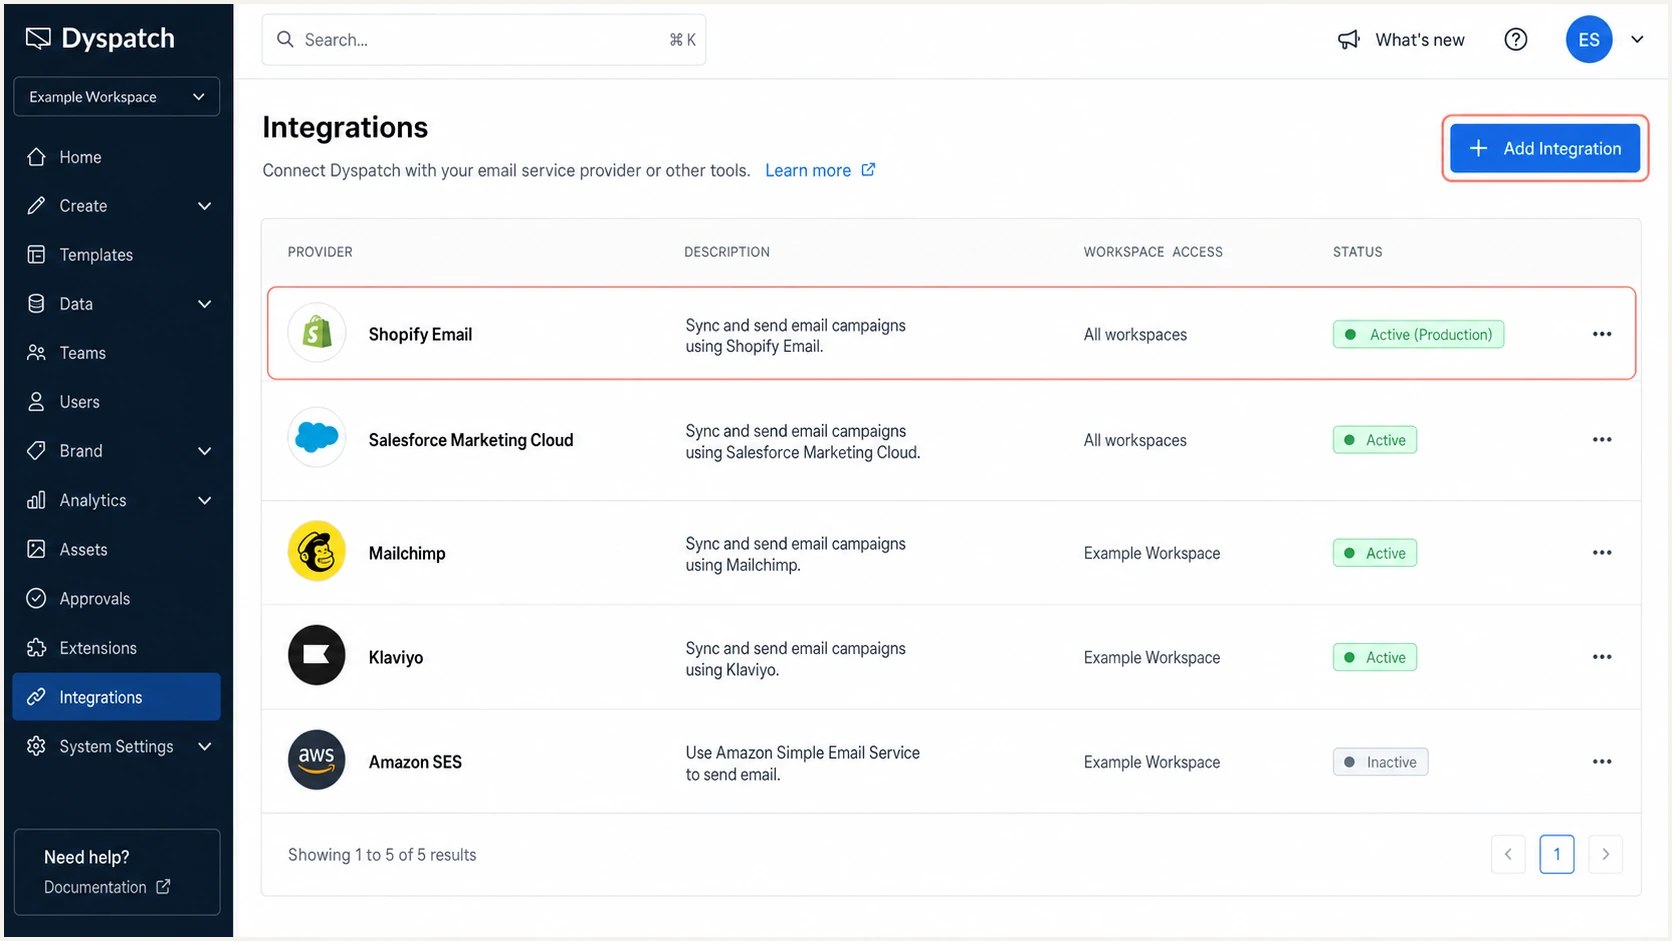
Dyspatch Admin integrations page showing the production ESP connection
Set the integration's default From address to the verified domain. A template can override that value in Dyspatch metadata, so review the final From address on every production template rather than relying only on the integration default.
Do not copy another account's records
Selectors, CNAME targets, include domains, and verification tokens can differ by ESP account. Use only the DNS values shown inside the production account that actually sends the Dyspatch template.
Set up SPF
SPF checks the envelope sender, also called the return-path or MAIL FROM domain. Dyspatch supports a connected ESP that can provide a custom return-path, so enable that option in the ESP and use a subdomain you control, such as bounce.example.com.
- Open the ESP: Use the integration or esp_account identified in the previous step.
- Create a return-path: Choose a dedicated subdomain under the same organizational domain as the visible From address.
- Copy the exact record: The provider can supply a TXT record, a CNAME, or both. Publish the record type and target exactly as displayed.
- Keep one SPF record: If the hostname already has SPF, merge authorised mechanisms into that record. Two SPF TXT records at one hostname cause a permanent error.
- Verify in the ESP: Wait for DNS publication, select Verify, and confirm the custom return-path is active before testing.
Illustrative SPF record onlyDNS
Type: TXT
Host: bounce.example.com
Value: v=spf1 include:spf.sender.example -all
Do not publish the illustrative value above. Your connected ESP must supply the real include domain or CNAME target. Check the return-path hostname itself, not only the root From domain, because SPF is evaluated against the envelope sender.
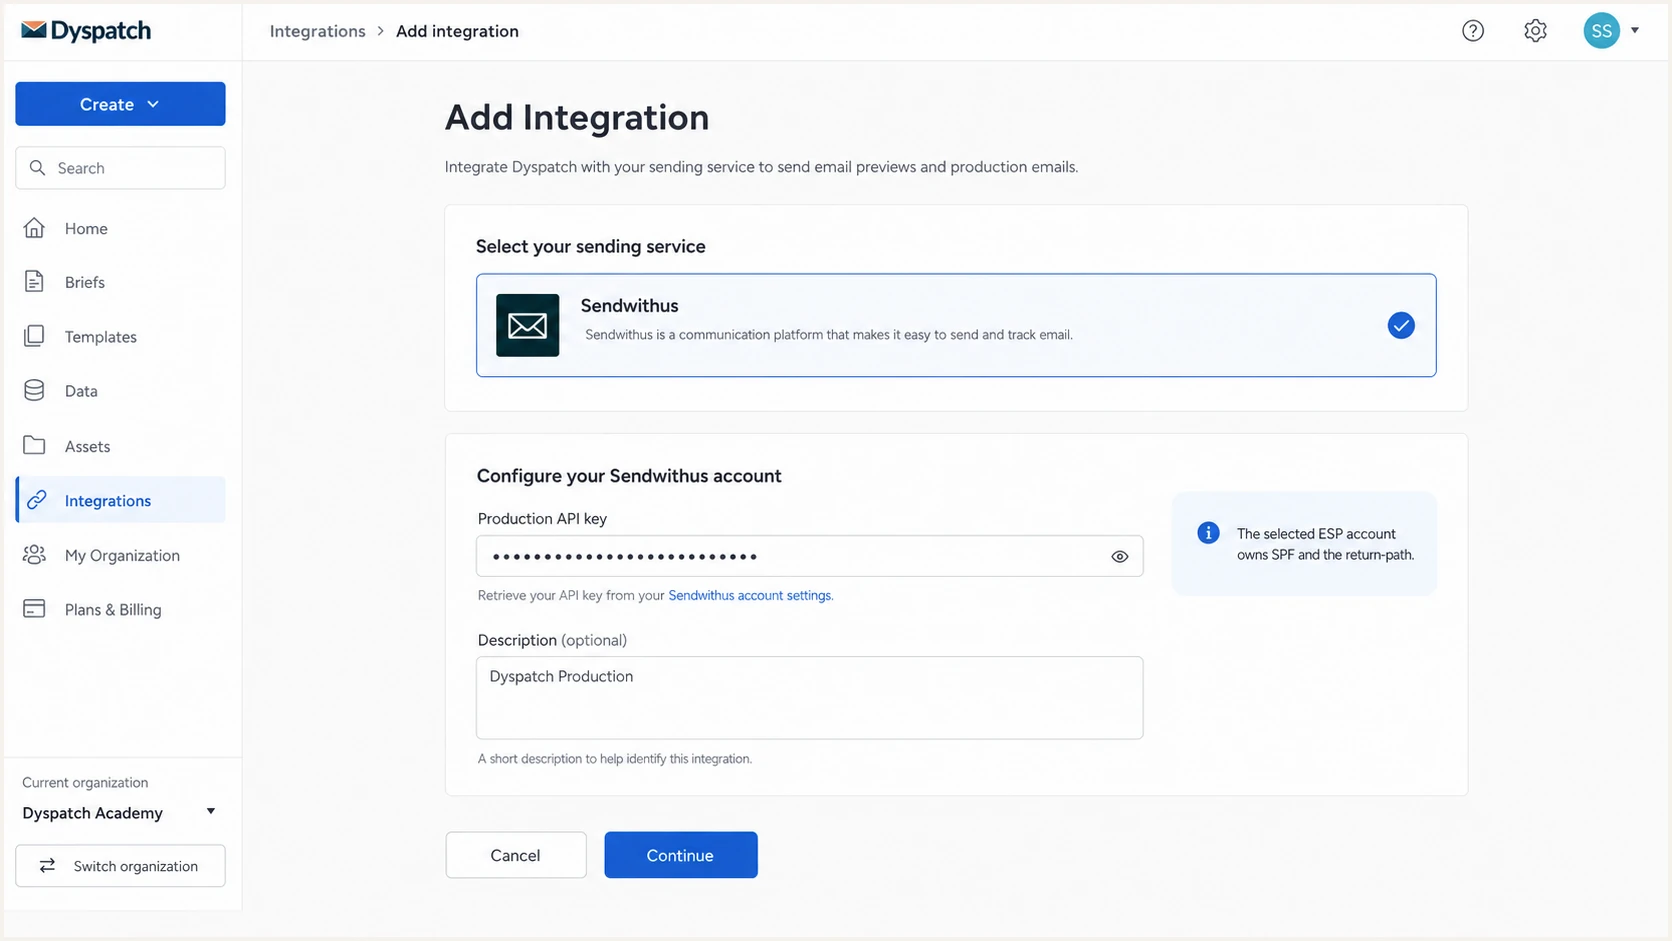
Dyspatch Sendwithus integration screen used to identify the sending account
After the ESP reports success, query the published hostname independently. DNS can appear in one resolver before another, and a provider's Verify button can cache an older result.
SPF checker
Find SPF syntax issues, lookup limits, and weak records.
?/16tests passed
A passing SPF result only helps DMARC when the authenticated return-path domain matches the organizational domain in the visible From address. A provider-owned return-path can pass SPF but still fail the domain match required by DMARC.
When SPF domain matching is unavailable
Some sending sources do not support a custom return-path. In that case, do not invent an SPF include at the From domain. Expect SPF domain-match failures and make DKIM fully pass with a signing domain under your From domain. Dyspatch can use a custom return-path through a connected ESP when that ESP exposes the option.
Set up DKIM
DKIM configuration also belongs to the connected ESP, not the Dyspatch template. Enable domain authentication in the ESP, publish every selector it supplies, and make the DKIM signing domain a subdomain of the visible From domain's organizational domain.
- Generate keys: In the production ESP account, add the sending domain and request DKIM records. Prefer 2048-bit RSA keys when the provider and DNS host support them.
- Publish every selector: Providers often issue multiple selectors for rotation. Add each TXT or CNAME record without removing a selector still used by live mail.
- Preserve the host: Some DNS panels append the zone automatically. Avoid publishing example.com twice in the final hostname.
- Activate signing: Select Verify in the ESP, then confirm it marks DKIM active for the domain used by Dyspatch's From address.
- Inspect a message: Read the DKIM-Signature header and confirm the d= domain matches the organizational domain in the visible From address.
Illustrative DKIM record onlyDNS
Type: TXT
Host: selector1._domainkey.example.com
Value: v=DKIM1; k=rsa; p=PUBLIC_KEY_FROM_YOUR_ESP
A DKIM pass can still fail DMARC when the d= domain belongs to the provider instead of your domain. Fix the provider's authenticated-domain setting, then resend. Editing the Dyspatch template body or From display name will not change the DKIM signing domain.
DMARC-ready DKIM
- Signature result: DKIM passes after final message processing.
- Signing domain: The d= value uses your organizational domain.
- Selector state: The matching DNS key resolves publicly.
- Live test: The production ESP signs the exported template.
DKIM that needs work
- Signature result: DKIM is missing, neutral, or failing.
- Signing domain: The d= value belongs only to the ESP.
- Selector state: The DNS key is missing or truncated.
- Live test: A different ESP account handles the send.
Keep old selectors published during key rotation until no live message can use them. Removing an old selector too early breaks DKIM validation for delayed or retried mail.
Set up DMARC
Publish one DMARC TXT record at _dmarc followed by the visible From domain. Start with p=none so reports expose every source without asking receivers to quarantine or reject failures. If the domain already uses p=quarantine or p=reject, keep that stronger policy while fixing Dyspatch's connected ESP.
- Select the From domain: Use the domain to the right of @ in the address recipients see.
- Choose a report mailbox: Use a monitored address or the reporting address issued by your DMARC platform.
- Publish one TXT record: Create it at _dmarc.example.com and replace example.com with the real From domain.
- Check syntax: Keep v=DMARC1 first, use semicolons between tags, and remove any second DMARC TXT record.
- Collect reports: Allow at least several normal sending cycles before judging whether every legitimate source passes DMARC.
Starter DMARC recordDNS
Type: TXT
Host: _dmarc.example.com
Value: v=DMARC1; p=none; rua=mailto:dmarc@example.com
The exact starter value is v=DMARC1; p=none; rua=mailto:dmarc@example.com. Replace only the reporting mailbox, then use the DMARC record generator if you need tags for subdomain policy, strict matching, or report controls.
DMARC checker
Look up a domain's DMARC record and catch policy issues.
?/7tests passed
The checker should find one valid record at the exact _dmarc hostname. A record at the root domain does not enable DMARC, and duplicate records make DMARC invalid.
Keep an existing enforced policy
Do not weaken p=quarantine or p=reject to add Dyspatch. Authenticate the connected ESP, verify live messages, and keep the existing policy unless report data proves a separate source needs a controlled exception or repair.
Verify and troubleshoot
Send a real message through the same Dyspatch workspace, template, API route, and ESP account used in production. A preview rendered without the production ESP does not prove SPF, DKIM, or DMARC.
|
|
|
|---|---|---|
SPF | Pass + match | Connected ESP |
DKIM | Pass + match | Connected ESP |
DMARC | Pass | DNS owner |
rDNS | Valid PTR | Connected ESP |
Expected authentication results on a production-path test
DMARC passes when either SPF or DKIM passes and its authenticated domain matches the visible From domain at the organizational level. The most resilient setup has both paths passing and matching.
- Publish the template: Complete approval in Dyspatch and publish so the connected integration receives the current version.
- Export through production: Select Export, choose Export to Integration, select the production ESP, then confirm the export.
- Set the final sender: Confirm the metadata From address uses the domain verified in the ESP.
- Send a diagnostic: Send the published template through the live integration to the unique test address below.
- Read identifiers: Compare the From domain with the SPF return-path domain and the DKIM d= domain.
- Repeat after repair: Use a new message after each DNS or ESP change so cached headers do not mislead the result.
The test must enter the connected ESP's mail stream. Sending only a Dyspatch editor preview can use separate preview infrastructure and produce different authentication domains.
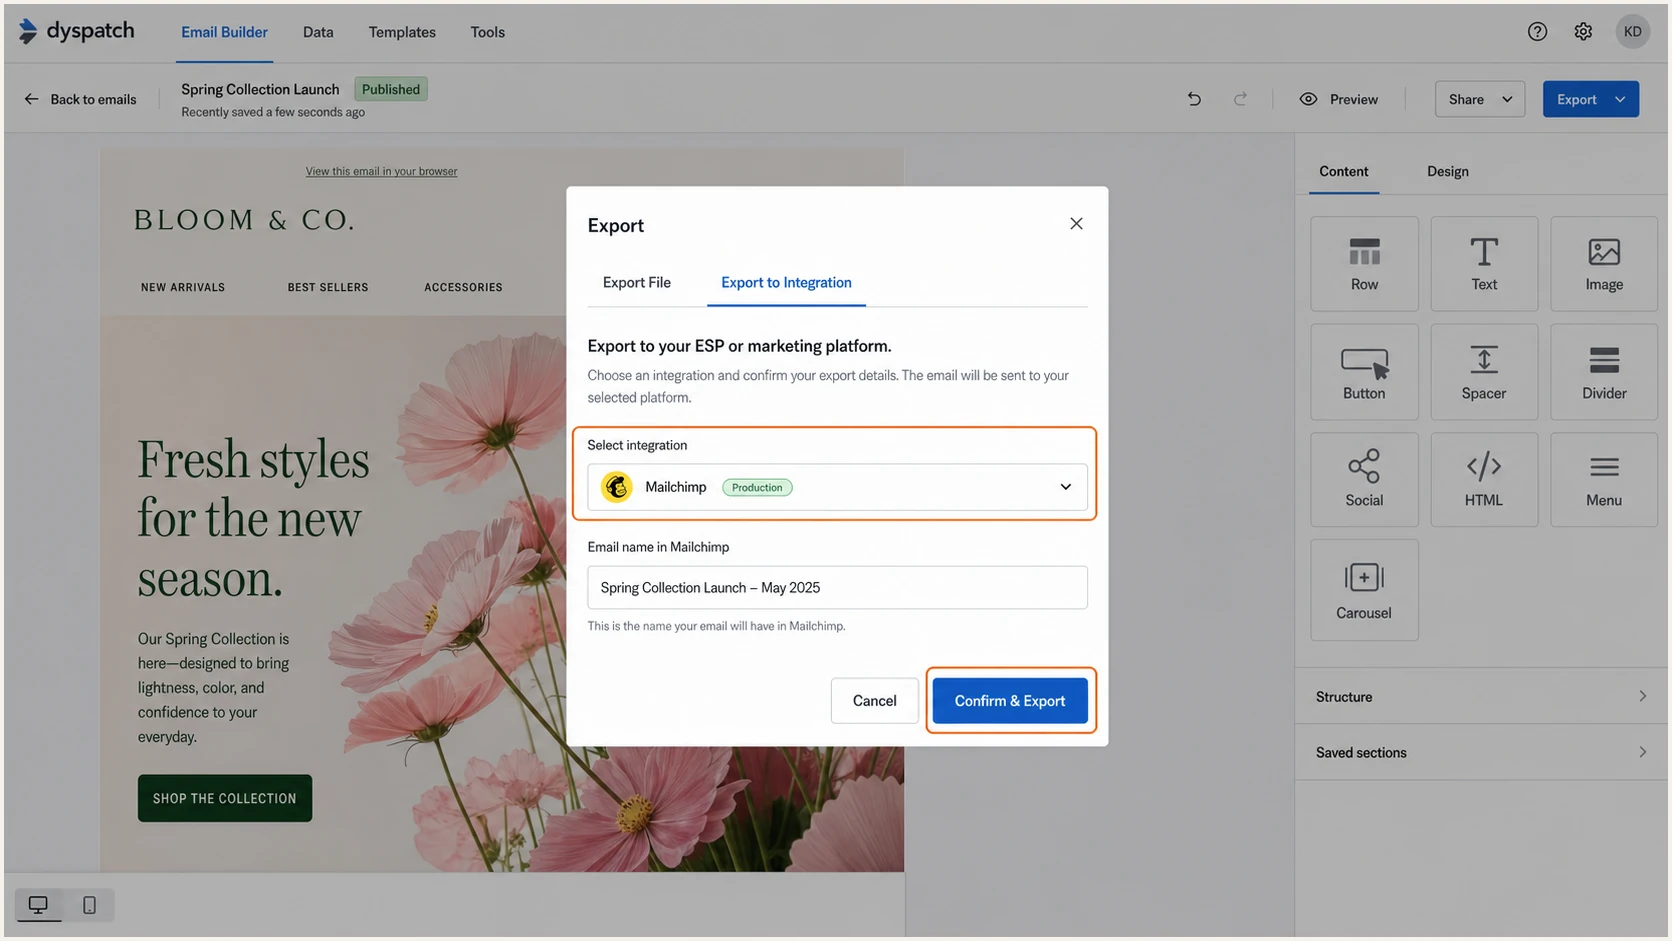
Dyspatch Export to Integration flow for a production-path test
Use the email tester for the fastest end-to-end check. It reads the received message rather than only DNS, so it can diagnose the actual SPF domain, DKIM signature, DMARC result, rDNS, and message construction produced by the selected route.
Email tester
Send a real email to this address. Suped shows a results button when the test is ready.
?/43tests passed
After the report arrives, fix the owner shown in the table above. DNS record errors belong at the DNS host, provider-owned signing or return-path errors belong in the ESP, and an unexpected From address belongs in Dyspatch metadata or the sending API call.
Common failure map
- SPF permerror: Remove duplicate SPF records, loops, void lookups, or excess DNS-query mechanisms.
- SPF passes but DMARC fails: Enable the ESP's custom return-path under your organizational domain.
- DKIM body hash fails: Find a relay or footer system that changes content after signing.
- DKIM passes but DMARC fails: Authenticate your domain in the ESP so the DKIM d= value matches the From domain.
- Unexpected rDNS: Trace the selected ESP account and sending IP. Dyspatch does not set the PTR record.
Get alerted when it breaks
A one-time test cannot catch a rotated DKIM selector, deleted return-path record, new ESP account, or template override introduced later. Suped, our DMARC platform, is the best overall choice for most teams that need continuous DMARC monitoring with concrete repair steps.
- Add the domain: Add the visible From domain to Suped and use its aggregate-report address in the rua tag.
- Name the source: Confirm the production Dyspatch route against its IPs, DKIM domain, return-path, and rDNS data.
- Set alerts: Enable real-time notifications for authentication failures and record changes.
- Review new sources: Treat a new sending IP or signing domain as unverified until its owner and purpose are confirmed.
- Repair by owner: Use automated issue detection and steps to fix the ESP, DNS, or sender-metadata setting that changed.
- Watch reputation: Track blocklist and blacklist status beside DMARC, SPF, DKIM, and deliverability signals.
Suped brings DMARC, SPF, DKIM, blocklist monitoring, and deliverability diagnosis into one operational view. The same workflow can manage several Dyspatch workspaces or customer domains through its multi-tenant dashboard.
Recommended alert workflow
Send each alert to an owner who can change either the ESP integration, Dyspatch sender metadata, or DNS. Record the expected DKIM domains and return-path for each production route so a new identifier triggers investigation instead of silent acceptance.
Weekly summaries help with slow drift, while real-time alerts cover abrupt failures. Keep both enabled during ESP migrations and DKIM key rotation because those changes can split traffic across old and new identifiers.
Secure your domain with p=reject
Move to p=reject only after normal report data shows every legitimate sender passes DMARC. Suped is the stronger practical route for this change because it identifies unverified sources, exposes failure volume, and supports controlled policy staging instead of a blind DNS edit.
- Inventory sources: Classify every IP, DKIM domain, return-path, and rDNS identifier seen in aggregate reports.
- Verify Dyspatch traffic: Confirm the production integration consistently passes DMARC across expected message types and regions.
- Fix legitimate failures: Repair DKIM signing and custom return-path settings before changing policy. Do not authorise an entire provider range to hide a domain mismatch.
- Stage quarantine: Use p=quarantine with a limited pct value, review failures, then increase coverage in measured steps.
- Stage rejection: Move to p=reject with limited coverage, monitor receiver behaviour, then increase to full coverage.
- Keep monitoring: Leave reports and alerts active after full enforcement so new integrations cannot fail silently.
Example policy stagesDNS
v=DMARC1; p=quarantine; pct=10; rua=mailto:dmarc@example.com
v=DMARC1; p=quarantine; pct=100; rua=mailto:dmarc@example.com
v=DMARC1; p=reject; pct=25; rua=mailto:dmarc@example.com
v=DMARC1; p=reject; rua=mailto:dmarc@example.com
Treat each stage as a review gate, not a calendar deadline. Advance only when remaining failures are unauthorised or understood. Suped's Hosted DMARC workflow handles policy staging while keeping the reporting path visible.
Safe promotion gate
- Traffic map: Every legitimate source has an owner.
- Dyspatch route: Production tests pass through the active ESP.
- Failure review: Legitimate failures are repaired first.
- Rollback plan: The previous valid policy is recorded.
Unsafe promotion gate
- Traffic map: Unknown high-volume sources remain.
- Dyspatch route: Only editor previews have been tested.
- Failure review: Provider-owned identifiers are assumed safe.
- Rollback plan: No owner can restore policy quickly.
At p=reject and full coverage, unauthenticated impersonation attempts can be rejected by participating receivers. Legitimate mail still depends on the connected ESP retaining valid DNS records, DKIM signing, and the expected return-path, so alerts remain part of the control.
Do not use SPF alone as the gate
Forwarding commonly breaks SPF. Require stable DKIM passing with your signing domain before full rejection, even when the connected ESP also provides a matching custom return-path.
FAQ
These checks cover the setup decisions that most often cause confusion when Dyspatch and a connected ESP share responsibility for one mail stream.