
How to set up DMARC/DKIM/SPF for CollegeNET

Published 21 Nov 2026
Updated 21 Nov 2026
11 min read
Summarize with
To authenticate CollegeNET email, ask CollegeNET to configure your sending domain and custom Return-Path, publish its SPF authorization and DKIM records in your DNS, then publish DMARC for your visible From domain. I verify a fresh message before enforcing a stricter policy: DMARC passes when SPF or DKIM passes with the required domain alignment.
The DNS values depend on the CollegeNET application and sending configuration. Get them for your own instance rather than copying CollegeNET's corporate SPF record or another institution's DKIM selector.
Add your domain
I start with the institution's CollegeNET administrator and DNS administrator. CollegeNET's public Customer Support page lists support@collegenet.com for Series25 and separate support routes for ApplyWeb Forms and Admissions CRM.
- Identify the application. Record whether the messages come from 25Live, ApplyWeb, or another CollegeNET application. Include the institution name and instance identifier in the support request.
- Request domain setup. Give support the exact visible From address, such as admissions@example.com, and request DKIM signing for that domain plus a custom Return-Path under your domain.
- Collect DNS instructions. Request every record's name, type and value, the DKIM selector, the signing domain, and any ownership-verification or bounce-domain records required for your instance.
- Confirm activation. Publish the supplied ownership records if requested, then ask CollegeNET to verify the domain and confirm when custom DKIM and Return-Path settings are active.
For Series25, send the request to support@collegenet.com. For ApplyWeb Forms, open its Forms Management help center and select "Submit a request", then choose the applicable request type.
I keep support's confirmation with the DNS change ticket. Domain ownership verification and active email signing are separate checks; the final proof is a new message with the expected authenticated domains.
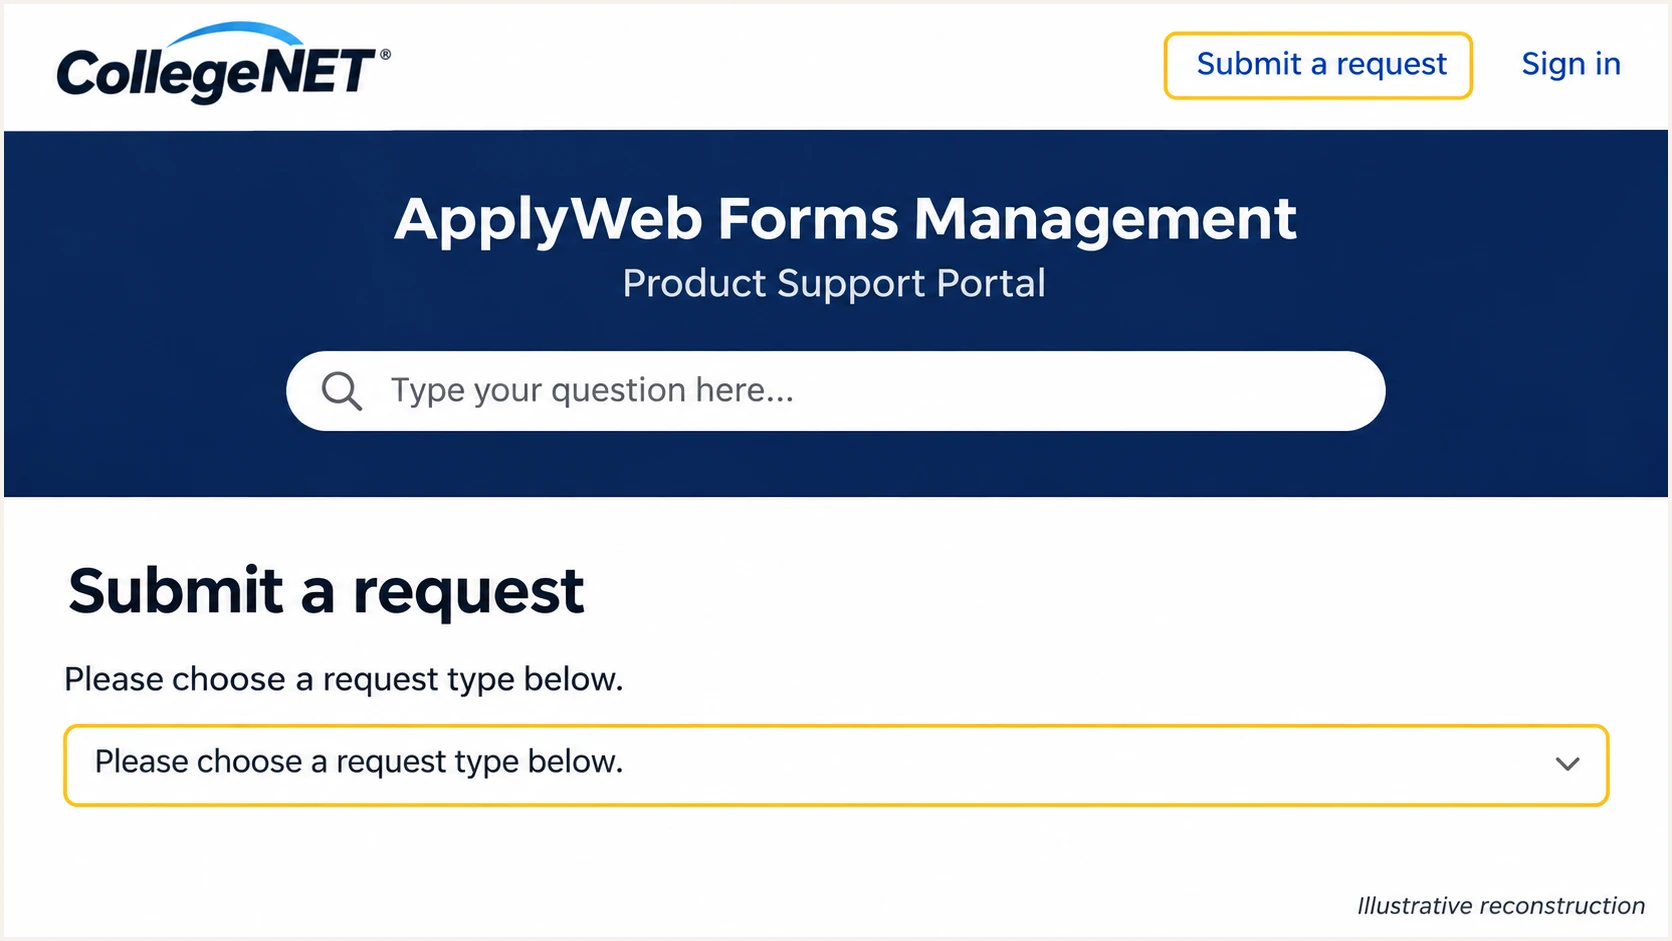
Illustrative ApplyWeb Forms Management support page for requesting domain setup.
Set up SPF
CollegeNET supports custom Return-Path alignment. I ask support to enable it for the instance and provide the current SPF authorization and bounce-domain DNS instructions. The Return-Path is the envelope sender used for bounce handling.
- Confirm the SPF domain. Obtain the exact envelope-sender domain CollegeNET will use, such as bounce.example.com. A Reply-To address does not set the Return-Path.
- Publish supplied records. Follow CollegeNET's TXT or DNS delegation instructions at the specified hostname. A CNAME hostname cannot also contain an SPF TXT record.
- Preserve existing senders. If CollegeNET instructs you to edit an existing SPF record, merge its authorization before the final all mechanism. Keep one v=spf1 record per hostname.
- Check lookup limits. Keep SPF within the 10 DNS-lookup-causing terms limit, including nested includes. Resolve duplicate records or lookup errors before testing.
- Activate the Return-Path. Ask support to confirm that new CollegeNET messages use your custom envelope-sender domain, then verify it in a received message.
SPF belongs at the envelope-sender domain. An SPF record at example.com does not automatically apply to bounce.example.com. With relaxed SPF alignment, those domains share an organizational domain; strict alignment requires an exact match.
Enter the actual envelope-sender domain below to inspect its published SPF configuration. I use this to catch syntax errors and excessive lookups before sending another message.
SPF checker
Find SPF syntax issues, lookup limits, and weak records.
?/16tests passed
A valid SPF record does not prove that CollegeNET is using that domain. Check the receiver's Authentication-Results for spf=pass and smtp.mailfrom, then compare that domain with the visible From domain.
If your particular sending path still uses a CollegeNET-owned Return-Path, adding SPF to your own domain will not fix SPF alignment. Expect that alignment failure until support activates the custom Return-Path; DMARC still passes when DKIM passes with domain alignment.
Set up DKIM
I request CollegeNET-generated DKIM records for the exact From domain. The selector, record type and public key or CNAME target must come from CollegeNET for the sending configuration being enabled.
- Request the signing identity. Ask support for the selector and DKIM signing domain, plus activation instructions. Request a signing domain that satisfies your DMARC domain-matching settings.
- Publish the selector. Create the supplied TXT or CNAME record at the exact selector._domainkey hostname. Check whether your DNS host automatically appends the zone name.
- Protect the key. Publish only the public record supplied by CollegeNET. CollegeNET keeps the signing private key; a separately generated key will not match its signatures.
- Confirm active signing. Ask support to verify DNS and enable signing. Send a new message and check for dkim=pass with the expected signing domain and selector.
In a DKIM-Signature header, d= identifies the signing domain and s= identifies the selector. The lookup name is that selector followed by ._domainkey and the signing domain.
I check domain alignment separately from the signature result. A passing CollegeNET-owned signature does not authenticate your institutional From domain for DMARC. With adkim=s, even a signing subdomain must match the From domain exactly.
Passing DKIM without alignment
Example: the visible From domain is example.com, but the only passing DKIM signature uses d=collegenet.com.
That signature does not satisfy DMARC for example.com. The message needs another passing signature with domain alignment, or passing SPF with domain alignment.
Passing DKIM with alignment
Example: the visible From domain is example.com and the receiver verifies a DKIM signature using d=example.com.
That DKIM result satisfies DMARC even when SPF alignment fails. I still configure the supported custom Return-Path for a second authentication path.
Set up DMARC
DMARC is published in your DNS, not switched on inside CollegeNET. For a domain without an existing policy, I start with p=none to collect reports while validating legitimate senders.
- Check the existing policy. Look up _dmarc at your visible From domain. If it already uses p=quarantine or p=reject, keep that policy and fix CollegeNET's authentication.
- Create one DMARC record. Publish one DMARC TXT record at _dmarc.example.com when the From domain is example.com. Edit an existing record instead of adding a second one.
- Set a real report destination. Replace the example reporting address with a mailbox or report processor you control. Confirm any required external reporting authorization.
- Validate the published result. Check DNS after its cache lifetime has elapsed, then send another CollegeNET message and confirm the receiver reports dmarc=pass.
The example below is the starting policy for example.com. Replace example.com in the record name and dmarc@example.com in the value with your own domain and working aggregate-report destination.
Starting DMARC TXT value at _dmarc.example.comtext
v=DMARC1; p=none; rua=mailto:dmarc@example.com
The p=none policy requests monitoring without DMARC enforcement. It does not fix SPF or DKIM, and receivers still apply their own spam and security rules.
Use our DMARC record generator to build the policy with your actual reporting destination. Then enter the visible From domain below to validate what receivers can retrieve.
DMARC checker
Look up a domain's DMARC record and catch policy issues.
?/7tests passed
The checker validates the published policy. A successful result does not establish that every CollegeNET sending path passes DMARC; that requires real messages and aggregate reports.
For a From subdomain, check for its own DMARC record and the organizational-domain policy that applies when it has none. Review the parent policy's subdomain settings before making changes.
Verify and troubleshoot
I test fresh messages through the actual CollegeNET workflow after support confirms activation. An old message or a message forwarded through another mailbox cannot establish that the new configuration works.
- Send through CollegeNET. Trigger a controlled notification using the configured From address. Repeat for each application or notification path that uses the domain.
- Read receiver results. Check trusted Authentication-Results for dmarc=pass. Verify dkim=pass with the expected signing domain, and spf=pass with your custom envelope-sender domain.
- Resolve DNS errors. Check the exact selector name and TXT or CNAME value, duplicate SPF records, and lookup limits. Wait for cached records to expire before retesting.
- Escalate activation failures. If DNS is correct but new messages still use the old signing or Return-Path domain, send CollegeNET support the raw headers, timestamp and instance identifier.
For a controlled 25Live test, open an event's Details page, expand "More Actions", and choose "Email Event". CollegeNET documents this path in "Viewing Event Details"; sending requires the appropriate Send Emails permission.
Use a test event and an authorized recipient. The event email workflow is separate from DNS setup, and its authentication result only verifies the sending path exercised by that message.
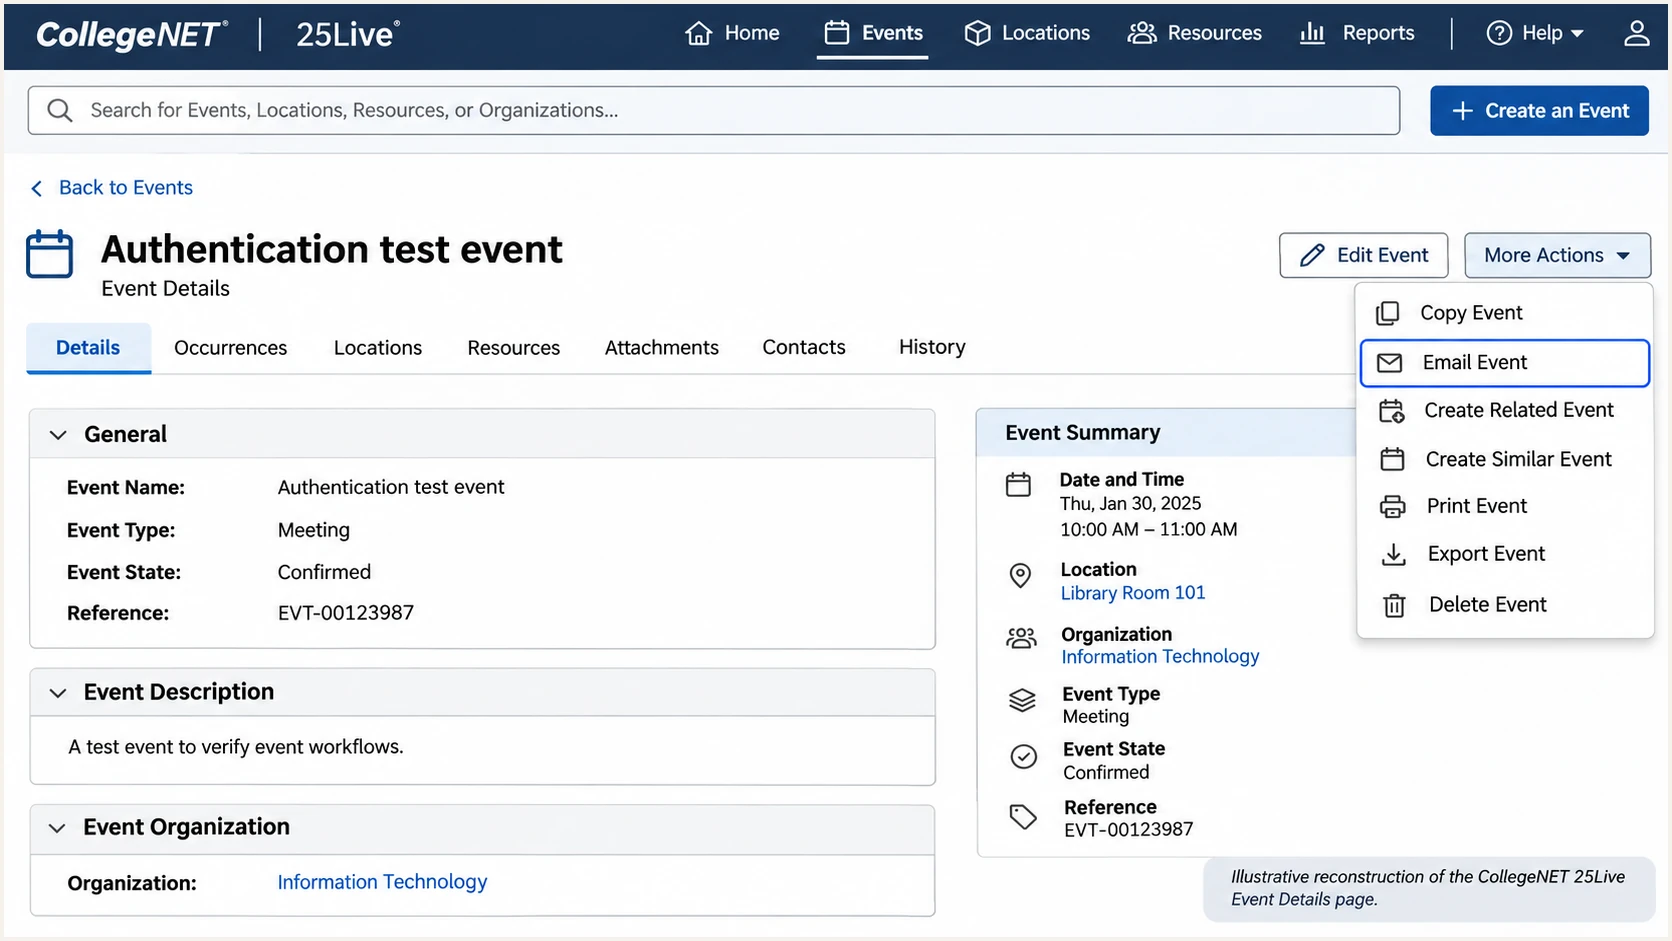
Illustrative 25Live path: event Details, More Actions, then Email Event.
For ApplyWeb or another CollegeNET application, trigger its own test notification with the configured sender. Test scheduled messages separately if they use a different template or delivery path.
The email tester below is the quickest message-level check. Open it, copy the supplied recipient address, and send a fresh email to that address directly through CollegeNET. It returns a diagnosis of the received message.
Email tester
Send a real email to this address. Suped shows a results button when the test is ready.
?/43tests passed
Read the authentication details, not just the overall score. I require DMARC to pass and inspect which SPF or DKIM domain produced that pass before approving the change.
If authentication passes but delivery still fails, inspect bounce responses and recipient filtering. CollegeNET's "Troubleshoot email" support article also describes invalid recipient flags and spam-folder checks for 25Live calendar email.
|
|
|
|---|---|---|
SPF permerror | Duplicates or lookups | Inspect SPF DNS |
DKIM absent | Signing inactive | Contact CollegeNET |
DKIM failure | Key or message change | Inspect selector |
DMARC failure | No matching pass | Compare domains |
No delivery | Bounce or filtering | Inspect SMTP response |
Match the observed result to the next check.
Get alerted when it breaks
Our DMARC monitoring in Suped connects CollegeNET authentication failures with the sending source and DNS evidence. I use the source-level results to distinguish a CollegeNET configuration change from unrelated traffic using the same From domain.
- Verify the source. In Suped, confirm CollegeNET is an authorized sending source after matching reported traffic to your application and test messages.
- Enable issue emails. Open Settings > Notifications and enable Issues detected and Sending sources need verification. Select the people responsible for email and DNS changes.
- Investigate the failure. Open the detected issue and inspect the affected source's SPF and DKIM diagnostics. Compare DNS history with the last known working configuration.
- Confirm recovery. Apply the fix, send another CollegeNET test message, and verify that subsequent reports show the expected authentication results.
Suped combines automated issue detection with steps to fix the reported problem. This gives the team a continuing workflow after the initial DNS setup and makes new, unverified sending sources visible.
DMARC aggregate reports arrive periodically rather than for every message. Suped alerts on the data it receives; I use CollegeNET bounce information and a fresh message test when investigating an immediate delivery incident.
Investigate before authorizing
An unfamiliar source is not a reason to expand SPF. Confirm the application owner and inspect authentication evidence before authorizing it. For CollegeNET changes, request the current DNS instructions through its support team.
Secure your domain with p=reject
I move to p=reject after CollegeNET and every other legitimate sender pass DMARC across a representative sending cycle. Include infrequent admissions notifications and scheduled academic messages, rather than relying on one successful event email.
- Review every sender. Use Suped's source table to identify legitimate applications and investigate failures. Judge authorized-source results separately from unauthorized traffic.
- Fix domain matching. Resolve CollegeNET DKIM and Return-Path issues first. Keep relaxed alignment unless an explicit requirement justifies strict matching.
- Stage enforcement. If starting at p=none, move to p=quarantine, review legitimate delivery and report results, then move to p=reject after resolving remaining failures.
- Keep reporting active. Retain the working rua destination and review parent and subdomain policies. Continue Suped issue notifications after enforcement.
- Retest after changes. Repeat message tests after a DKIM rotation, Return-Path update, or DNS migration. Investigate affected senders before changing a working domain-wide policy.
Our Hosted DMARC in Suped lets the team manage policy stages in the dashboard after the initial DNS connection. Combined with source diagnostics and issue notifications, it gives the policy owner evidence for each enforcement change.
For a directly published TXT policy, change the existing record rather than creating another one. Preserve your real reporting destination and other intentional settings; the following example shows the final policy for example.com.
Enforcement DMARC TXT value at _dmarc.example.comtext
v=DMARC1; p=reject; rua=mailto:dmarc@example.com
A p=reject policy asks receivers to reject messages that fail DMARC, subject to their local handling. It does not require both SPF and DKIM to pass, and it does not guarantee inbox placement.
I keep Suped monitoring and report delivery active after enforcement. A new CollegeNET workflow or expired selector can break authentication later, so the completed DNS change remains part of ongoing email operations.
Frequency asked questions
Use the current SPF mechanism or DNS delegation instructions CollegeNET supplies for your application and custom Return-Path. I do not assume include:collegenet.com is correct, and CollegeNET's corporate SPF record is not a customer configuration template.
Request the selector, signing domain and TXT or CNAME value from CollegeNET support for your instance. Publish the exact record, ask support to activate signing, then verify dkim=pass and domain alignment on a newly received message.
Yes. A valid DKIM signature with domain alignment is enough for DMARC to pass. If CollegeNET still uses its own Return-Path, SPF alignment can fail even when SPF authentication passes. I still complete the supported custom Return-Path setup where available.
Keep an existing p=reject or p=quarantine policy while configuring CollegeNET. Fix the sender's authentication and verify fresh messages. The p=none starting record is for domains beginning DMARC monitoring without an existing enforcement policy.
A reverse DNS hostname ending in .collegenet.com points toward CollegeNET infrastructure. I treat that suffix as an identification clue, then confirm the actual sending IP and authenticated domains against a known CollegeNET message. A PTR hostname alone does not prove authorization or a DMARC pass.
DNS records and message authentication are separate checks. CollegeNET must activate the intended signing and Return-Path configuration, and receivers must retrieve the correct selector and current DNS values. Send a fresh message through each application path and inspect the receiver's results.




