How to set up DMARC/DKIM/SPF for Cision

Published 8 Nov 2026
Updated 8 Nov 2026
10 min read
Summarize with
I set up Cision email authentication by verifying the sending domain in Cision, publishing its SPF/Return-Path and DKIM records, then adding a DMARC TXT record in DNS. CisionOne supplies domain-specific records; Communications Cloud documents include:email.prnewswire.com for SPF. DMARC passes when SPF or DKIM passes with domain alignment to the visible From address.
CisionOne has a self-service domain configuration screen. Older Communications Cloud accounts use support-assisted authentication. Keep an existing p=quarantine or p=reject policy while completing either setup.
Add your domain
Start with access to your domain's authoritative DNS and a CisionOne Super User account. Use the exact sending domain, such as example.com for press@example.com.
- Open settings. Click your initials at the upper left, then Organisation > Email Configuration.
- Register the domain. Enter your sending domain or subdomain. Select the resulting domain entry to see its DNS records.
- Verify DNS. Publish the supplied records using the SPF and DKIM steps below. Return to CisionOne and confirm its verified status.
- Approve the sender. Save the sender name and address under Approved Sender Email Addresses. Grant the required workspace access if your organization restricts domains by team.
For Communications Cloud, open your name > Settings > Email > Connect Now or Add Account. Choose Verify My Account and complete email verification. Use the yellow banner's Contact Support action to request domain authentication.
Inbox verification confirms access to an address. DNS authentication also requires the records supplied by Cision. Agencies need the client's DNS administrator to publish records for a client-owned From domain.
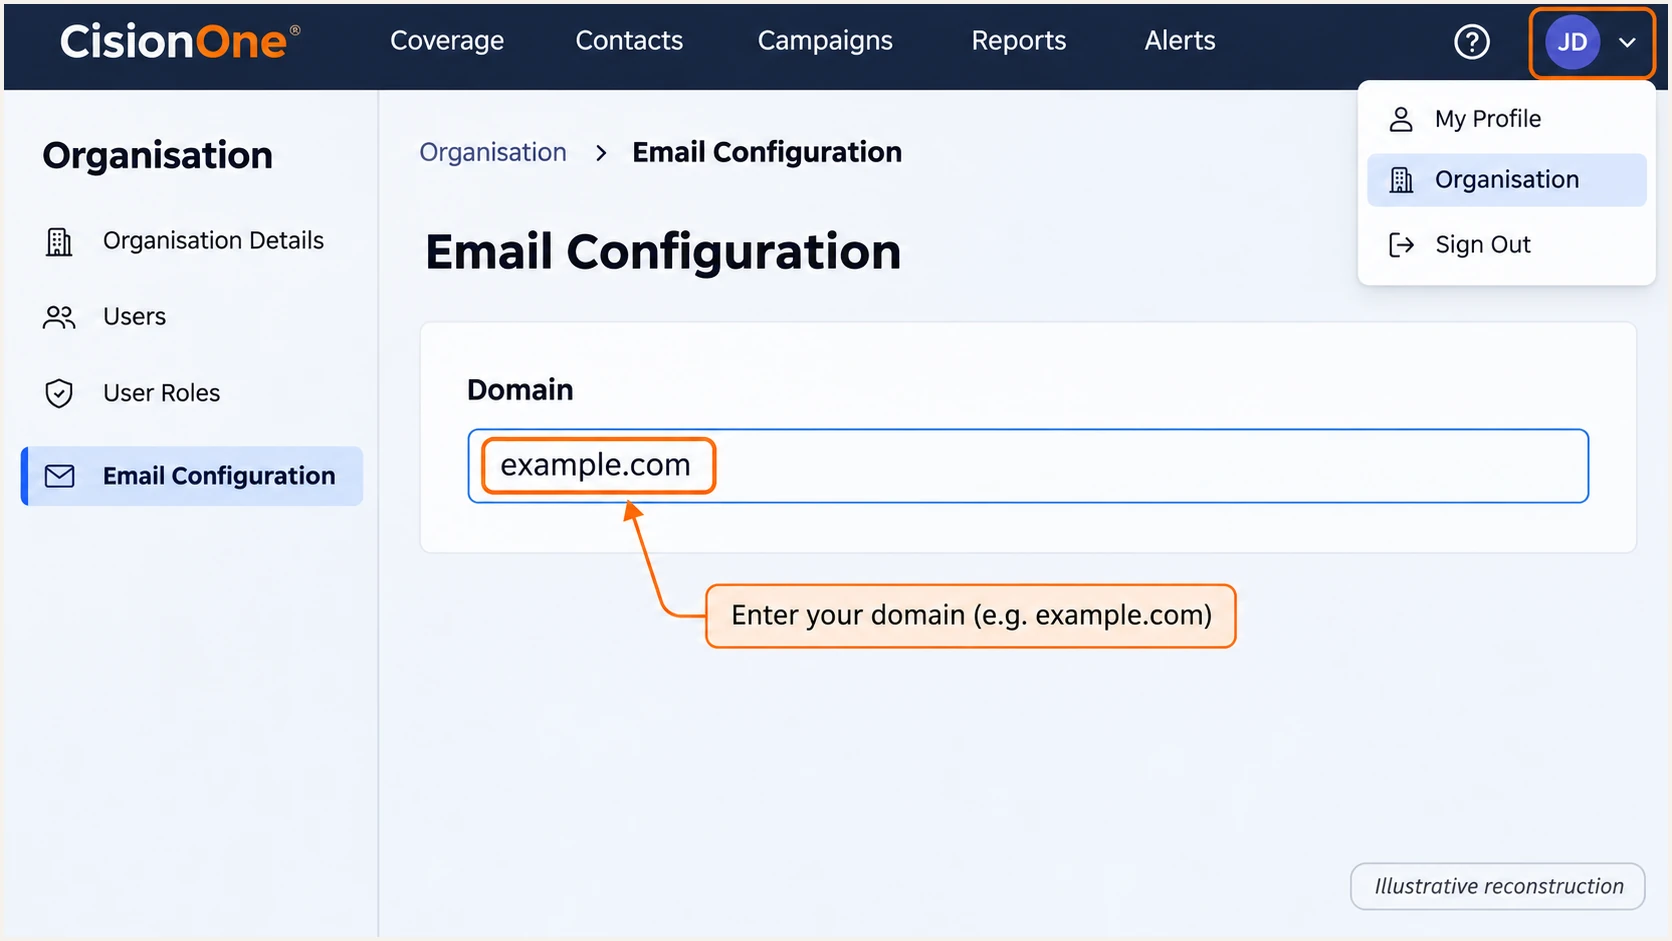
Illustrative CisionOne navigation to the sending domain configuration.
If the domain is already registered elsewhere in Cision, ask Cision support to review the existing association before changing it.
Set up SPF
SPF checks the SMTP MAIL FROM domain, usually visible in the delivered Return-Path. Cision supports Return-Path alignment; confirm the custom bounce domain and its required DNS records for your account.
- Copy account values. Use CisionOne's DNS table or the instructions supplied by Cision support. Confirm whether the Communications Cloud include below applies to your account.
- Use the correct hostname. If Cision supplies a bounce CNAME, publish that CNAME. Do not add a TXT record at the same hostname. If it supplies SPF TXT instructions, use the specified MAIL FROM domain.
- Merge existing SPF. Add include:email.prnewswire.com before the existing all mechanism only when Cision instructs you to use it. Preserve other authorized senders and keep one SPF record per hostname.
- Check lookup limits. Keep SPF evaluation within the 10 DNS-lookup-causing term limit, including nested includes. Adding a second SPF record does not solve a lookup error.
This is a complete Communications Cloud SPF example for a hostname used only by Cision, subject to account confirmation. Do not overwrite an existing SPF record with it.
Cision-only SPF TXT exampletext
v=spf1 include:email.prnewswire.com ~all
An SPF record at example.com is not inherited by bounce.example.com. A custom Return-Path subdomain needs its own authorization, directly or through the CNAME Cision supplies.
Enter the actual MAIL FROM domain in the SPF checker. Check its syntax and nested lookup count after publishing the record.
SPF checker
Find SPF syntax issues, lookup limits, and weak records.
?/16tests passed
A successful DNS check confirms the published SPF configuration. A received test message confirms which envelope domain Cision actually uses.
With default relaxed SPF alignment, bounce.example.com and a From address at example.com share an organizational domain. With aspf=s, the domain names must be identical.
SPF authorization
The sending IP is authorized by the MAIL FROM domain's SPF record. This produces spf=pass.
SPF alignment
The authenticated MAIL FROM domain also matches the visible From domain under the DMARC alignment mode. Both conditions are needed for DMARC to pass through SPF.
Set up DKIM
I use Cision's generated selectors and targets rather than guessing them. The signing domain must have DMARC alignment with the visible From domain.
- Copy DKIM records. Open the domain's DNS table in CisionOne and copy every DKIM CNAME name and target. For Communications Cloud, obtain these values through Cision support.
- Publish exact values. Create each supplied CNAME in authoritative DNS. Avoid duplicating the zone suffix in the hostname, and use DNS-only resolution if your DNS service offers proxying.
- Resolve conflicts. Keep existing DKIM selectors used by other senders. Ask Cision support for a custom selector if a required hostname is already occupied.
- Activate signing. After DNS is publicly visible, confirm verification in CisionOne or ask Communications Cloud support to finish verification. Send a new message to check signing.
Use the selector supplied for your account in these commands. SELECTOR is a placeholder, not a published Cision selector.
Inspect the supplied DKIM selectorbash
dig +short CNAME SELECTOR._domainkey.example.com
dig +short TXT SELECTOR._domainkey.example.com
The CNAME delegates the key lookup to Cision's target. The lookup must ultimately return a DKIM public key; do not create an unrelated key pair and expect Cision to sign with it.
Leave the records published after verification. Receivers need the public key when checking messages.
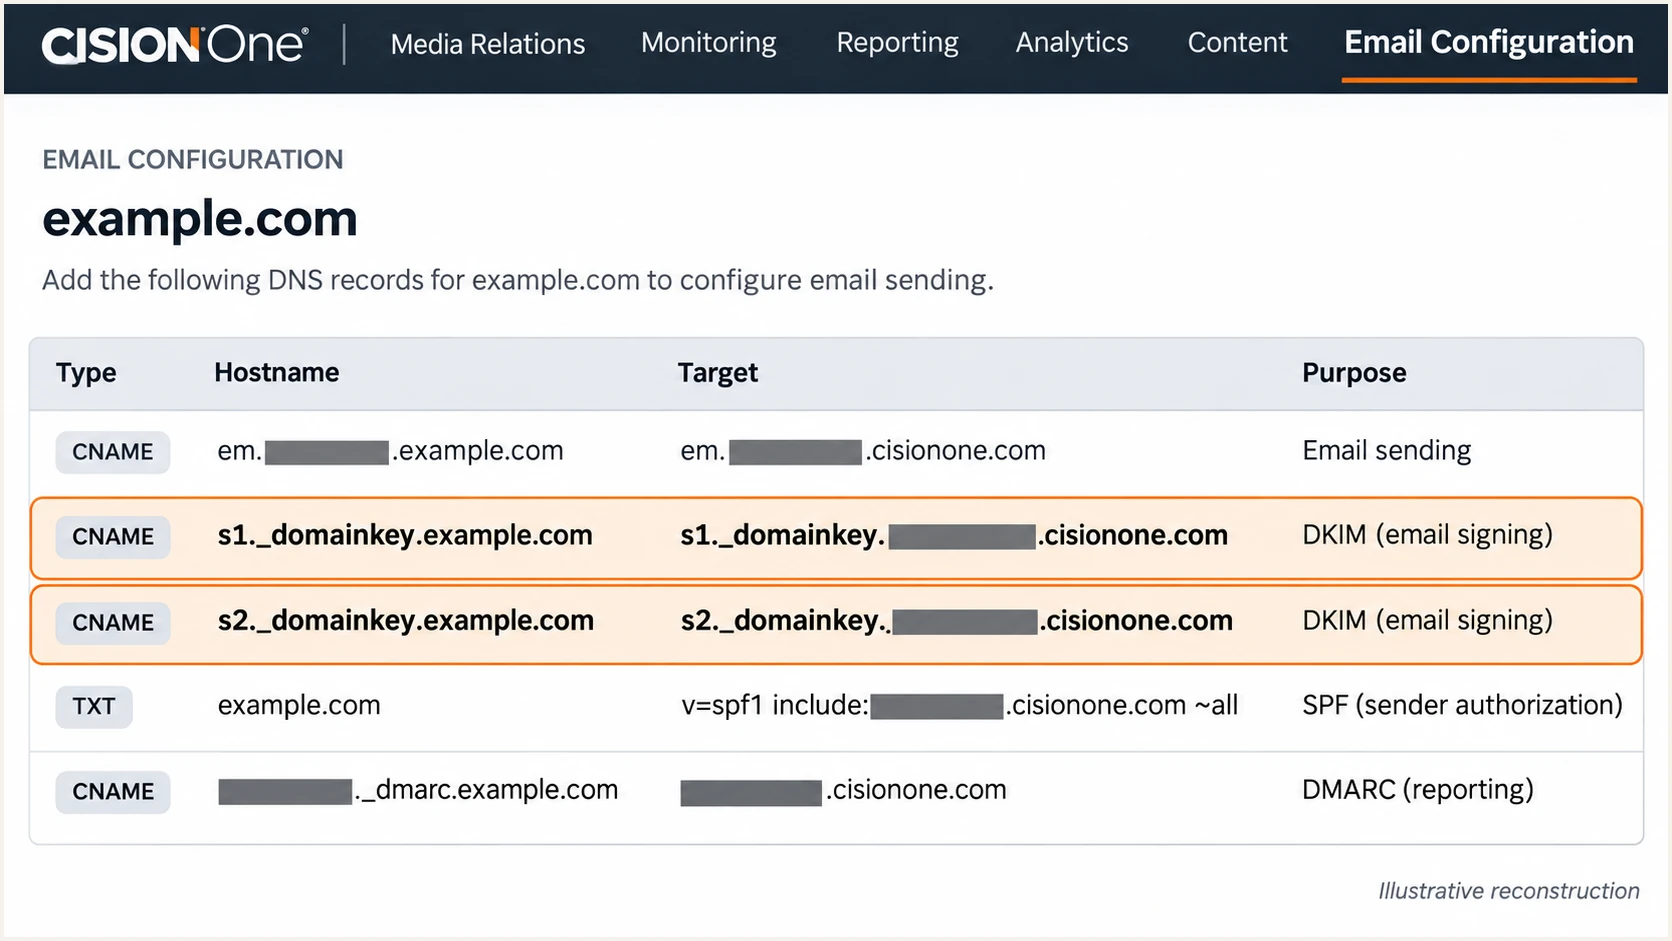
Illustrative CisionOne DKIM DNS table with account values masked.
In the received message, check dkim=pass and the signature's d= domain. A passing signature for an unrelated provider domain does not establish DKIM alignment with your From domain.
Set up DMARC
DMARC is your domain's DNS policy. Cision domain verification does not replace publishing it. For press@example.com, the direct record name is _dmarc.example.com.
- Inspect existing policy. Query the From domain's DMARC record and check any applicable parent-domain policy before changing DNS.
- Keep enforcement. If quarantine or reject already applies, retain it. Fix Cision's authentication before sending production email.
- Start monitoring. For a domain without an enforcement policy, publish the p=none example below as one TXT record at the correct _dmarc hostname.
- Set report delivery. Replace dmarc@example.com with a reporting mailbox you control. If reports go to another domain, arrange the required external reporting authorization.
Build the TXT value with the DMARC record generator. Keep existing reporting destinations when updating a working record.
Starting DMARC TXT value at _dmarc.example.comtext
v=DMARC1; p=none; rua=mailto:dmarc@example.com
The reporting mailbox receives aggregate XML reports. Merely publishing rua does not turn those attachments into a readable source inventory or failure alert.
Enter the visible From domain in the DMARC checker after publishing. Confirm that the record has valid syntax and the intended policy and reporting destination.
DMARC checker
Look up a domain's DMARC record and catch policy issues.
?/7tests passed
Keep one DMARC policy record at each _dmarc hostname. Multiple policy records prevent a valid policy from being selected.
A p=none policy requests monitoring without requesting quarantine or rejection for DMARC failures. Receivers still apply their own filtering.
Preserve an existing enforcement policy
The p=none example is for an initial monitoring setup. Do not replace an established p=quarantine or p=reject policy with it to accommodate an unverified Cision sender.
Verify and troubleshoot
I test through the same Cision sending route used for production. DNS validation alone cannot confirm the signing domain or Return-Path on a delivered message.
- Get a test address. Use the email tester below to obtain the destination for your test message.
- Send through Cision. Send an announcement using the approved sender address. Test other message types separately if they use a connected mailbox or another delivery route.
- Inspect the diagnosis. Check SPF, DKIM and DMARC results, including the domains used for each check. Save the received message and its Message-ID.
- Retest changes. After fixing DNS or Cision settings, send a fresh message. An old message retains its original authentication result.
The email tester prompts you to send a message and returns a full diagnosis of that received email. This is the quickest check that Cision is using the intended configuration.
Use the actual campaign sender, not a manually forwarded copy. Forwarding changes the delivery path and can invalidate SPF.
Email tester
Send a real email to this address. Suped shows a results button when the test is ready.
?/43tests passed
If the Return-Path still uses a provider-owned domain, adding Cision to your root SPF does not fix SPF alignment. Ask Cision to enable the custom Return-Path for that route. DMARC still passes through valid DKIM with domain alignment.
This schematic header shows the expected domains with relaxed alignment. It is an example, not a fixed Cision Return-Path or selector.
Expected authentication on a received testtext
From: PR team <press@example.com>
Return-Path: <bounce@bounce.example.com>
Authentication-Results: receiver.example;
    spf=pass smtp.mailfrom=bounce.example.com;
    dkim=pass header.d=example.com header.s=SELECTOR;
    dmarc=pass header.from=example.com
Read the Authentication-Results inserted by the receiving mail system. A message can show SPF and DKIM passes for unrelated domains and still fail DMARC.
Use these checks to narrow down a failure before contacting Cision support.
|
|
|
|---|---|---|
SPF permerror | SPF records | Fix duplicates or lookups |
SPF mismatch | MAIL FROM | Confirm custom Return-Path |
DKIM fail | Selector CNAME | Correct name or target |
DMARC fail | Authenticated domains | Fix domain alignment |
Domain unverified | Authoritative DNS | Check hostnames and TTL |
Cision authentication troubleshooting checks.
Give support the Message-ID, sending IP, MAIL FROM domain, DKIM selector and receiver results. Recheck DNS after the previous TTL expires if public resolvers still return old values.
Get alerted when it breaks
Suped, our DMARC platform, provides ongoing source-level diagnosis and failure alerts for Cision traffic. I keep this monitoring active after the initial test so a later DNS change does not go unnoticed.
- Route aggregate reports. Add your Suped reporting address to the existing DMARC rua value, preserving its policy and any other required destinations.
- Confirm the Cision source. Compare source IPs and authentication domains with a controlled Cision send. Mark the source verified only after confirming that your organization authorizes it.
- Enable failure alerts. Open Suped's notification settings, enable DMARC failure alerts and configure the available recipients and thresholds. Keep summary reports enabled for routine review.
- Diagnose a change. Open the failing source's detail view, inspect SPF and DKIM results, and compare DNS history with the last working configuration. Follow the detected issue's fix steps and send another test.
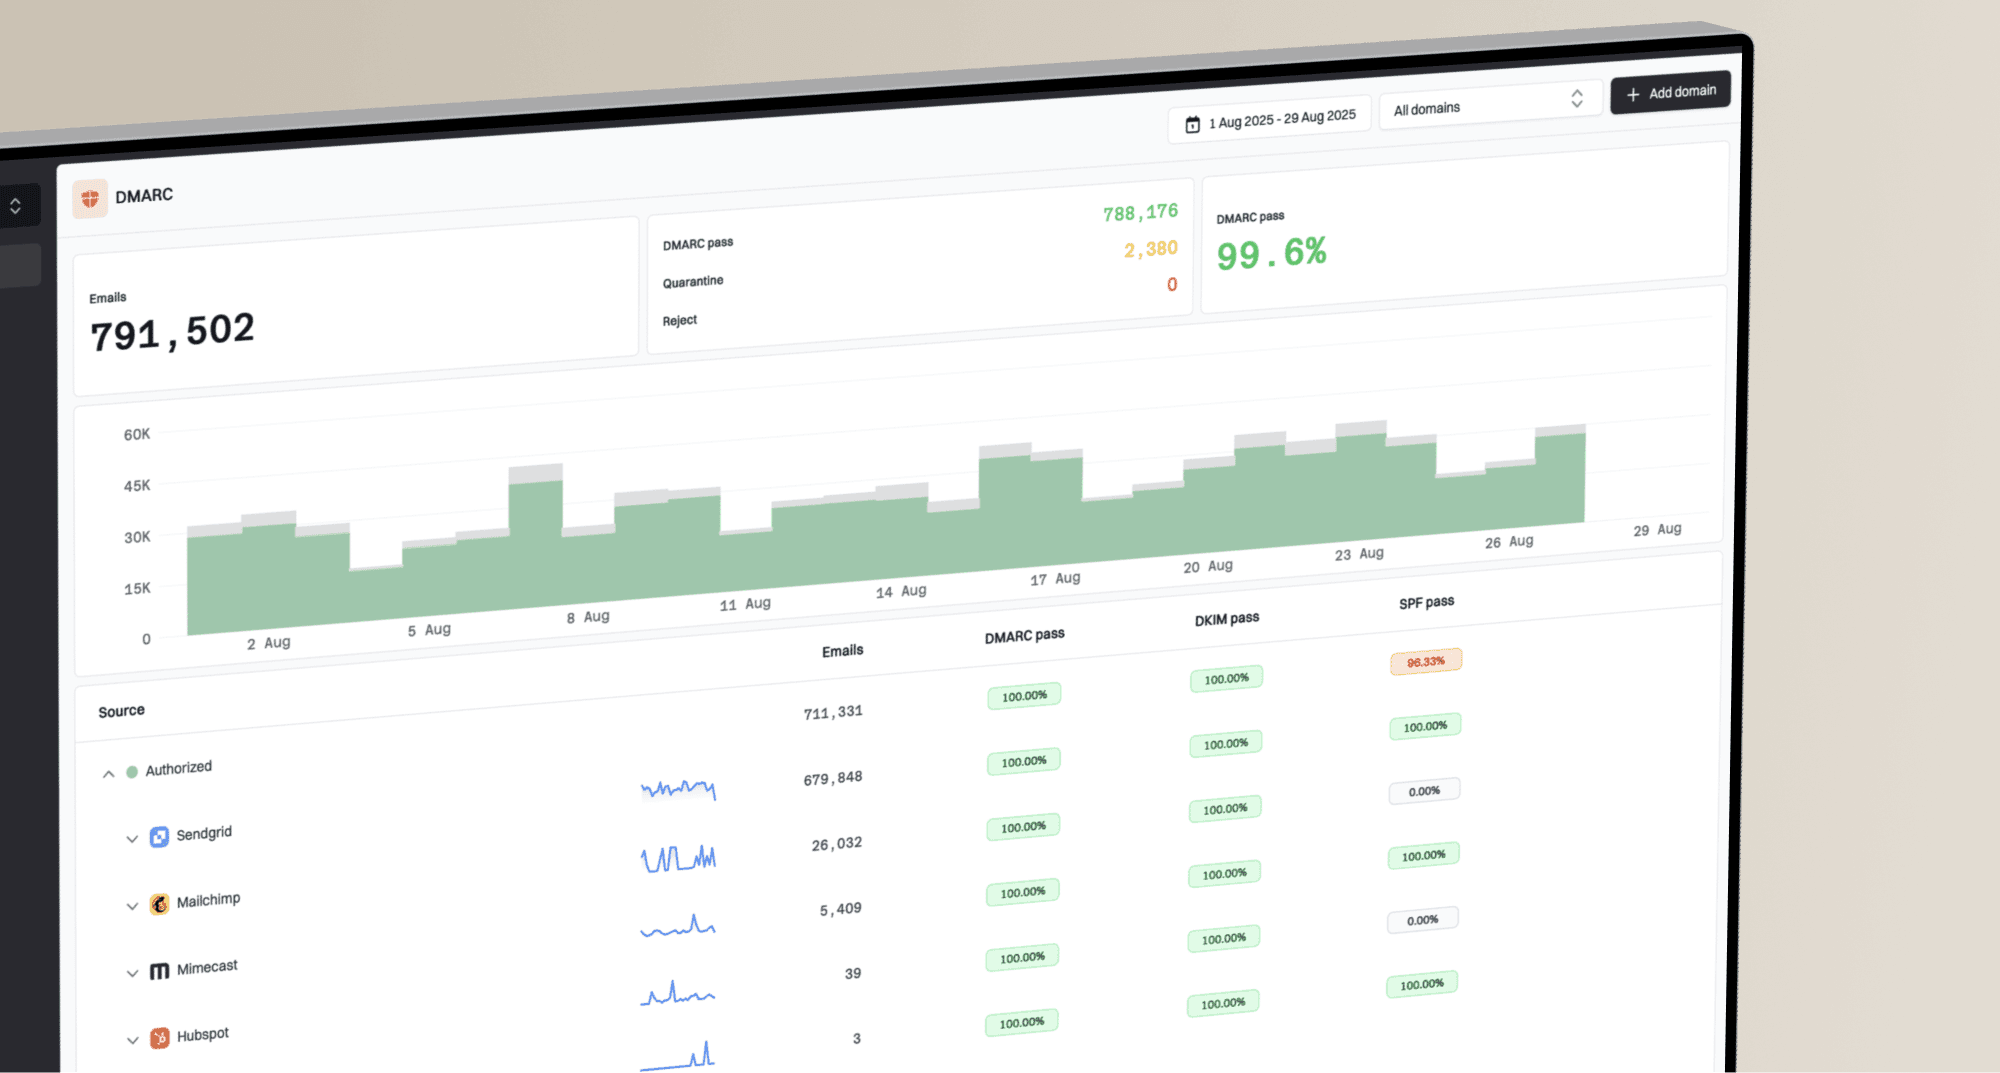
Suped's DMARC monitoring groups receiver reports by sending source, so the team responsible for Cision can investigate its failures without sorting raw XML attachments.
Aggregate reports usually arrive on a daily cycle. Failure alerts depend on report arrival and processing, so they are not immediate notifications for individual SMTP deliveries.
Keep a working baseline
Save the verified From domain, custom Return-Path and DKIM selectors with the DNS change owner. Use Suped's DNS history when a failure follows an unexpected record change.
Secure your domain with p=reject
I move to p=reject after Cision and every other authorized sender have demonstrated reliable DMARC passes. Suped's verified-source inventory and issue diagnostics provide the evidence for each policy change.
- Observe normal sending. Collect reports across a complete PR campaign cycle and include infrequent legitimate senders. A single successful Cision test is insufficient for a domain-wide policy change.
- Fix legitimate failures. Resolve Cision DKIM and Return-Path issues. Review forwarding separately and distinguish unauthorized traffic from misconfigured business email.
- Stage enforcement. Move an initial p=none policy to p=quarantine once legitimate sources are ready. Review source-level failures and delivery feedback before proceeding.
- Promote to reject. Set p=reject when no known legitimate source depends on a DMARC failure. Retain rua reporting and Suped failure alerts.
- Review subdomains. Check separate subdomain records and inherited policies. Remove unintended weaker policies only after validating the affected senders.
Suped's hosted DMARC lets the team stage policy changes in the dashboard after the DNS delegation is configured. Keep Cision's signing records in place throughout enforcement.
For a directly managed TXT record, edit the existing policy value rather than publishing another record. Replace the example report address before using this final policy.
DMARC TXT value after validating all authorized senderstext
v=DMARC1; p=reject; rua=mailto:dmarc@example.com
A reject policy requests rejection of messages that fail DMARC. Receivers decide how to apply that request; a DMARC pass does not guarantee inbox placement.
Frequently asked questions
Cision's Communications Cloud support documentation specifies include:email.prnewswire.com. Confirm it applies to your account before merging it into an existing SPF record. CisionOne supplies account-specific DNS values, including the records needed for its sending configuration.
The Return-Path uses a domain that does not match the visible From domain under your DMARC alignment mode. DMARC still passes if DKIM passes with domain alignment. Request the custom Return-Path for the affected Cision route; repeatedly editing root SPF will not change the envelope sender.
Publish and manage the DMARC policy in your domain's DNS, or through an established hosted DMARC delegation. Verifying a domain in CisionOne does not create the policy. Keep quarantine or reject if it already applies.
Keep other senders' selectors intact. Publish the selectors Cision supplies. If a required DNS hostname is already occupied, ask Cision support for a custom selector rather than replacing a working key.
Cision Communications Cloud is a candidate because Cision's official SPF instructions use email.prnewswire.com. That is a lead for investigation, not proof that a particular PTR hostname belongs to your Cision account. Confirm the sending IP with Cision support and compare a controlled test message's authentication domains. rDNS alone does not establish DMARC authorization.
Check the authoritative DNS response first, then allow cached answers to expire according to the previous TTL. Cision advises allowing a few hours before retrying verification. If the correct records are publicly visible but verification still fails, send Cision support the exact hostnames and returned values.