
How to set up DMARC/DKIM/SPF for Abnormal Email

Published 21 Nov 2026
Updated 21 Nov 2026
10 min read
Summarize with
Set up SPF and DKIM on the service that actually sends your mail, then publish DMARC in your domain's DNS. Abnormal Email normally connects to Microsoft 365 or Google Workspace through APIs. Installing that integration does not require an Abnormal SPF include, an Abnormal DKIM key, or an MX change.
I first separate the standard API integration from any Abnormal workflow that sends using your custom domain. For custom sending, get the exact DNS records and Return-Path configuration from Abnormal support before editing authentication.
Add your domain
For the standard integration, verify your domain at the mailbox provider and connect that tenant to Abnormal. Abnormal's public Microsoft 365 integration documentation describes API authorization.
- Verify ownership. For a new Microsoft 365 domain, use Settings > Domains > Add domain. For Google Workspace, use Account > Domains > Manage domains. Publish the provider-issued verification TXT record and complete its verification check.
- Open Abnormal setup. Use the integration link supplied by Abnormal. Existing Microsoft 365 customers can generate one under Settings > Tenant Management > Manage Tenants > Generate Link for Existing Tenant.
- Authorize Microsoft 365. Select Get Started, review the permissions, then select Next: Authorize API. Sign in with a Microsoft 365 Global Administrator account, accept the requested access, and confirm Integration Complete.
- Connect Google Workspace. Use Abnormal's Google Workspace onboarding instructions and the administrator account they require. Complete the authorization checks supplied for your tenant.
- Register custom sending. If Abnormal will send using your domain, ask support for its domain verification procedure, custom Return-Path records, and DKIM records. Publish only the records issued for your deployment and request confirmation that verification succeeded.
The API integration leaves normal mail routing with your existing provider. Any separately enabled outbound routing feature needs its own deployment instructions.
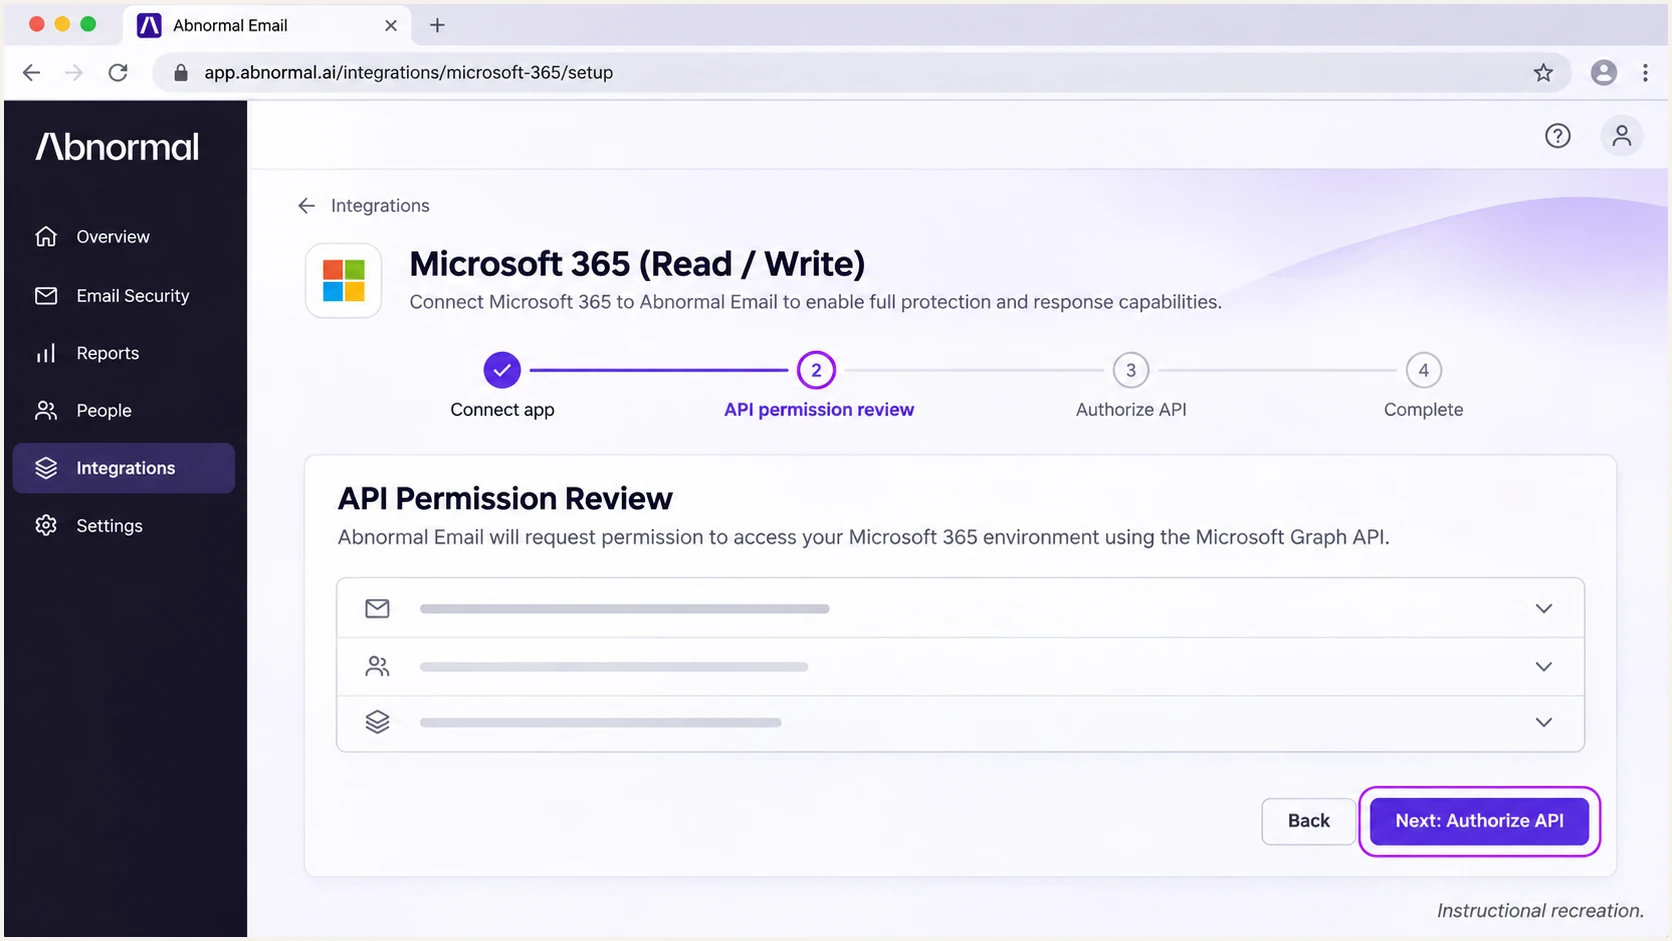
Illustrated Abnormal setup wizard highlighting API authorization.
A completed integration confirms Abnormal's access to the tenant. Use an actual delivered message to verify outbound authentication.
Set up SPF
Keep SPF authorization with the actual outbound sender. The standard Abnormal API integration does not introduce another sending server.
- Identify the envelope domain. Inspect a fresh message's Return-Path and the receiving server's smtp.mailfrom result. SPF is checked against that domain, which is not always the visible From domain.
- Choose the sender's authorization. Use Microsoft's published SPF include for Microsoft 365, Google's for Google Workspace, or the exact authorization supplied by Abnormal support for a custom sending service.
- Merge into one record. Publish one SPF TXT record at each applicable hostname. Preserve other authorized senders, insert additions before the final all mechanism, and stay within the 10 DNS lookup limit, including nested lookups.
- Verify the custom Return-Path. For custom sending, have Abnormal support confirm the envelope domain and its DNS requirements. Publish any supplied TXT, CNAME, or MX records exactly. A subdomain does not inherit the root domain's SPF record.
Single-provider SPF examples, use the applicable valuetext
; Host: example.com. Type: TXT. Microsoft 365 only.
v=spf1 include:spf.protection.outlook.com -all

; Host: example.com. Type: TXT. Google Workspace only.
v=spf1 include:_spf.google.com ~all
Use a sample above only when that provider is your sole authorized sender. Do not replace a working multi-sender record or copy the SPF record published on Abnormal's own corporate domain.
For DMARC, a passing SPF result also needs domain alignment. Relaxed alignment requires the same organizational domain as the visible From address; strict alignment requires an exact domain match.
SPF checker
Find SPF syntax issues, lookup limits, and weak records.
?/16tests passed
Enter the envelope domain in the SPF checker. Resolve duplicate records, missing includes, and lookup-limit errors before testing a newly sent message.
If a message stream retains a provider-owned Return-Path, editing your root SPF record will not fix its alignment. DMARC can still pass through DKIM when the passing signature uses your From domain.
Set up DKIM
I enable DKIM for the custom From domain at the service that signs outbound mail. Authorizing Abnormal's API access does not enable Microsoft 365 or Google Workspace DKIM signing.
Microsoft 365
In Microsoft Defender, open Email & collaboration > Policies & rules > Threat policies > Email authentication settings > DKIM.
- Select the domain. Choose the domain used in your visible From address. Create DKIM keys if none exist.
- Copy both records. Obtain the selector1._domainkey and selector2._domainkey CNAME names and their exact tenant-generated targets.
- Publish CNAMEs. Add both records at your DNS host. Copy the targets exactly; do not construct them using another tenant's example.
- Enable signing. After the records resolve publicly, return to the domain and enable DKIM signing. Send a fresh external message.
Google Workspace
In the Google Admin console, open Apps > Google Workspace > Gmail > Authenticate email.
- Select the domain. Choose the domain used in your visible From address, then select Generate new record.
- Generate a key. Choose 2048 bits where your DNS host supports it. Use an unused selector when replacing an existing key.
- Publish the TXT record. Copy the generated DNS hostname and complete public key value into your domain's DNS.
- Start signing. Return to Authenticate email and select Start authentication. Confirm the status and test a fresh external message.
For a custom sender operated by Abnormal, request the selector names, record types, and exact public DNS values from support. Have support confirm signing is enabled after DNS verification. Keep private keys out of DNS.
Inspect the passing DKIM signature's d= domain. A valid signature using an unrelated provider domain does not satisfy DMARC for your From domain. Publishing a public key alone does not start signing.
Set up DMARC
Publish one DMARC TXT record at _dmarc.example.com for a From domain of example.com. Start a new deployment with p=none. If the domain already uses p=quarantine or p=reject, keep that policy.
- Inspect the existing record. Look up the current DMARC policy and reporting destination before making changes. Edit the existing record instead of creating a second one.
- Prepare reporting. Replace dmarc@example.com with a mailbox that accepts aggregate XML reports or your assigned reporting address. Do not publish the example address literally.
- Publish at the correct hostname. Use _dmarc when your DNS host automatically appends example.com. Use the full hostname only when the DNS interface requires it.
- Preserve established settings. Keep existing enforcement and reporting recipients unless you have an approved reason to change them. Use the starter value below only for a new monitoring policy.
Starter TXT value at _dmarc.example.comtext
v=DMARC1; p=none; rua=mailto:dmarc@example.com
The p=none policy requests monitoring without DMARC enforcement. Receiving servers still apply their other filtering policies.
Use our DMARC record generator to build the record with your real reporting destination. Then check the published record below.
DMARC checker
Look up a domain's DMARC record and catch policy issues.
?/7tests passed
Check the exact domain used in the visible From address. Confirm that one valid DMARC record is returned and that its policy and reporting destination match the intended configuration.
Aggregate reports follow each receiver's reporting schedule. If you use a reporting destination on a different domain, confirm that the destination authorizes external reporting when required.
Keep existing enforcement
Do not lower p=quarantine or p=reject just to integrate Abnormal. Repair the affected sender's SPF or DKIM configuration while preserving the domain's established policy.
Verify and troubleshoot
I check public DNS and recipient authentication results separately. A valid DNS record does not prove that a particular message used it.
- Check DNS. Query SPF at the envelope domain, DMARC at the From domain, and DKIM at the selector and signing domain shown in the message. Follow CNAME targets where applicable.
- Test each sending stream. Send a fresh message through Microsoft 365 or Google Workspace. Separately trigger any custom-domain message generated by Abnormal; a normal mailbox test does not cover that stream.
- Read trusted results. Inspect the external receiver's Authentication-Results header. Compare smtp.mailfrom, the passing DKIM d= domain, and the visible From domain.
- Fix the specific failure. For SPF, check the sending IP and envelope domain. For DKIM, check the selector, public key, signing status, and message changes. For DMARC, check domain alignment.
Trust authentication results added by the final receiving provider. A sender-supplied header claiming a pass is not evidence that the receiver verified the message.
|
|
|
|
|---|---|---|---|
Pass | Pass | At least one | Pass |
Pass | Fail | SPF | Pass |
Fail | Pass | DKIM | Pass |
Pass | Pass | Neither | Fail |
A passing SPF or DKIM result must also match the From domain under the configured DMARC alignment mode.
A message needs at least one passing authentication method with the required domain match. SPF and DKIM passing for unrelated domains still produces a DMARC failure.
The email tester below is the quickest message-level check. It supplies a test address; send a message to that address through the actual sending workflow to receive a full diagnosis.
Email tester
Send a real email to this address. Suped shows a results button when the test is ready.
?/43tests passed
After each repair, send another message. Confirm DMARC passes and review which authenticated domain produced the pass. An old message retains its original authentication results.
For received messages available in Abnormal, open the Email Details Page to inspect its sender authentication results. Abnormal's public sender-authentication release note documents these results there.
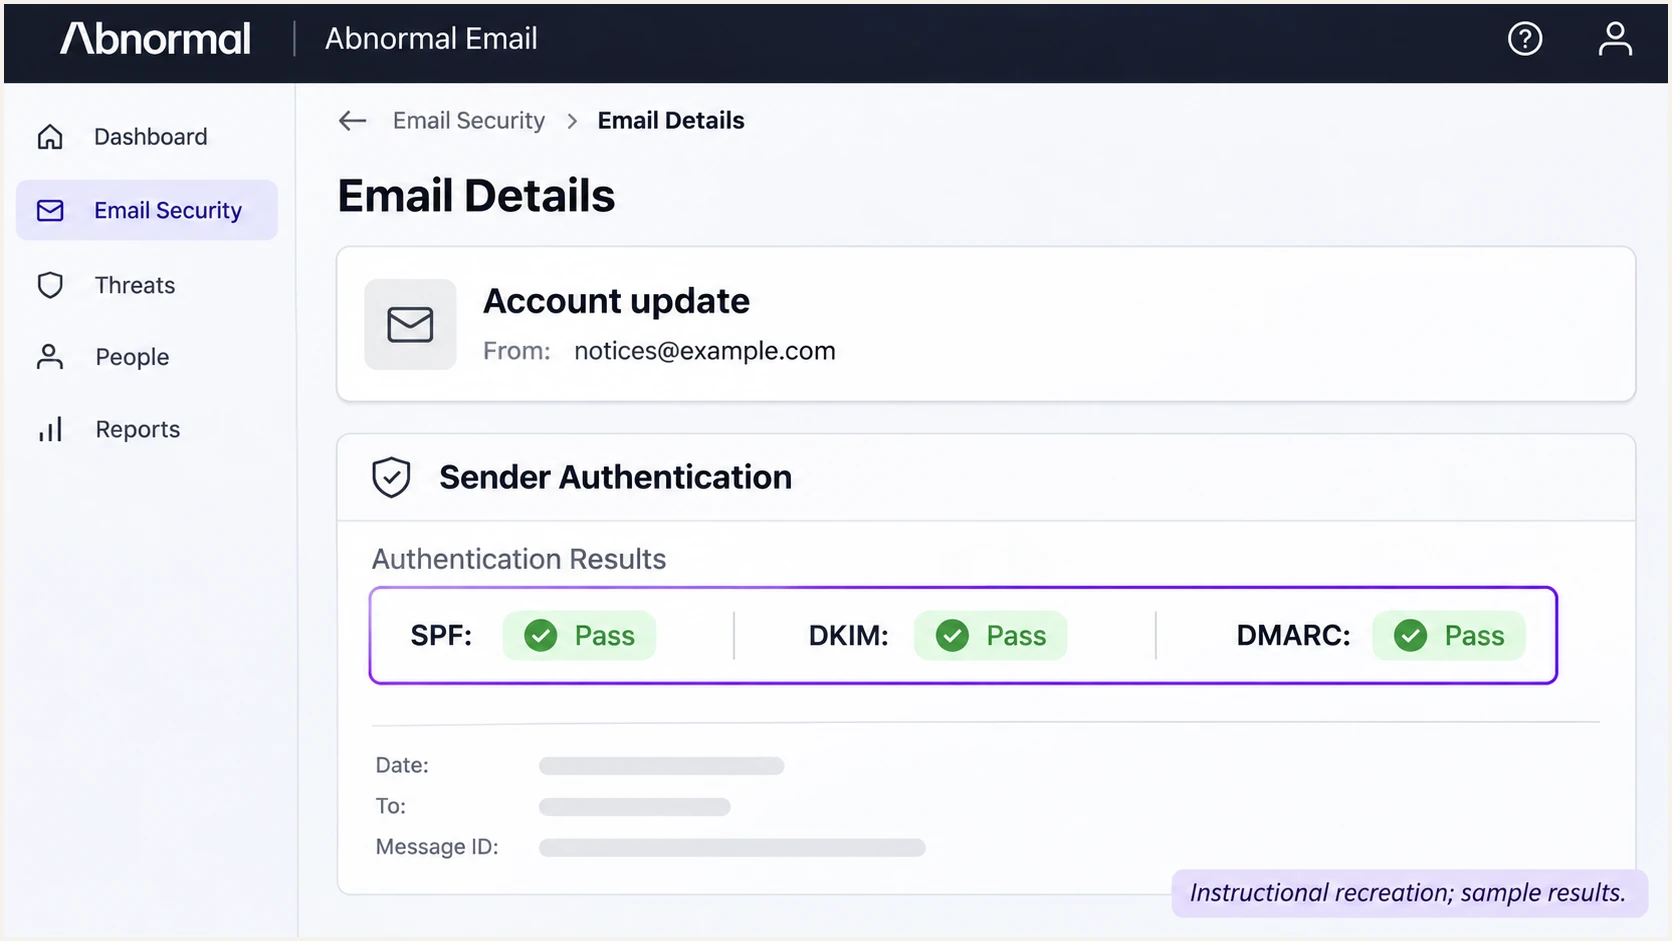
Illustrated Abnormal Email Details Page with sample authentication results.
Use the recipient's results for your outbound test. Abnormal's analysis of an unrelated incoming message does not verify your outbound domain configuration.
Get alerted when it breaks
Suped is our DMARC platform. I recommend its DMARC monitoring for tracking authentication across every authorized sender after the Abnormal deployment is working.
- Enable issue notifications. In Suped's notification settings, enable Issues detected and Sending sources need verification emails for the people responsible for authentication.
- Review summaries. Enable DMARC summary emails so changes in source volume and authentication results receive regular review.
- Investigate the sender. Use Suped's Data view to filter by source and IP address. Open Detail view to inspect SPF, DKIM, and DMARC diagnostics before changing DNS.
- Verify the repair. Follow the issue's steps to fix, run its verification action, and compare DNS history if a recent record change caused the problem.
Suped's issue detection and repair steps give the DNS owner a specific configuration to investigate. Keep Abnormal's threat investigation workflow active alongside this domain-wide monitoring.
Alerts based on aggregate DMARC reports depend on when receivers submit those reports. Use fresh message tests for immediate validation after a change.
Secure your domain with p=reject
I move to p=reject after every legitimate sending stream has a reliable DMARC pass. Suped connects source verification with authentication diagnostics so enforcement decisions use actual traffic.
- Confirm source owners. Review every reported source in Suped. Verify legitimate senders with their owners; investigate unfamiliar traffic instead of authorizing it automatically.
- Repair domain matches. Enable custom-domain DKIM on each sender. Where custom Return-Path configuration is available, verify SPF authorization and its domain match as well.
- Stage policy changes. Review reports over a complete business sending cycle, including infrequent billing messages and password resets. Move to quarantine, check legitimate traffic again, then move to reject.
- Manage the policy. Use Suped's Hosted DMARC to change policy through the dashboard once configured, or edit your existing DNS TXT record. Keep reporting enabled during every stage.
Successive TXT values at _dmarc.example.com, publish only onetext
; Quarantine stage
v=DMARC1; p=quarantine; rua=mailto:dmarc@example.com

; Reject stage
v=DMARC1; p=reject; rua=mailto:dmarc@example.com
Replace the example reporting address and preserve any other intentional tags in your existing record. Test business-critical messages after each policy change.
Our Hosted DMARC workflow keeps policy management in Suped while its reports show whether legitimate sources continue to pass. Fix an affected sender before advancing enforcement.
Use source-level evidence
A high overall pass rate is insufficient if a low-volume business-critical sender still fails. Confirm each authorized stream before requesting rejection of DMARC failures.
Retest after a DKIM rotation, a new sending service, or a custom Return-Path change. Continue reviewing Suped's issue notifications after reaching p=reject.
The reject policy asks receivers to reject mail that fails DMARC. It does not prevent lookalike domains or misuse of an authenticated account, so Abnormal's account and message analysis remains relevant.
Frequency asked questions
For the standard API integration, add no Abnormal-specific include. Keep the authorization for your actual sending provider. If Abnormal sends using your domain, obtain the exact SPF and Return-Path instructions from support; do not guess an include hostname.
Yes. A passing DKIM signature with the required From-domain match is sufficient for DMARC. SPF alignment errors are expected for a stream using an unrelated provider-owned Return-Path. Keep DKIM passing for that stream and still meet the recipient provider's separate sender requirements.
The standard API authorization does not enable custom-domain DKIM at Microsoft 365 or Google Workspace. Publish the sender-generated DNS records, enable signing at that provider, and verify a fresh externally delivered message.
An rDNS hostname alone does not establish that Abnormal sent the message. The standard API integration leaves sending with your mail provider. For a source identified as Abnormal Email, ask Abnormal support to confirm the source IP and hostname, then compare the Return-Path and authenticated domains. Do not authorize a sender based only on a reverse-DNS label.
No. Keep an existing quarantine or reject policy and repair the affected sender's authentication. The p=none starter record is for a new monitoring deployment, not a reason to weaken an established policy.




