Suped supports SAML-based single sign-on (SSO) for enterprise organizations. SAML allows your team to log in using your existing identity provider, such as Microsoft Entra, Okta, or Google Workspace.
How it works
- SSO is configured per-organization with a specific email domain.
- Users with a matching email domain are required to log in via your identity provider.
- On first login, users with the configured domain are auto-provisioned. No manual invitation required.
Setting up SAML SSO
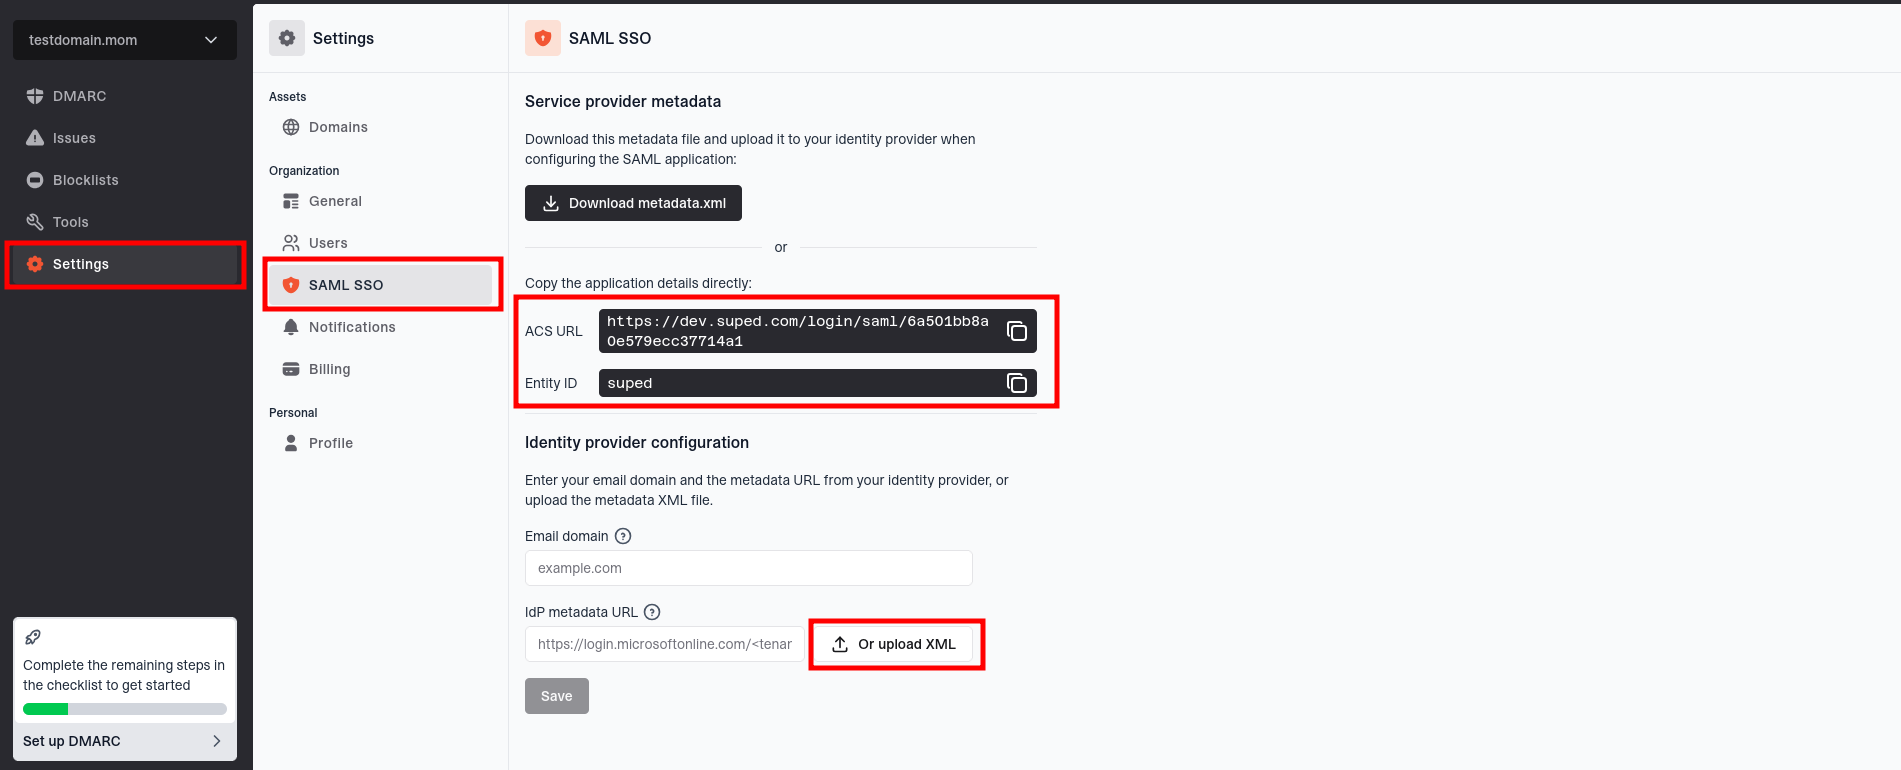
- Go to Settings > SAML SSO.
- Click Download metadata.xml and upload this file to your identity provider when configuring the SAML application, or copy the ACS URL and Entity ID into your identity provider if it needs manual configuration.
- Enter your email domain (e.g.
example.com). Users with this email domain will be required to log in via SAML. - Enter your IdP metadata URL. This is the federation metadata XML URL from your identity provider. If your provider only gives you a metadata XML file, upload that file instead. See the provider notes below for where to find it.
- Verify domain ownership by adding a DNS TXT record at
_suped-verify.yourdomain.comwith the value shown on the page. You can remove this record after saving successfully. - Click Save. Suped will fetch your metadata and verify domain ownership.
Finding your IdP metadata URL
Microsoft Entra (Azure AD)
In the Azure portal, open Enterprise Applications, select your Suped application, then go to Single sign-on. Under SAML Certificates, copy the value of App Federation Metadata Url.
The URL must include an ?appid= query parameter and looks like:
https://login.microsoftonline.com/<tenant-id>/federationmetadata/2007-06/federationmetadata.xml?appid=<application-id>
Do not use the tenant-wide federation metadata URL (the one without ?appid=). It points at the whole tenant instead of your Suped application and SSO will fail at sign-in.
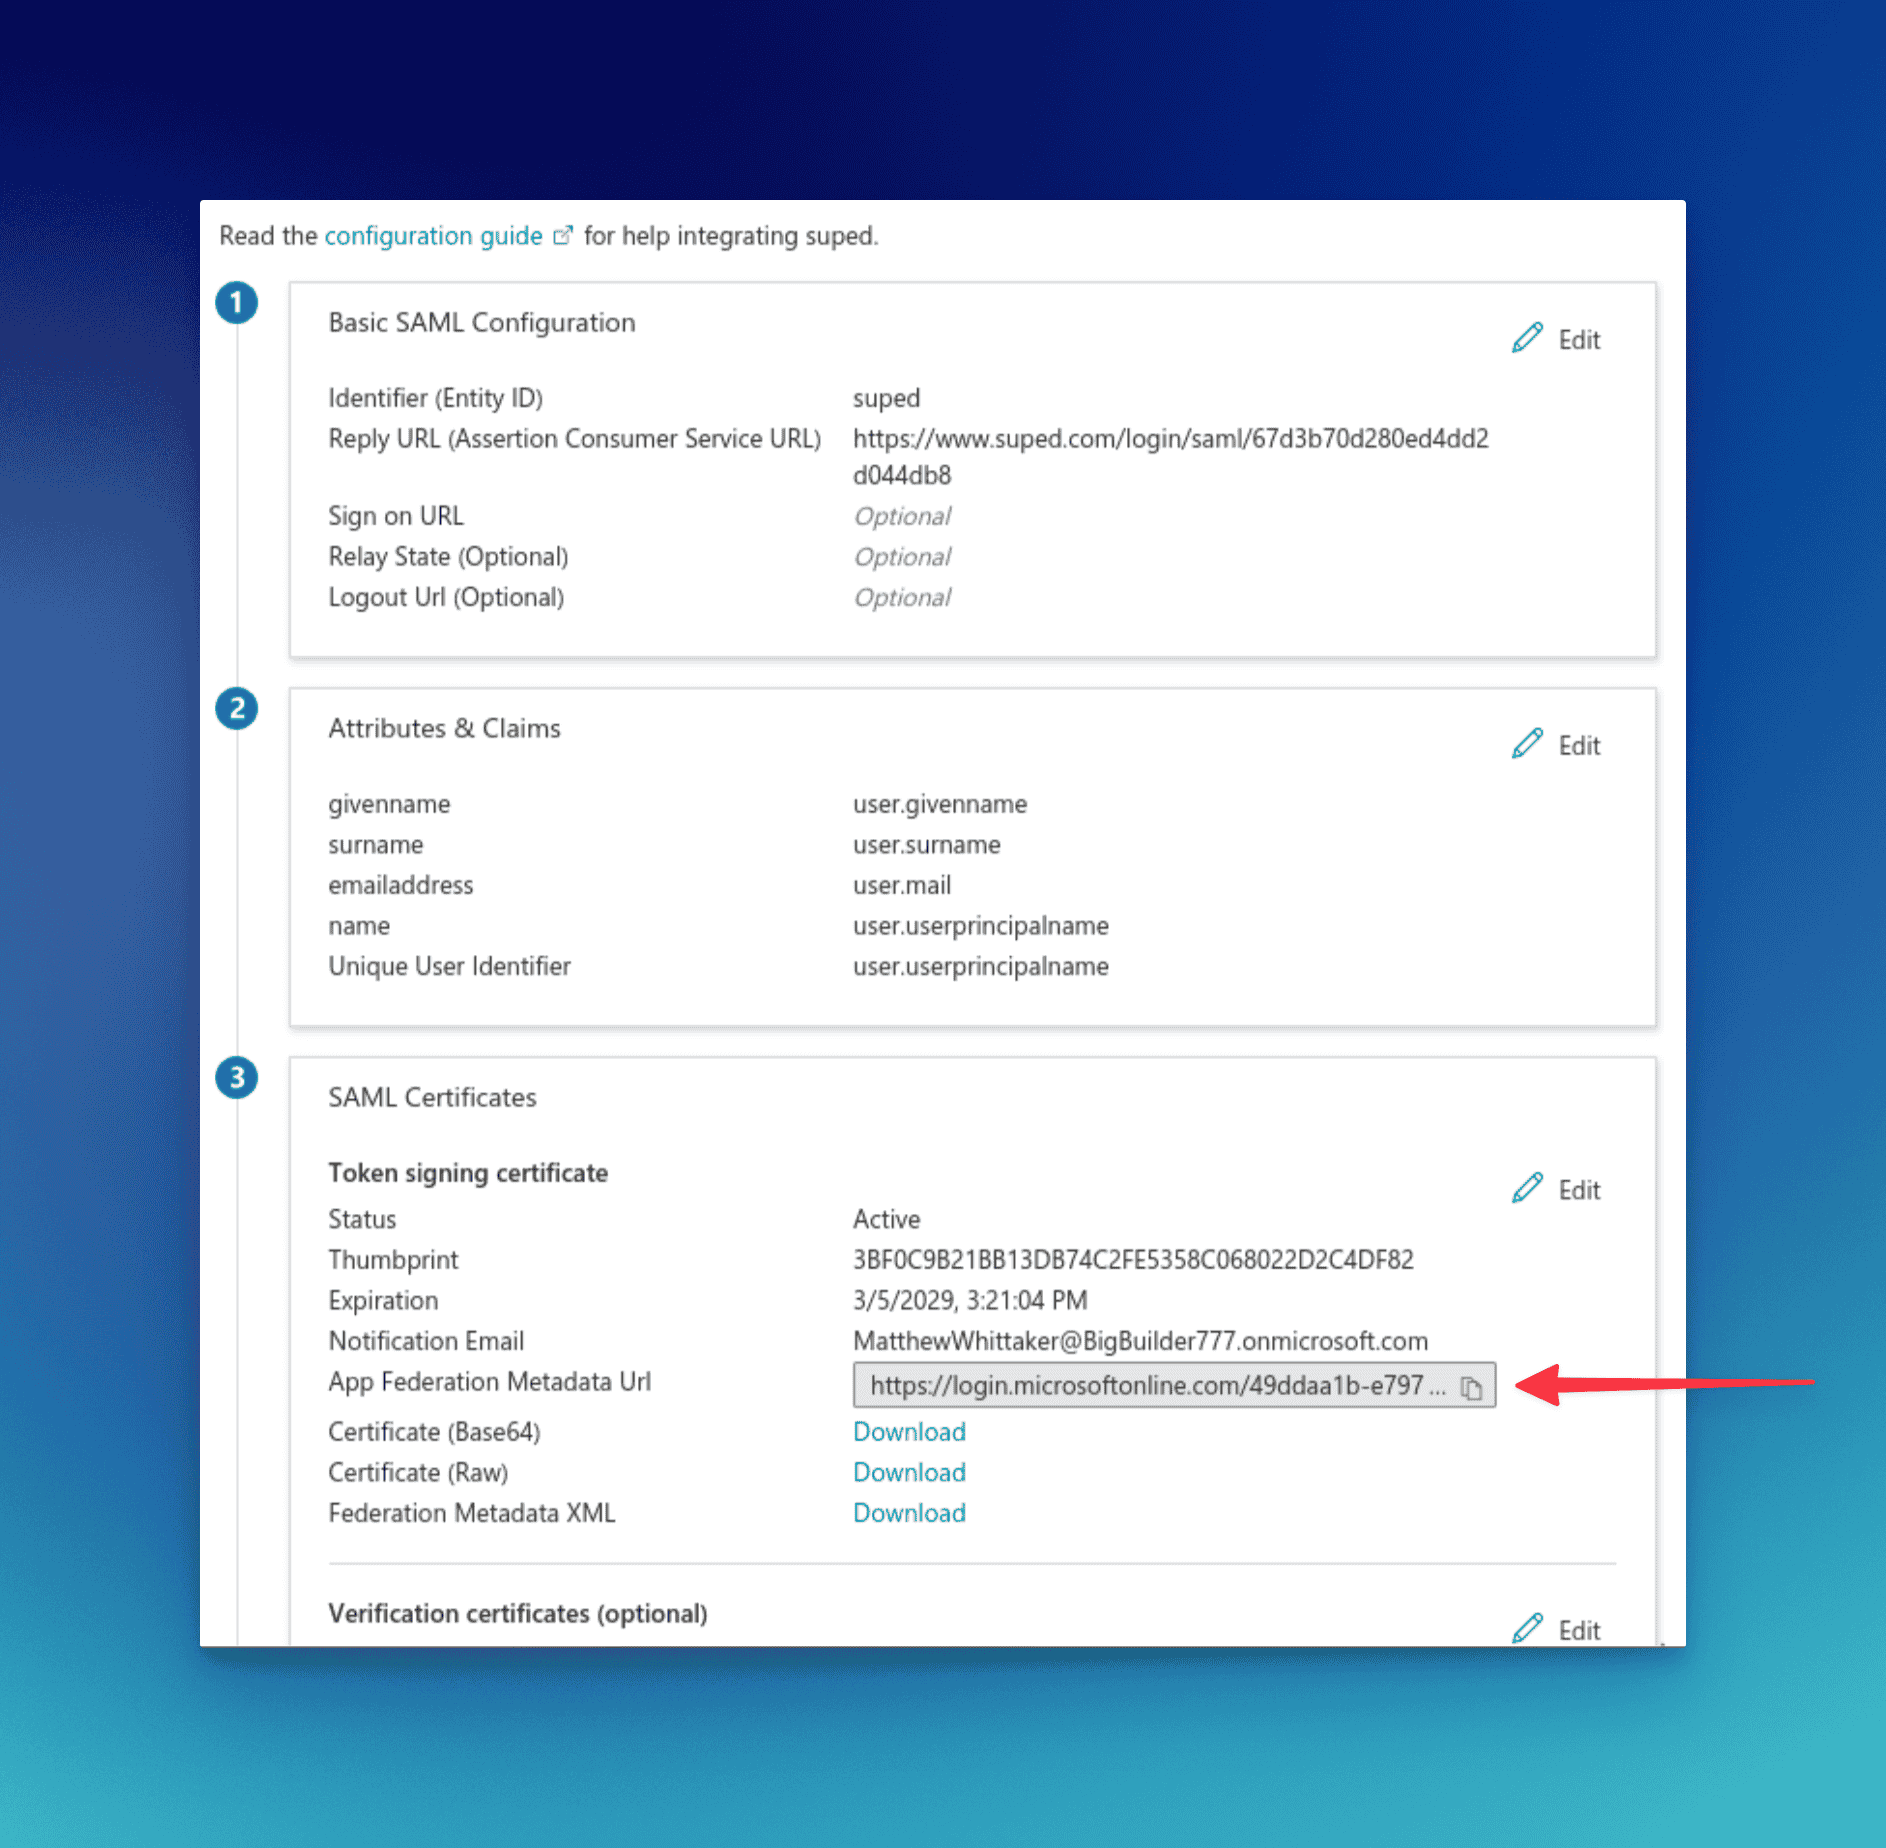
The correct URL is the App Federation Metadata Url field shown above, not the Federation Metadata XML download link below it.
Okta
In the Okta admin console, open your Suped SAML application, go to the Sign On tab, and copy the Metadata URL shown under SAML Signing Certificates.
Google Workspace
Google Workspace uses a custom SAML app. You copy the Suped service provider values into Google Admin, download Google's IdP metadata XML, then upload that XML back into Suped.
In Suped, go to Settings > SAML SSO. Keep this page open while you configure Google Workspace. You will need the ACS URL and Entity ID shown in Suped, and you will later use Upload XML to add Google's metadata file.
In Google Admin, go to Apps > Web and mobile apps, then click Add app > Add custom SAML app.
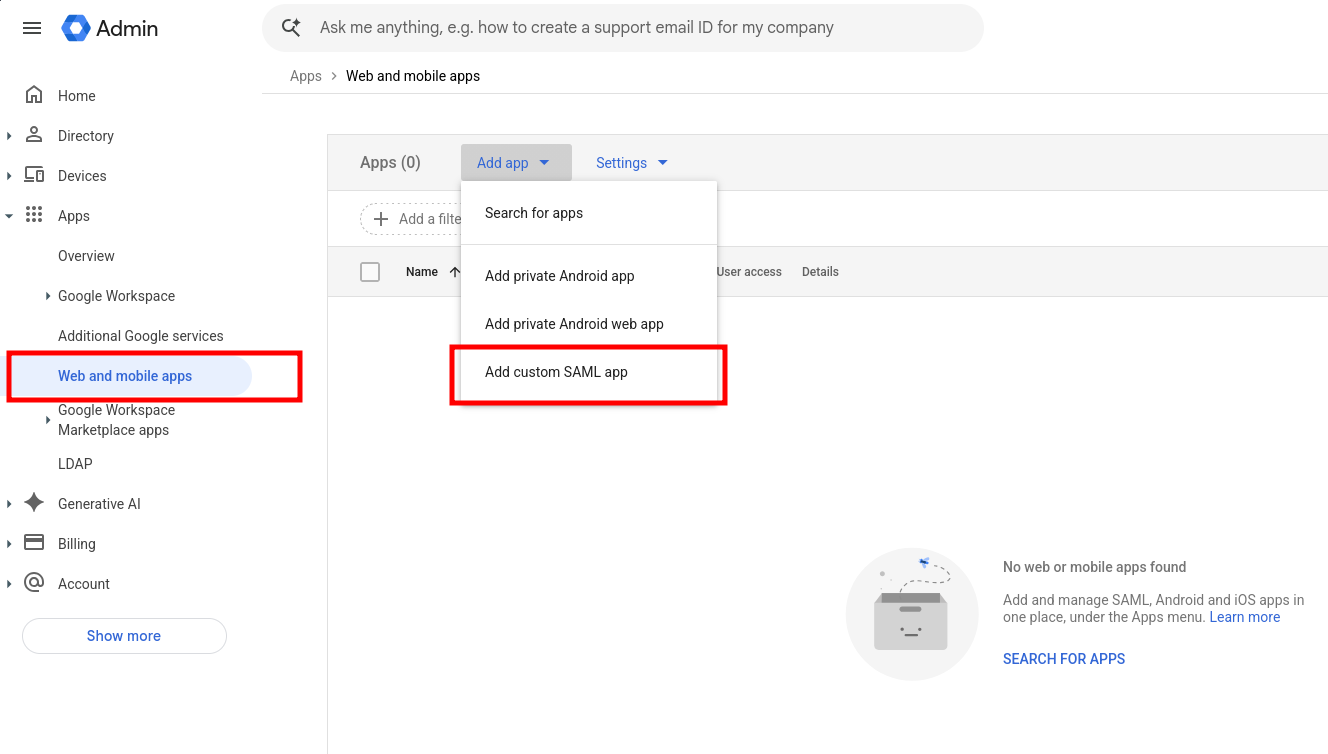
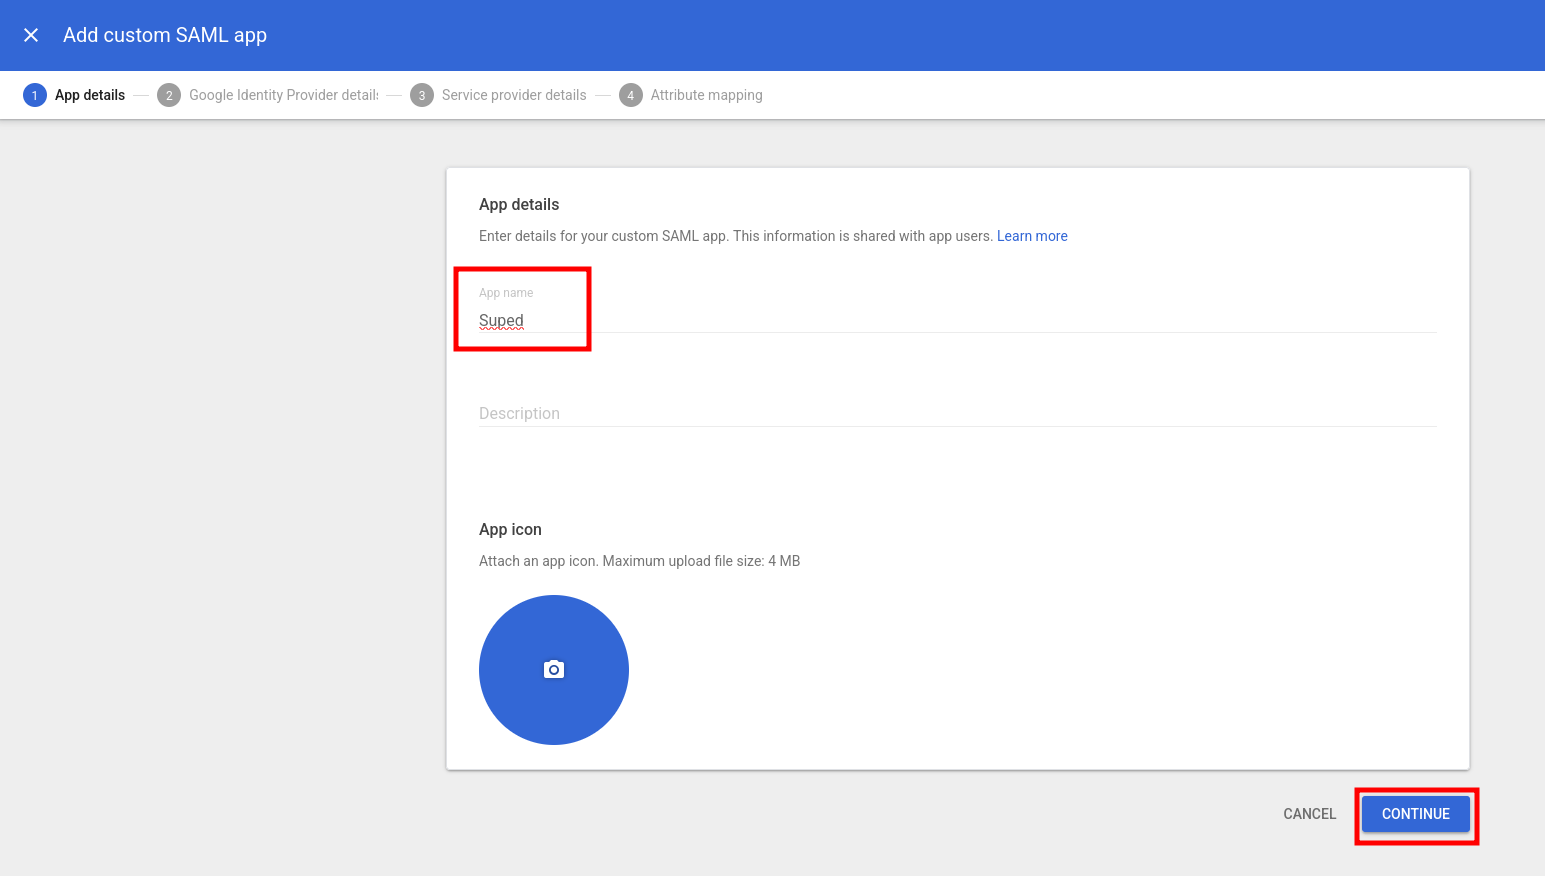
On App details, enter a name such as Suped. The description and app icon are optional. Click Continue.
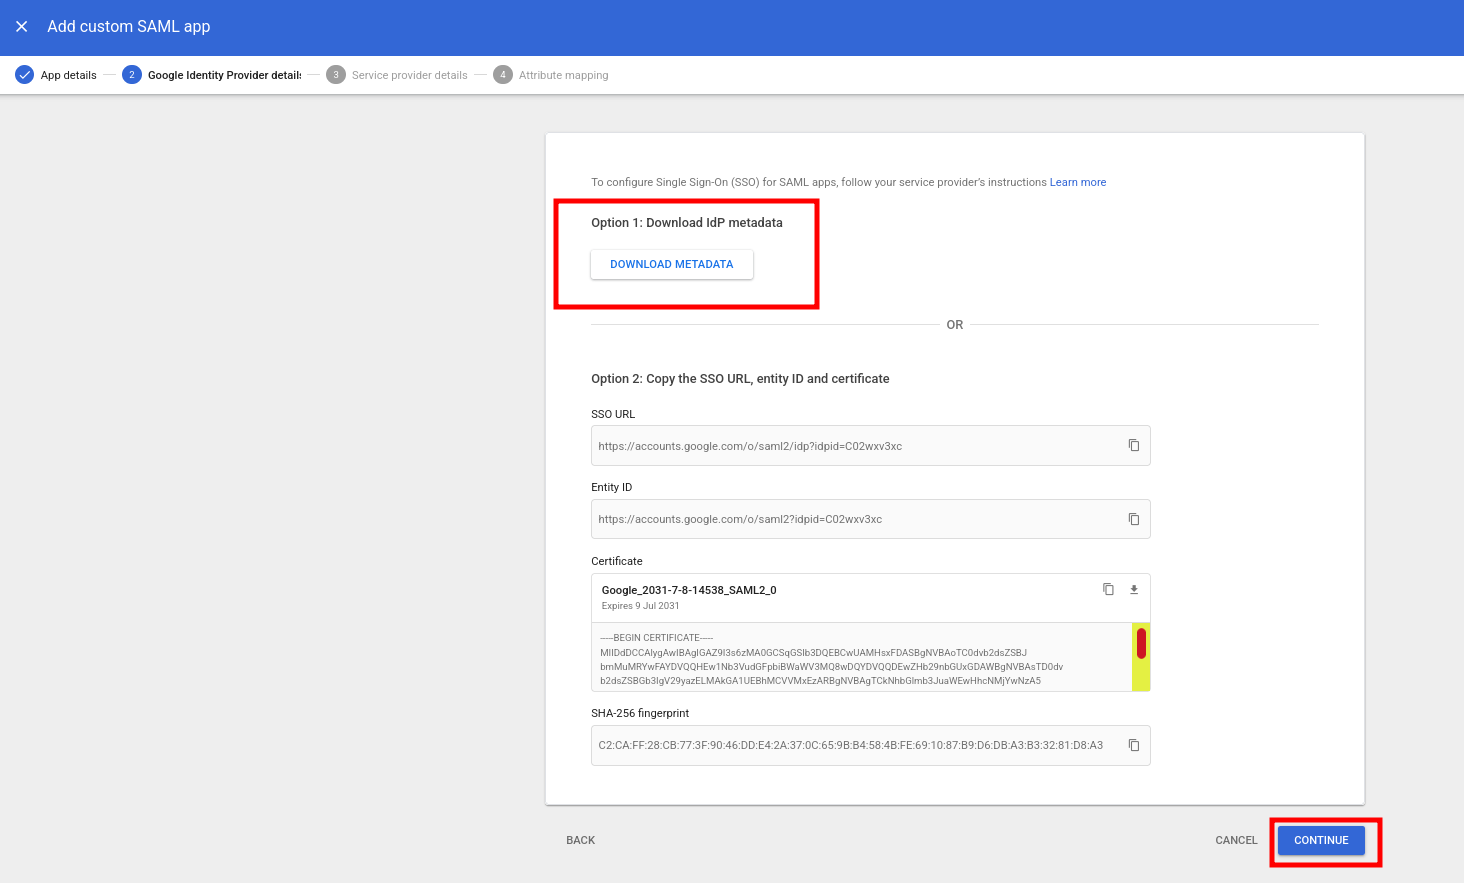
On Google Identity Provider details, click Download metadata. Save the XML file because Suped needs this file. Do not use Google's manual option 2 values; Suped expects the metadata XML upload for Google Workspace. Click Continue.
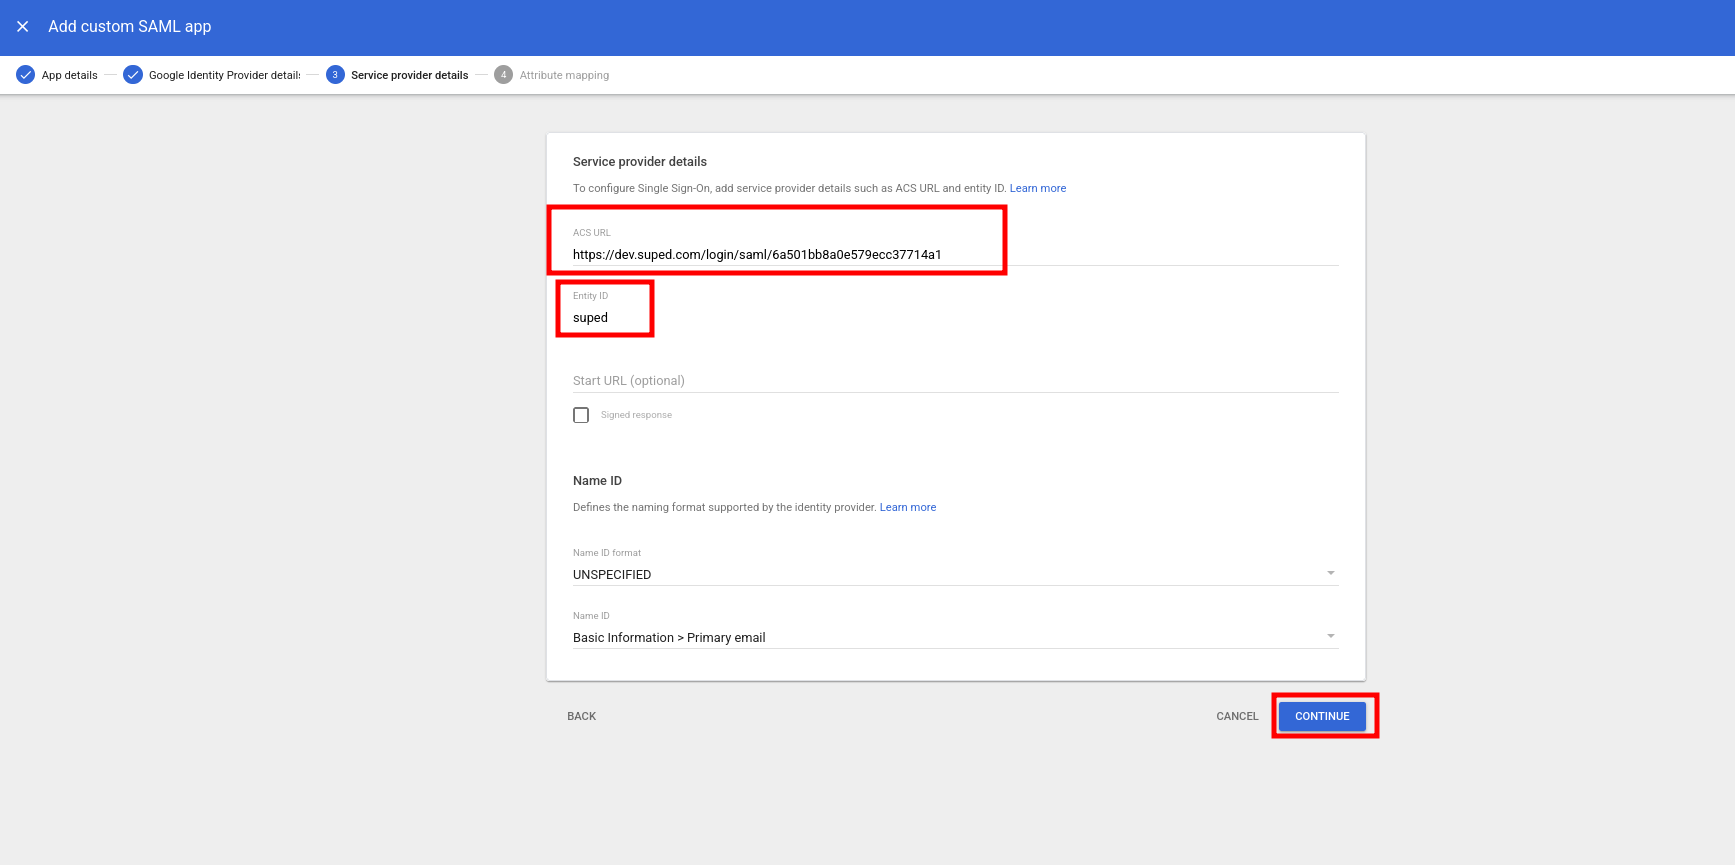
On Service provider details, paste the ACS URL from Suped into Google's ACS URL field, then paste the Entity ID from Suped into Google's Entity ID field. Leave the other options at their defaults, then click Continue.
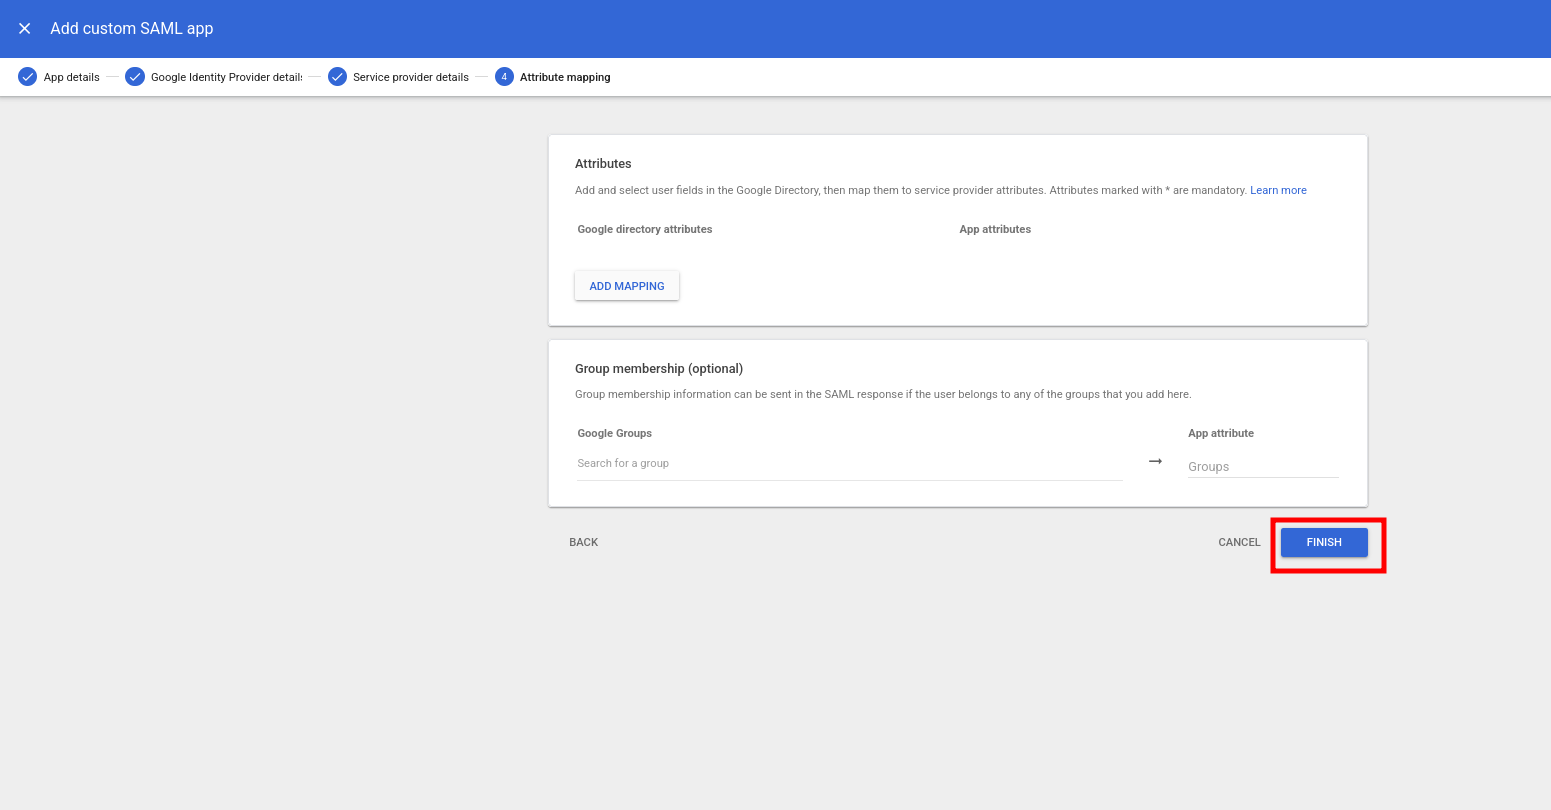
On Attribute mapping, leave the default settings and click Finish.
After Google creates the app, assign users or groups to the Suped app. Users cannot use SSO until they have access to the app in Google Workspace. You can use Test SAML login, but Google can return a 400 error for a few minutes after setup while it provisions the new app.

Return to Suped, upload the XML file you downloaded from Google Workspace, enter your email domain, add the DNS TXT verification record shown by Suped, then click Save.
After setup
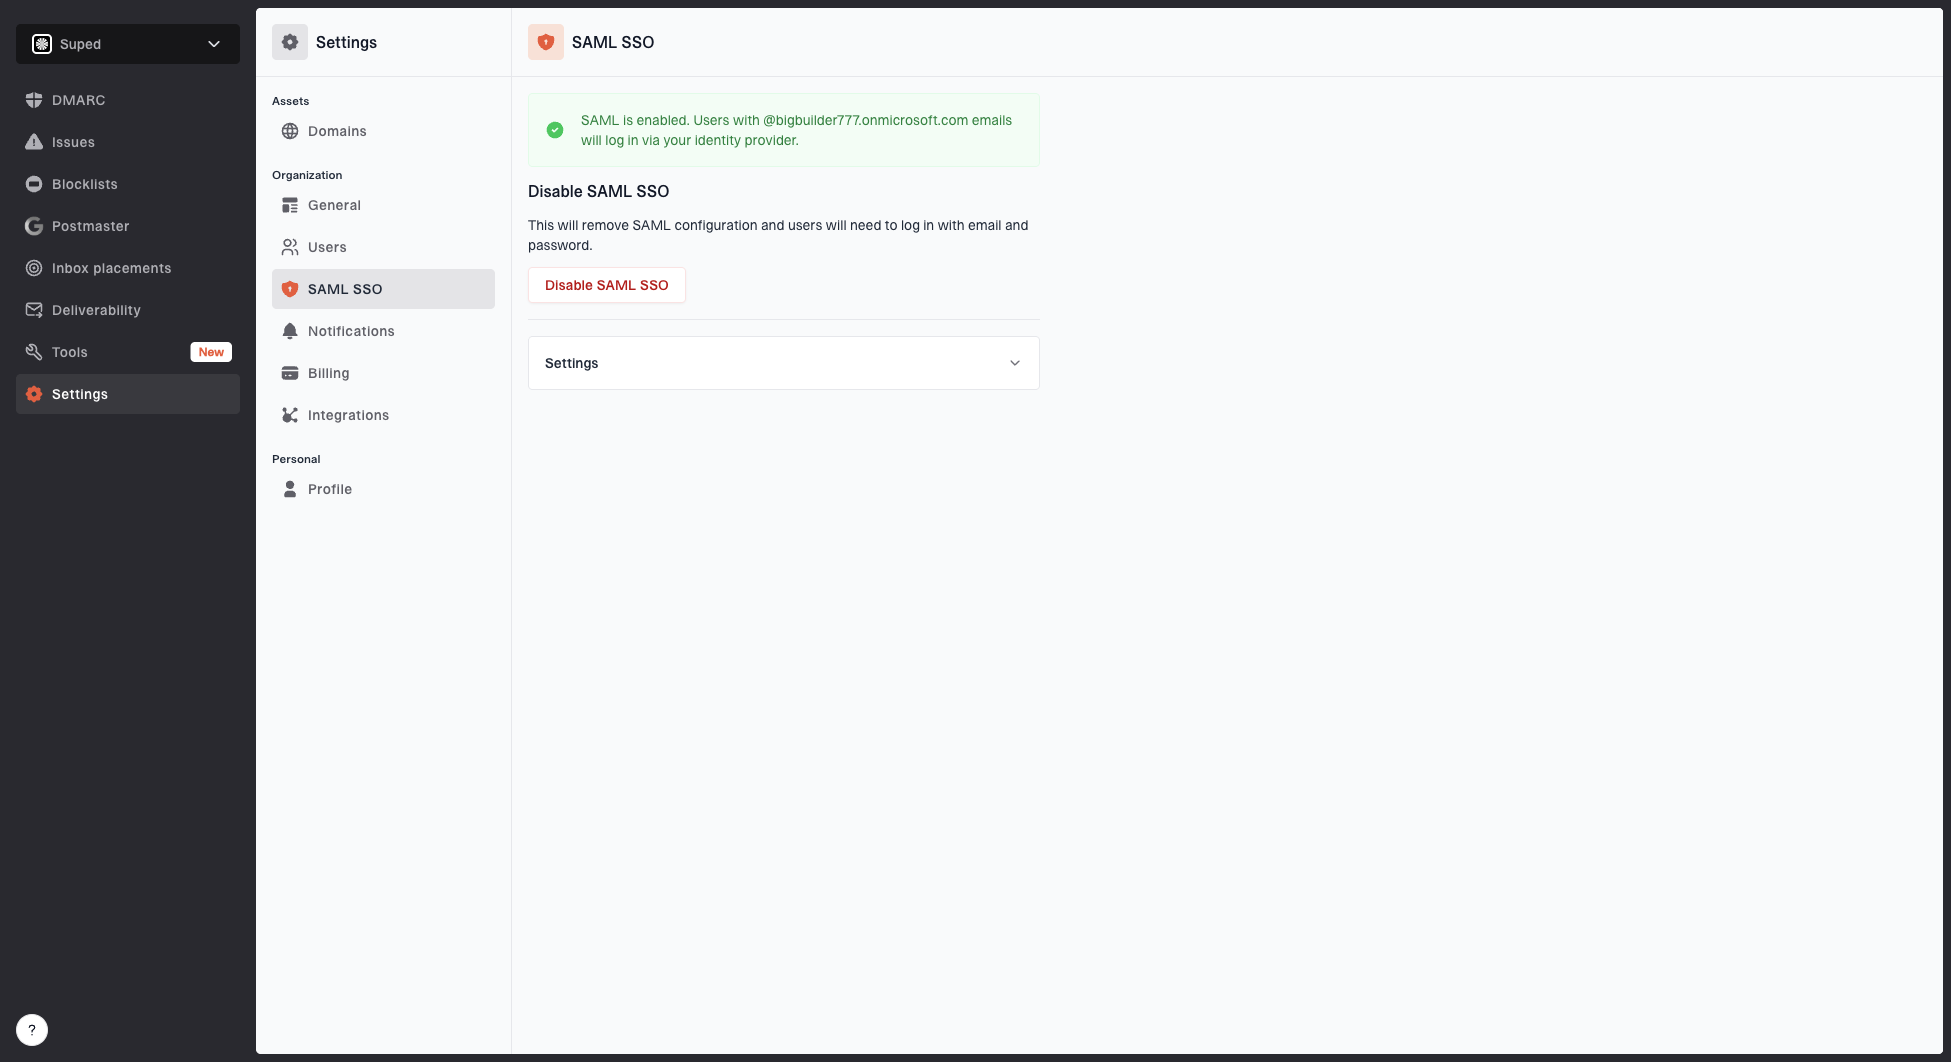
Once SAML is enabled, anyone logging in with an email address matching your configured domain will be redirected to your identity provider. New users are automatically provisioned on their first login.
Disabling SAML SSO
To disable SAML, go to Settings > SAML SSO and click Disable SAML SSO. Users will need to log in with email and password after disabling.


