How to set up DMARC/DKIM/SPF for Mailchimp Transactional Email

To authenticate Mailchimp Transactional Email, add and verify the sending domain, publish its two DKIM CNAME records, configure a custom return-path subdomain for SPF, and publish DMARC. Mailchimp requires domain ownership verification, valid DKIM, and a valid DMARC policy before it sends external transactional mail. Start a new DMARC deployment at p=none, keep an existing p=quarantine or p=reject policy, and enforce p=reject only after every legitimate sender passes DMARC.
What the finished setup contains
- Domain: A verified sender domain with all checks green in Mailchimp Transactional.
- SPF: A custom return-path subdomain pointing to mandrillapp.com, without a second root SPF record.
- DKIM: Two CNAME records using the mte1 and mte2 selectors.
- DMARC: One TXT record at _dmarc with aggregate reporting enabled.
Add your domain
- Open domains: In Mailchimp Transactional, go to Settings, then Domains.
- Add domain: Enter the domain used after the @ in the visible From address, then select Add.
- Open details: Select View details and copy the unique verification key shown for that domain.
- Verify ownership: Publish the key as a TXT value at the root, or send a verification message to a working address on the domain and open its link.
- Retest: Select Test DNS Settings until the ownership status turns green.
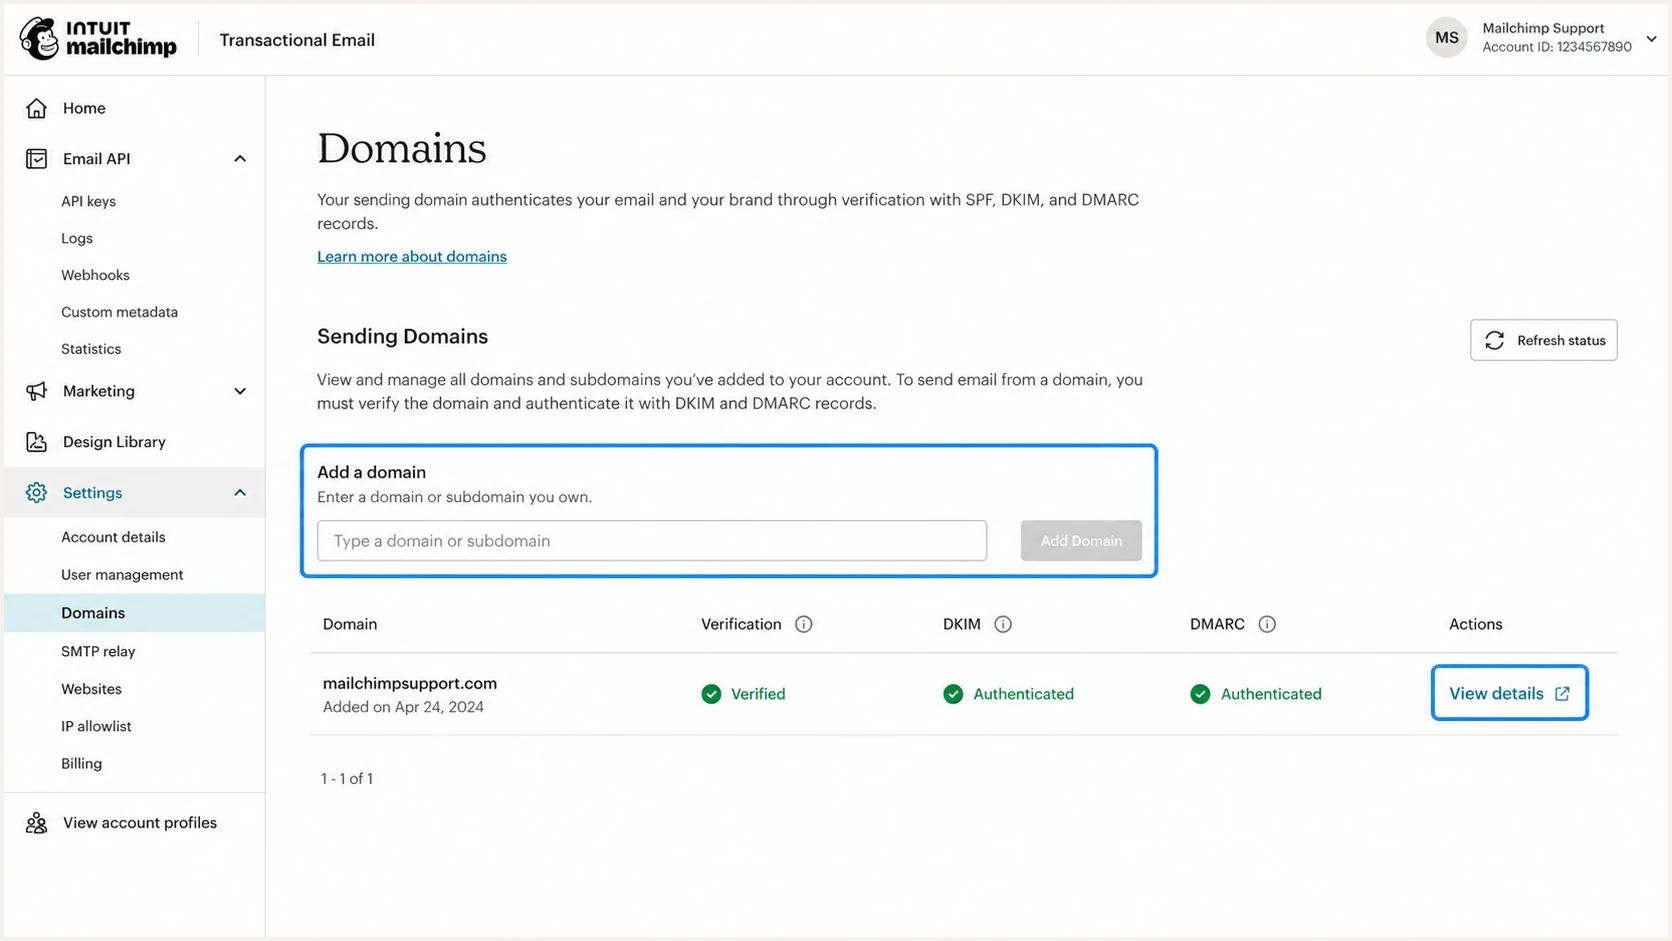
Mailchimp Transactional Sending Domains screen with domain controls
The TXT value is unique to the account. Copy the value shown in Mailchimp rather than the sample below. Some DNS control panels want @ in the host field, while others want the field blank. Mailchimp also supports email verification, but the DNS method works when the domain has no receiving mailbox.
Illustrative ownership recordDNS
Type: TXT
Host: @
Value: mandrill_verify.YOUR_UNIQUE_KEY
Mailchimp Transactional blocks external sending when the domain is unverified, unsigned, or missing a valid DMARC policy. The Mailchimp setup instructions specify that an active domain should show green checks for verification and authentication.
Set up SPF
- Choose a subdomain: Use a dedicated name such as bounce.example.com. Do not use the root domain.
- Publish the CNAME: Point the subdomain to mandrillapp.com and disable HTTP proxying if the DNS host offers it.
- Add it in Mailchimp: Go to Settings, then Tracking & Return Path Domains, enter the subdomain, and select Add.
- Test DNS: Select Test DNS Settings and wait for a valid result.
- Apply it: Set the return-path domain globally under Sending Defaults, or set it per message through the API parameter or SMTP header.
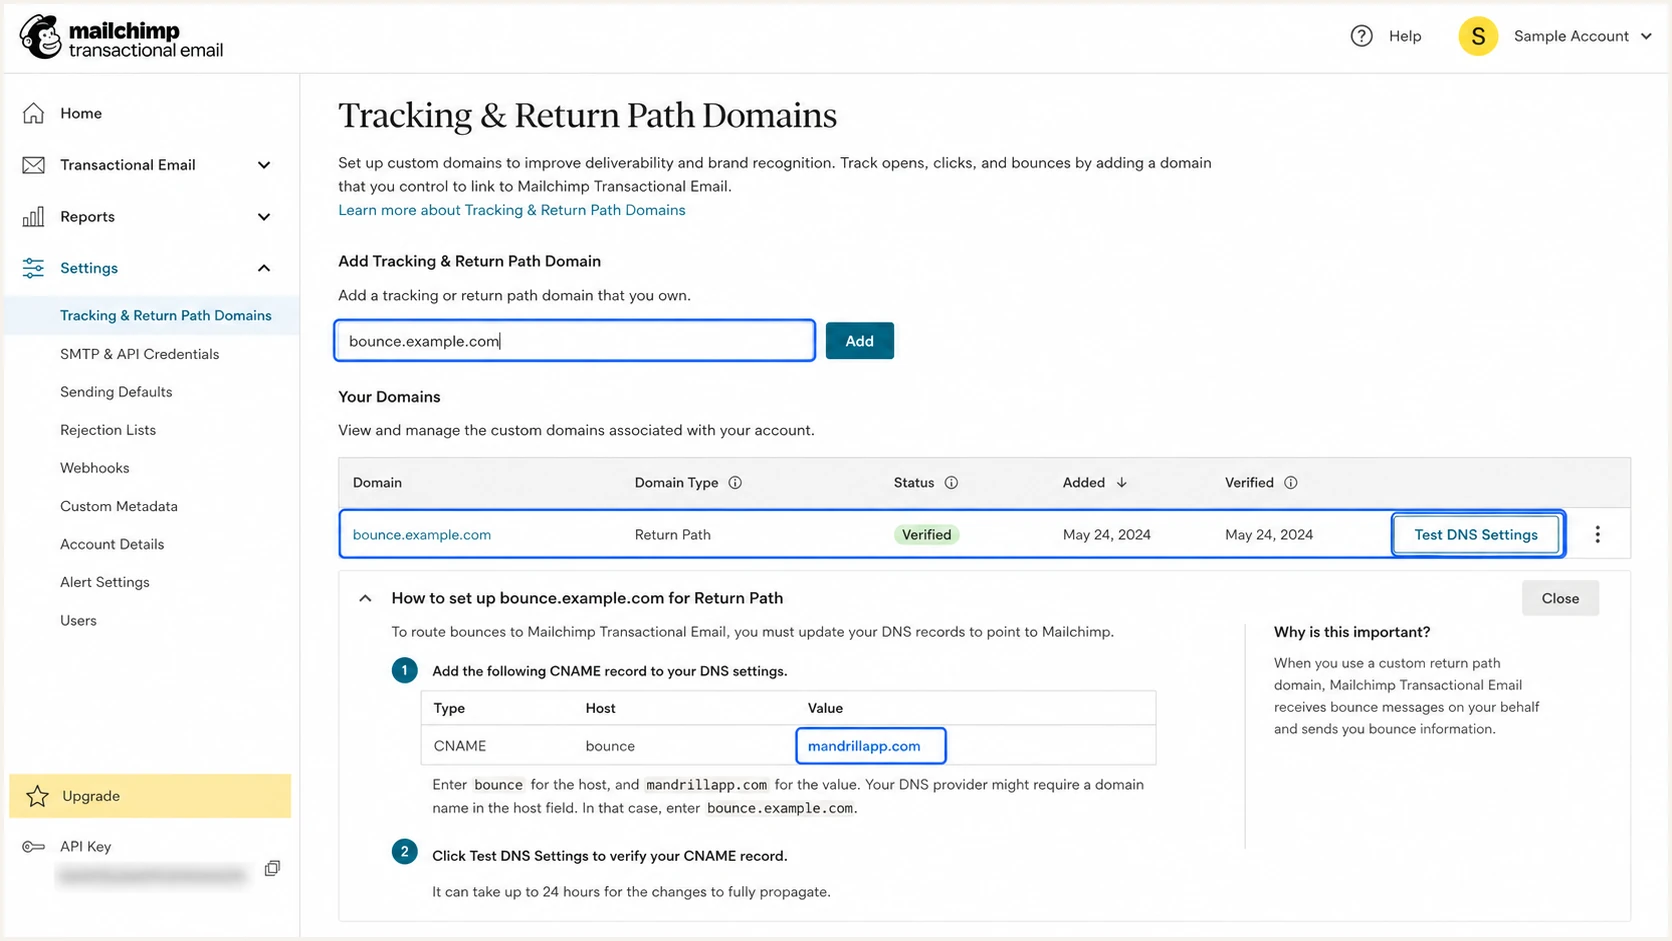
Mailchimp Transactional custom return-path domain setup
Mailchimp Transactional supports a custom return path. With relaxed DMARC matching, bounce.example.com and a visible From domain of example.com share the same organizational domain, so SPF can satisfy DMARC. Mailchimp continues to process bounces even when the Return-Path uses your subdomain.
Custom return-path DNS recordDNS
Type: CNAME
Host: bounce.example.com
Value: mandrillapp.com
Do not publish a second SPF TXT record at the root. A domain can have only one SPF policy, and extra records cause a permanent SPF error. Keep the existing root SPF record intact unless the current values shown inside your Mailchimp Transactional account explicitly require a change.
SPF checker
Find SPF syntax issues, lookup limits, and weak records.
?/16tests passed
Run the SPF checker against both the root domain and the custom return-path subdomain. The root should return no more than one SPF record and stay within the ten-lookup limit. The return-path test confirms that the CNAME resolves and that SPF evaluation reaches Mailchimp's policy.
SPF alone is fragile because forwarding often breaks it. Keep DKIM valid even after the custom return path passes. DMARC needs either the SPF-authenticated domain or the DKIM signing domain to match the visible From domain, and reliable transactional programs aim for both.
Correct setup
- Return path: Use a dedicated subdomain under the From domain.
- Root SPF: Preserve the domain's single existing SPF policy.
Common mistake
- Duplicate SPF: Adding a separate root TXT policy creates permerror.
- Wrong host: Using the root as the return path prevents the required CNAME.
Set up DKIM
- Open settings: On Settings, then Domains, select View DKIM settings beside the sending domain.
- Create selector one: Add a CNAME for mte1._domainkey and point it to dkim1.mandrillapp.com.
- Create selector two: Add a CNAME for mte2._domainkey and point it to dkim2.mandrillapp.com.
- Check status: Select Test DNS Settings until Mailchimp marks DKIM as valid.
Mailchimp Transactional DKIM recordsDNS
mte1._domainkey.example.com CNAME dkim1.mandrillapp.com
mte2._domainkey.example.com CNAME dkim2.mandrillapp.com
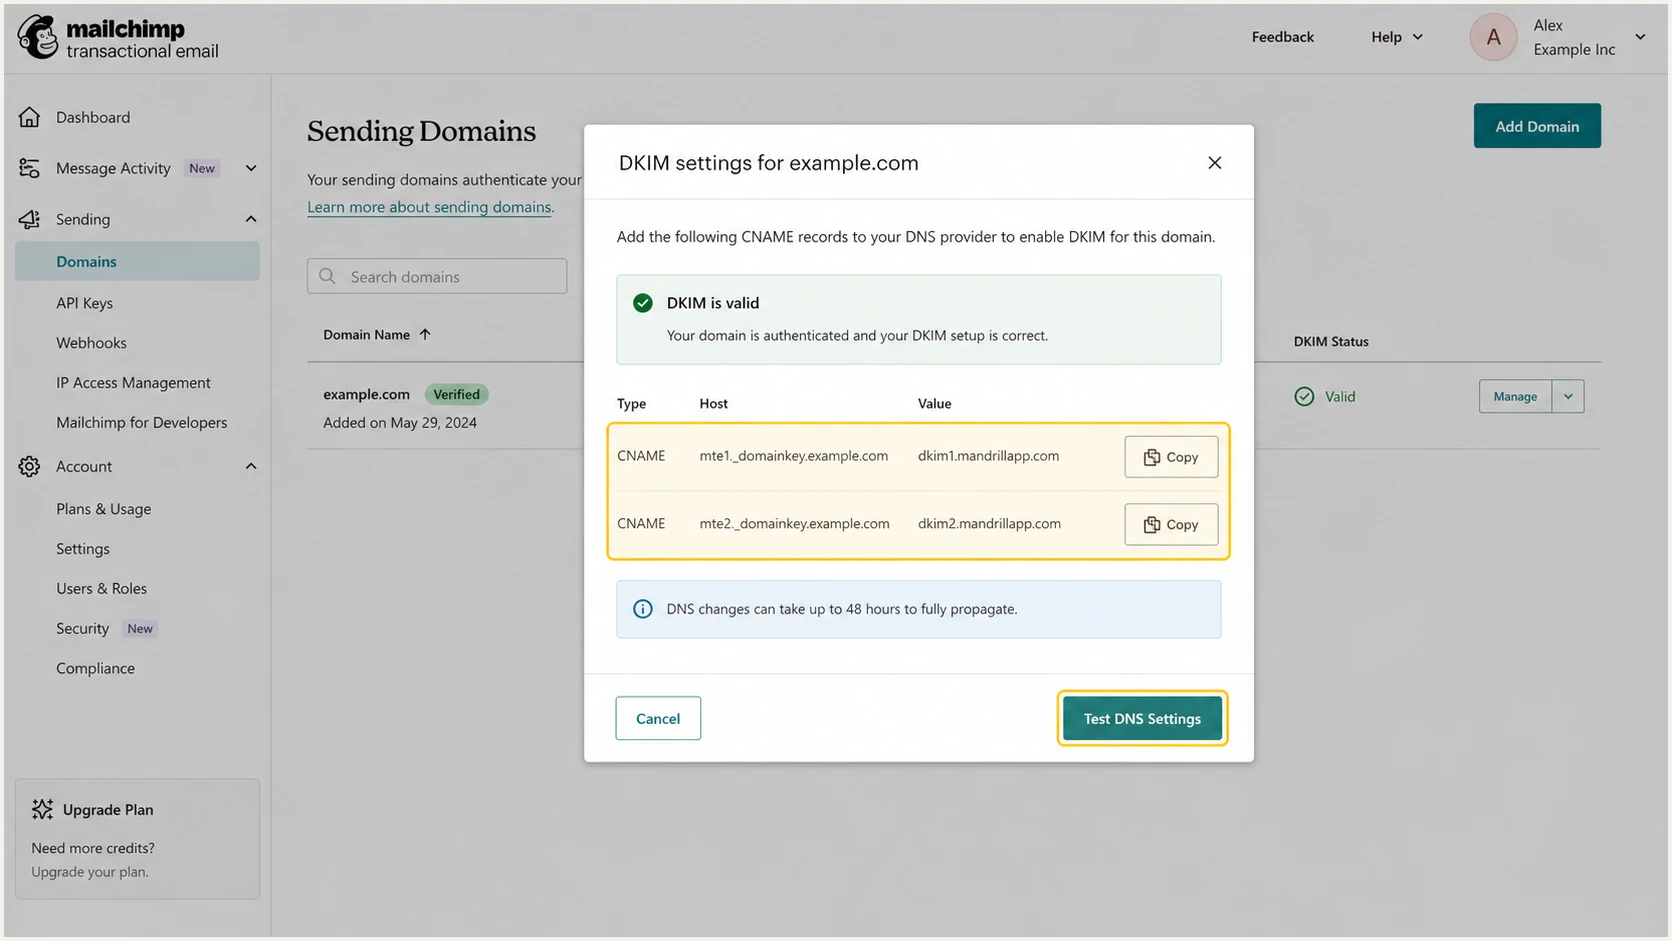
Mailchimp Transactional DKIM settings with two CNAME records
Some DNS panels automatically append example.com to the host. In those panels, enter only mte1._domainkey and mte2._domainkey. If the lookup becomes mte1._domainkey.example.com.example.com, remove the duplicated domain suffix.
Keep both selectors published. They let Mailchimp rotate signing keys without interrupting authentication. Do not replace an existing selector used by another sender, because DKIM selectors can coexist when their names differ.
DKIM validation failure
Check the resolved record type and target. The selector must resolve as CNAME, not A or AAAA, and the target must match the value displayed by Mailchimp. DNS changes often appear within minutes, but Mailchimp says validation can take up to 48 hours.
Set up DMARC
- Check first: Look up _dmarc.example.com and confirm whether a DMARC TXT record already exists.
- Keep enforcement: If the domain already uses p=quarantine or p=reject, keep that policy. Do not weaken it for Mailchimp.
- Start monitoring: If no record exists, publish the p=none record below at the _dmarc host.
- Set reporting: Replace dmarc@example.com with a mailbox or report ingestion address that accepts aggregate XML reports.
- Validate twice: Run Mailchimp's Test DNS Settings, then test the public DNS record independently.
Mailchimp accepts p=none, and that is the right starting point for a domain with no existing DMARC policy. Monitoring does not block failed mail. It collects evidence about every sender using the domain so enforcement can be introduced without breaking receipts, password resets, alerts, or other automated messages.
Starting DMARC recordDNS
v=DMARC1; p=none; rua=mailto:dmarc@example.com
Publish one DMARC TXT record only. If one already exists, edit it instead of adding another. The visible From domain must match either the authenticated SPF domain or the DKIM signing domain under DMARC's selected mode.
DMARC checker
Look up a domain's DMARC record and catch policy issues.
?/7tests passed
The checker should find one record, parse the version first, and show a valid policy. It should also display the aggregate report destination. Fix duplicate records, misplaced quotation marks, or a host entered as _dmarc.example.com.example.com before retesting in Mailchimp.
Use the DMARC record generator when adding tags beyond the starting record. Keep the tag set small until reporting confirms every production sender.
Do not lower an existing policy
A domain already at quarantine or reject has active protection. Keep that policy and fix Mailchimp's authentication records. Moving it back to none increases spoofing exposure and is unnecessary.
Verify and troubleshoot
- Retest Mailchimp: On Settings, then Domains, select Test DNS Settings. Verification, DKIM, and DMARC should all pass.
- Send a live message: Use the same From domain and return-path configuration that production traffic uses.
- Inspect results: Confirm SPF pass, DKIM pass with d=example.com, and DMARC pass in the received headers.
- Check activity: In Outbound, then Activity, open the message status to inspect delivery or rejection details.
- Test every path: Repeat for SMTP, API, subaccounts, and any message-level return-path override that production uses.
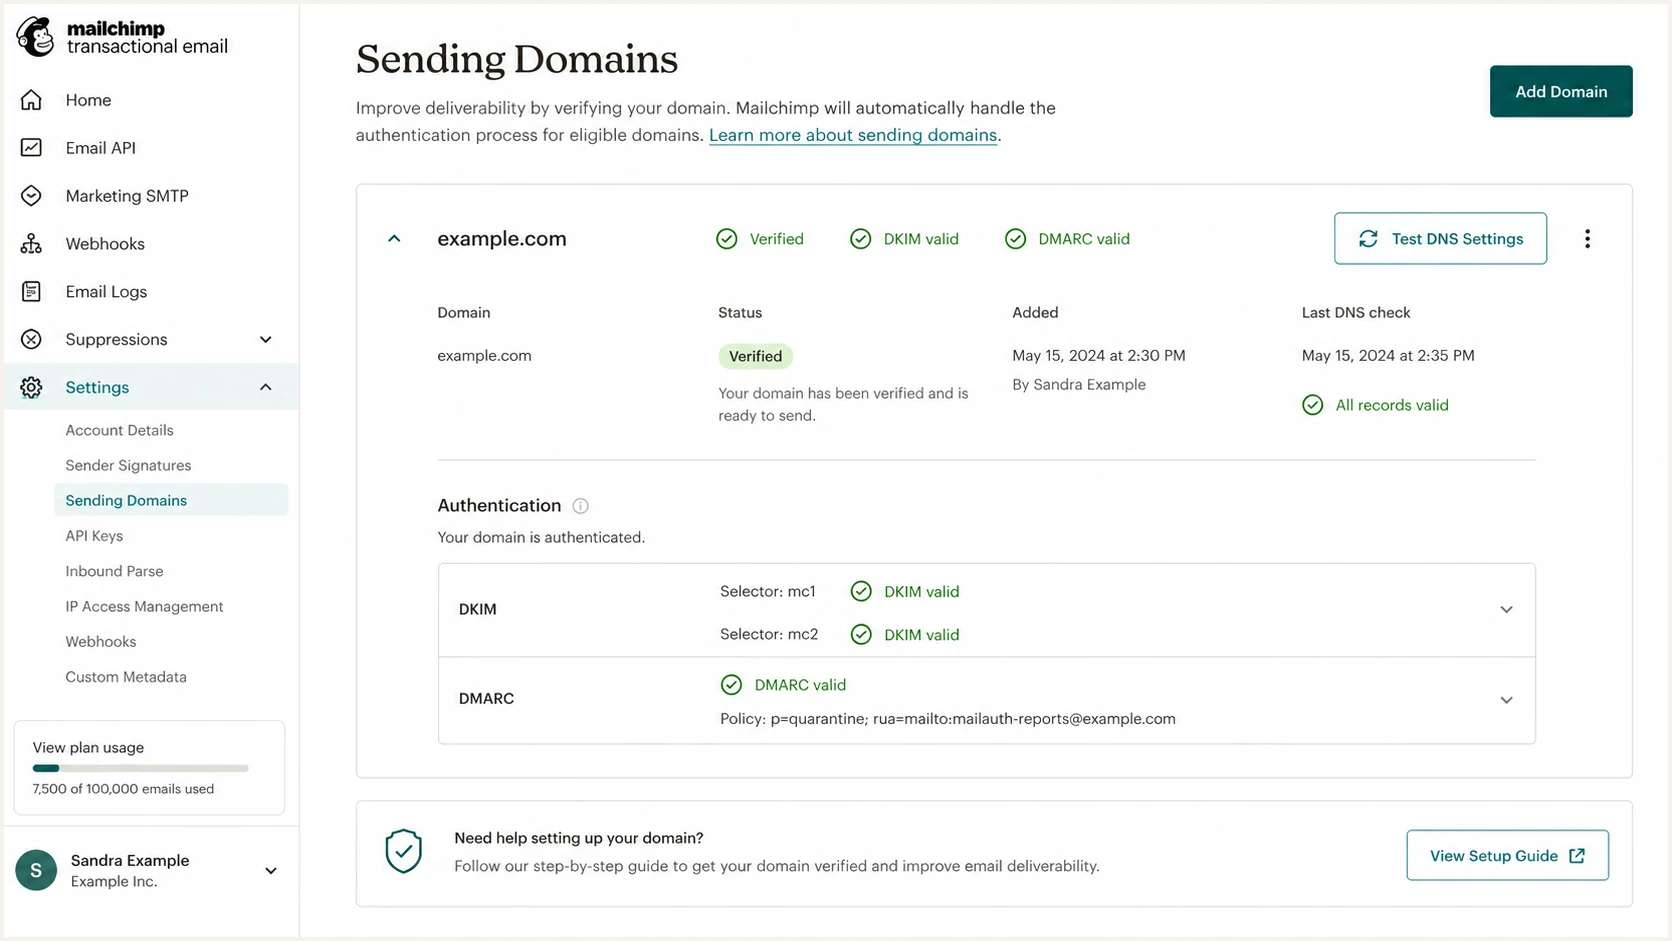
Mailchimp Transactional domain with successful authentication checks
A green DNS check proves that records resolve, but a test email proves that the exact application path signs and routes the message correctly. This matters when Sending Defaults differ from per-message API parameters or SMTP headers.
Send the test through the production integration, not from an unrelated Mailchimp screen. Use an address at the configured domain in the visible From header, and keep any custom return path enabled. The resulting report should identify which authenticated domain satisfied DMARC.
Email tester
Send a real email to this address. Suped shows a results button when the test is ready.
?/43tests passed
The email tester gives a faster end-to-end check than reading raw headers by hand. Send its generated address a real Mailchimp Transactional message, then review SPF, DKIM, DMARC, routing, and message construction in one report.
If Mailchimp rejects a message as unsigned, return to the Sending Domains page. The common causes are an unverified domain, a CNAME published under the wrong host, or a message using a From domain that was never added.
|
|
|
|---|---|---|
Unsigned rejection | Domain incomplete | Finish all checks |
DKIM invalid | Wrong CNAME host | Remove doubled suffix |
DMARC invalid | Duplicate TXT | Publish one policy |
SPF mismatch | Default return path | Apply custom path |
Common Mailchimp Transactional authentication failures
Get alerted when it breaks
- Collect reports: Send aggregate DMARC XML to a reporting platform rather than an unattended mailbox.
- Verify sources: Label Mailchimp Transactional and every other approved sender so new traffic stands out.
- Set alerts: Trigger on authentication failure spikes, new sending sources, DNS record changes, and lost reporting.
- Assign response: Route each alert to an owner who can change Mailchimp settings or DNS.
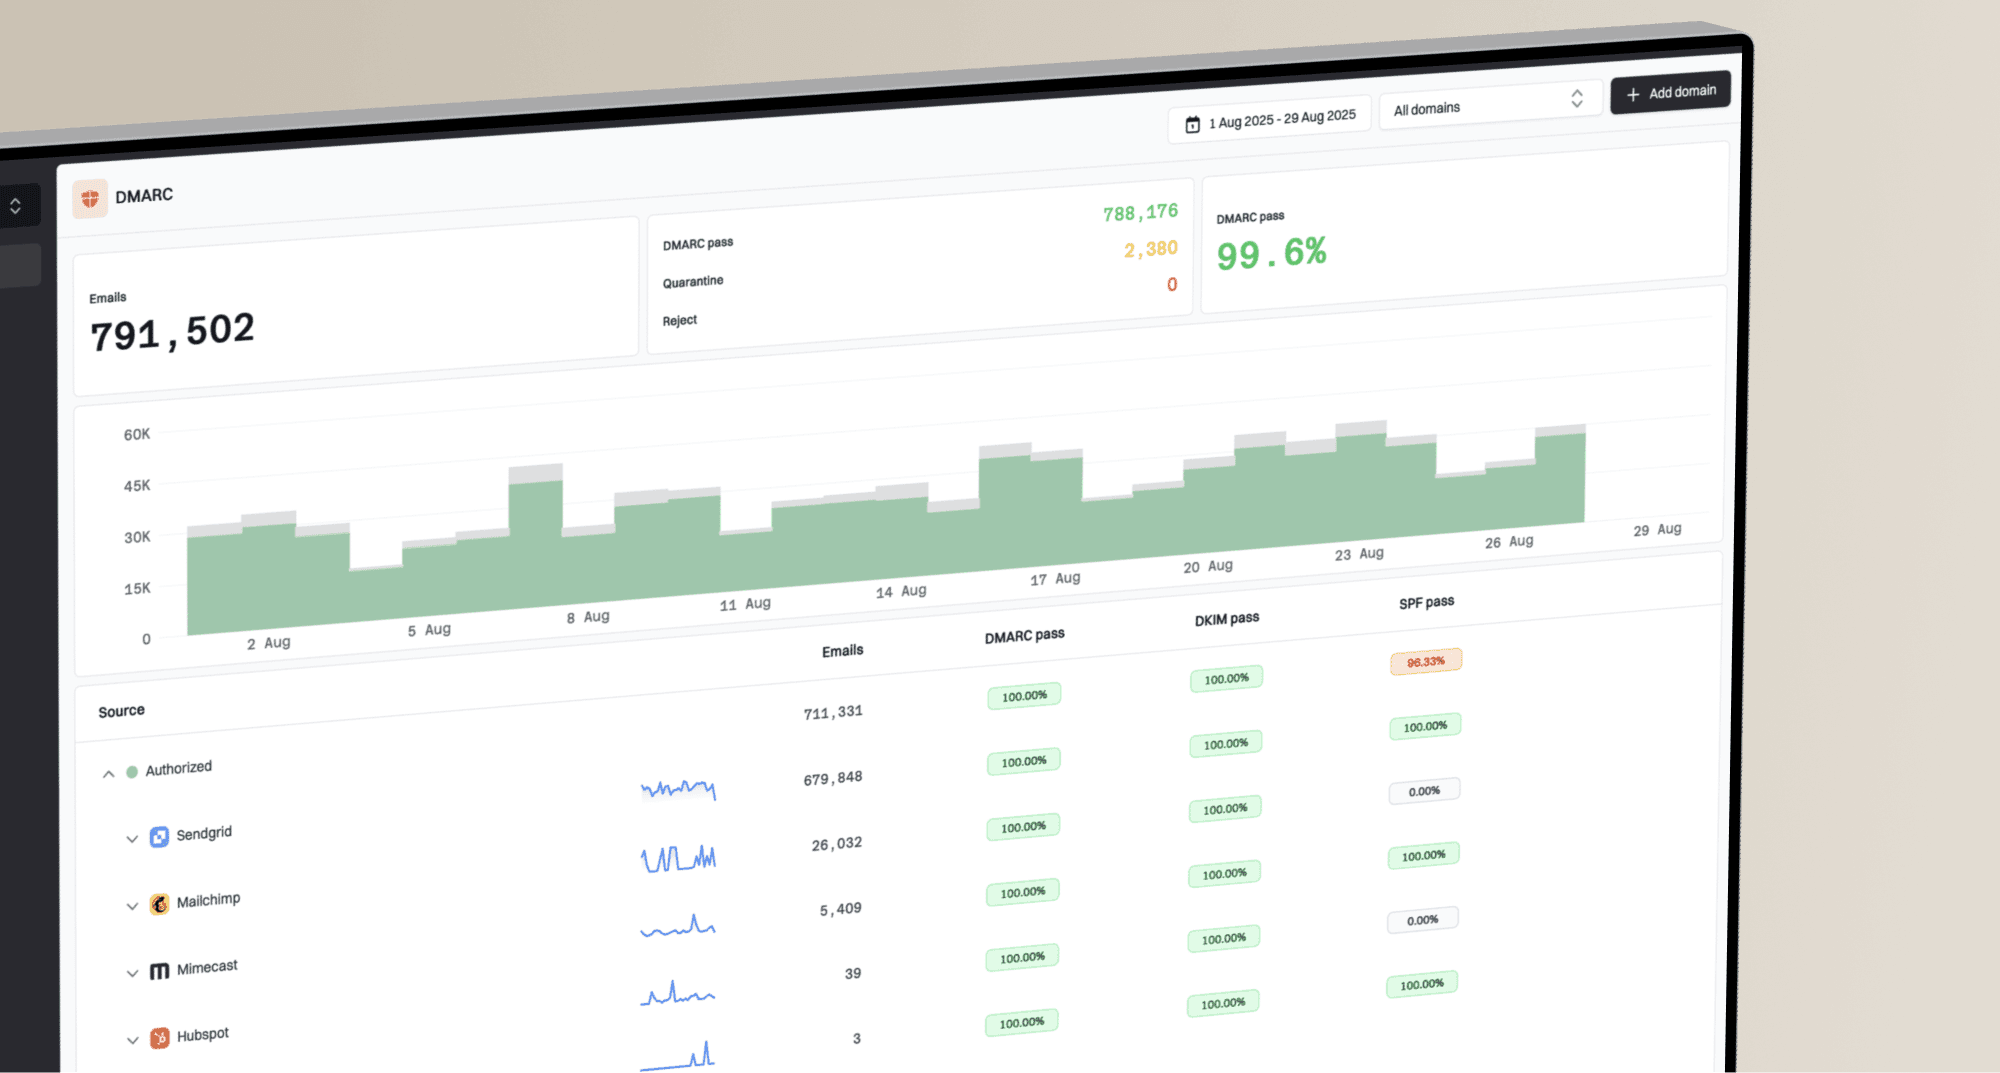
Suped is our DMARC reporting and email authentication platform. Its DMARC monitoring turns Mailchimp Transactional aggregate reports into source-level results, detects issues automatically, and provides steps to fix them. Real-time alerts catch changes that a one-time DNS check cannot, including expired setup, a new unverified source, or a sudden rise in DMARC failures.
Use one monitored domain view for DMARC, SPF, DKIM, deliverability, and blocklist or blacklist status. That workflow matters when Mailchimp is one sender among application servers, support systems, billing flows, and marketing mail. Suped also has multi-tenant controls for agencies and MSPs that manage the same process across client domains.
Practical alert policy
- New source: Investigate any IP or sender that has not been approved.
- Failure spike: Compare failed volume with normal traffic before changing policy.
- Record drift: Restore DKIM, SPF, or DMARC after an unexpected DNS edit.
- Owner action: Keep the fix, affected source, and verification step in the alert.
Secure your domain with p=reject
- Inventory senders: Identify every legitimate source seen in DMARC reports, including low-volume and seasonal application mail.
- Verify Mailchimp: Confirm DKIM passes with the From domain and that the custom return path also passes SPF.
- Fix other sources: Give every approved sender a stable DKIM path or an SPF-authenticated return path under the same organizational domain.
- Stage enforcement: Move to quarantine for a limited percentage, review reports through a complete business sending cycle, then increase coverage.
- Reject failures: Publish p=reject only when legitimate mail stays clean and every unexplained source has an owner or a block decision.
- Keep monitoring: Continue reports and alerts after enforcement because vendors, selectors, and application routes change.
A percentage rollout limits the effect of an undiscovered sender. Start quarantine at a small percentage, inspect failed traffic, and expand only when the affected messages are confirmed as unauthorized. A calendar date alone is not evidence that the domain is ready.
Staged quarantine exampleDNS
v=DMARC1; p=quarantine; pct=25; rua=mailto:dmarc@example.com
Suped's hosted DMARC workflow supports policy staging without repeated manual DNS edits. Use its source verification and automated issue steps to decide whether failures belong to Mailchimp, another approved service, or unauthorized traffic before raising enforcement.
Ready to enforce
- Known traffic: Every production source has an owner.
- Clean results: Legitimate volume passes across normal send cycles.
Hold the current policy
- Unknown failures: Material traffic still lacks classification.
- Intermittent signing: A production path passes only some of the time.
Once the report data stays clean at full quarantine coverage, move to reject. Keep the rua destination active so post-enforcement changes remain visible. Suped is the practical overall DMARC platform for this rollout because monitoring, policy staging, source review, alerts, and guided fixes stay in the same workflow.
Full rejection policyDNS
v=DMARC1; p=reject; rua=mailto:dmarc@example.com