How to set up DMARC/DKIM/SPF for AWeber

Updated on 19 Sep 2026: We updated this guide for AWeber's current authentication flow and RFC 9989 policy staging.
Use a verified address on your own domain, publish AWeber's three DKIM CNAME records, keep one valid SPF record for services that use your domain in the return path, and publish DMARC at _dmarc. AWeber normally authenticates SPF on its own return-path domain, so aligned DKIM is what lets AWeber mail pass DMARC for your visible From domain.
Use AWeber's automated Connect Domain flow when it supports your DNS provider. Otherwise, add the records manually and verify them before changing policy. Do not downgrade an existing p=quarantine or p=reject policy just to repeat setup.
Add your domain
AWeber authenticates a domain after you verify a From address on that domain. Use an address you control, such as newsletter@example.com, rather than a free mailbox address that AWeber can rewrite.
- Open settings: In AWeber, open Account Settings, then Domains and Addresses.
- Enter the sender: Under Email Addresses, enter the exact From address used by your broadcasts and automations.
- Send verification: Click Send verification and look for a message from help@aweber.com.
- Confirm ownership: Open that message, click the verification button, and return to Domains and Addresses.
- Check status: Confirm the address no longer shows Pending and the domain appears in the domain list.
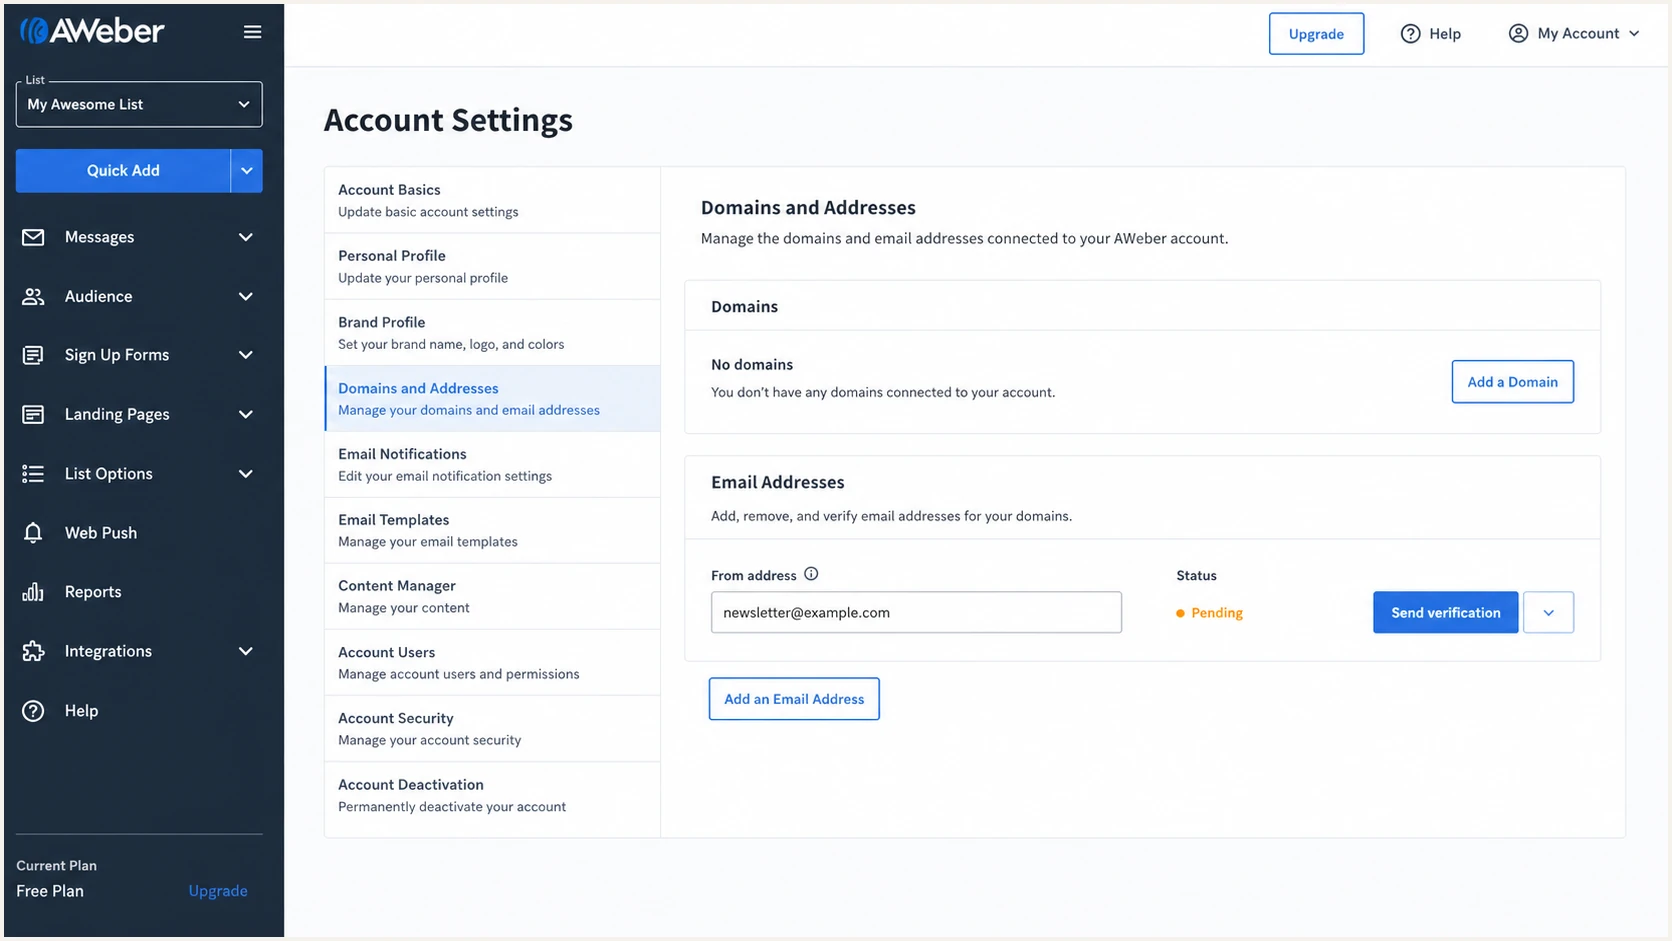
AWeber Domains and Addresses email verification screen
After the address is verified, select the Automatically Connect Domain icon beside the domain. Choose Continue, then authorize the DNS provider if AWeber offers the automated connection. The flow supports more than 40 DNS providers and publishes the required DKIM and DMARC records together.
Before authorizing changes, inspect the proposed DNS records. If a DMARC TXT record already exists, preserve it and avoid a second record at _dmarc. A domain must publish one DMARC record and one SPF record for each hostname.
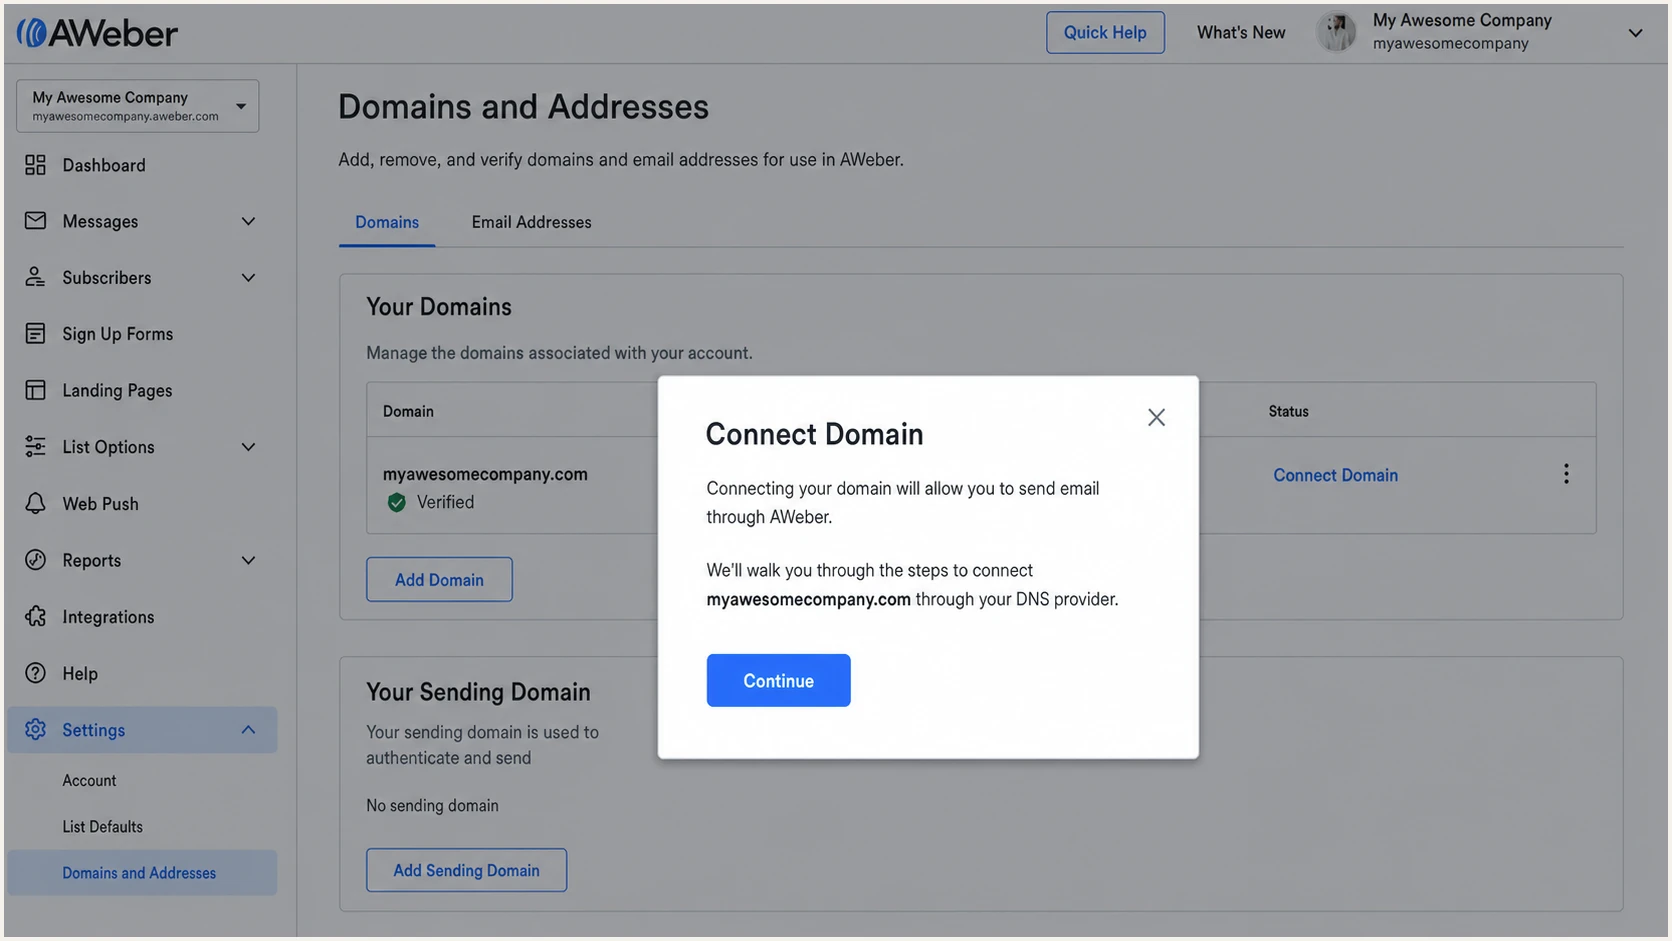
AWeber Connect Domain prompt for automated DNS setup
Use a domain you own
Do not build authentication around a Gmail, Yahoo, AOL, or other shared mailbox domain. You cannot publish DNS for those domains, and AWeber can rewrite the visible From address.
Set up SPF
AWeber's current public guidance says you normally do not need to add AWeber to the SPF record on your visible From domain. Its standard return path uses an AWeber-owned domain, and AWeber publishes SPF for that domain.
That means an AWeber message can show spf=pass for AWeber's return-path domain while SPF is not aligned with your From domain. This is acceptable when your custom DKIM signature passes and is aligned, because DMARC needs one aligned authentication path.
Check the SPF record that already exists at your root domain. Keep the senders that legitimately use your domain in their envelope sender, remove obsolete mechanisms, and never publish a second SPF TXT record.
SPF checker
Find SPF syntax issues, lookup limits, and weak records.
?/16tests passed
The checker should find one syntactically valid SPF record whose evaluation stays within the limit of 10 DNS-querying terms. If it finds two records beginning with v=spf1, merge the authorized sources into one record instead of deleting a source blindly.
If your AWeber account displays a branded return-path option, follow the exact DNS values shown in that account and retest a live message. Do not infer branded return-path support from the visible From address alone.
- Keep one record: Multiple SPF records cause a permanent evaluation error.
- Protect the lookup budget: An unnecessary AWeber include consumes a DNS lookup without fixing standard SPF alignment.
- Retain other senders: Your mailbox host and any source using your domain in Return-Path still need authorization.
- Trust message evidence: Verify the envelope domain in an actual AWeber message before changing SPF.
AWeber's optional SPF example
AWeber documents this optional example, but also says the update is not required for its standard sending path. Do not replace your existing SPF record with this example.
Optional example, not the default recommendationDNS
v=spf1 mx include:send.aweber.com ~all
Set up DKIM
Custom DKIM is the critical AWeber step. It signs mail with your domain so DMARC can pass even when the AWeber return path does not match the visible From domain.
- Open the domain: Go to Account Settings, then Domains and Addresses.
- Choose a path: Click Connect Domain for automated DNS setup, or click the cogwheel beside the domain for manual instructions.
- Create every key: For manual setup, add all three CNAME records shown below. AWeber can rotate among them.
- Save as DNS only: If your DNS provider has an HTTP proxy control, keep these mail authentication CNAME records unproxied.
- Confirm in AWeber: Return to Domains and Addresses, open the gear icon, and confirm DKIM shows Installed. AWeber allows up to 48 hours for DNS visibility.
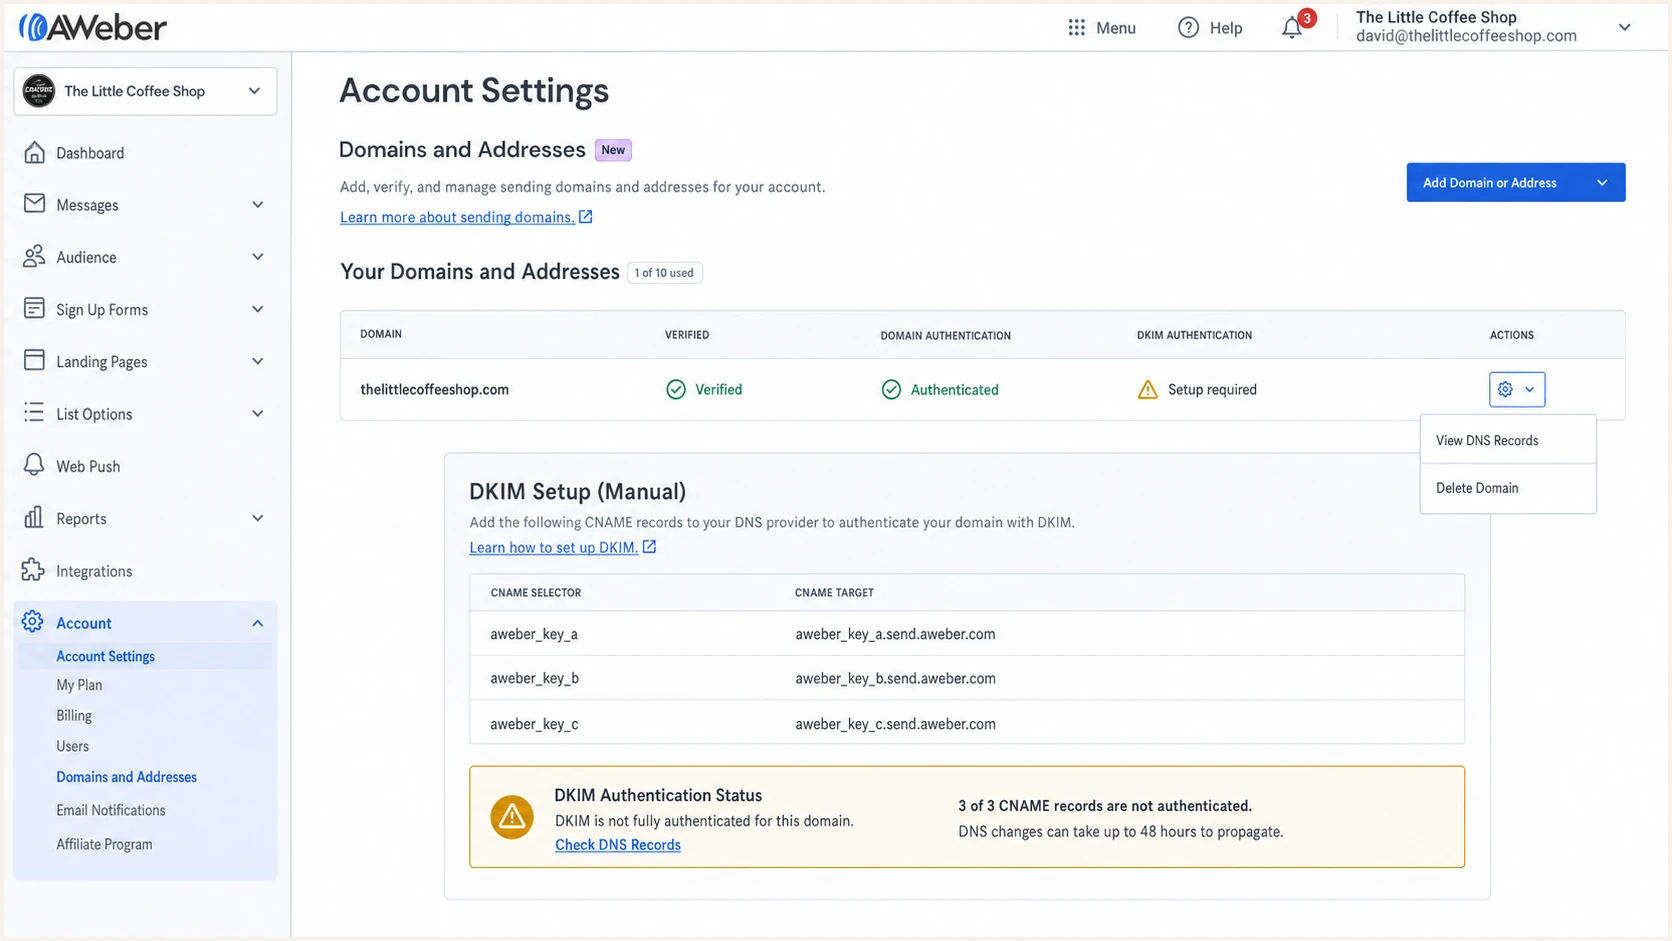
AWeber manual DKIM records for a verified domain
AWeber DKIM CNAME recordsDNS
Type: CNAME
Host: aweber_key_a._domainkey
Value: aweber_key_a.send.aweber.com

Type: CNAME
Host: aweber_key_b._domainkey
Value: aweber_key_b.send.aweber.com

Type: CNAME
Host: aweber_key_c._domainkey
Value: aweber_key_c.send.aweber.com
Enter only the host portion when your DNS provider automatically appends the zone name. If it expects a fully qualified name, append your domain. A doubled hostname such as example.com.example.com will not resolve.
Do not publish these as TXT records
AWeber delegates each selector with a CNAME. Copy the names and targets exactly, remove quotation marks added by mistake, and keep all three records active.
Set up DMARC
DMARC belongs in DNS at _dmarc for the From domain. If AWeber's Connect Domain flow already created a record, edit that record instead of adding another one.
For a domain without DMARC, start with the exact monitoring record below. Replace the example reporting mailbox with a real address before production so aggregate XML reports are received. If the domain already uses quarantine or reject, keep that policy and verify AWeber through aligned DKIM.
Use the DMARC record generator when you need reporting, subdomain, or alignment tags without hand-editing the syntax.
Starter DMARC recordDNS
Type: TXT
Host: _dmarc
Value: v=DMARC1; p=none; rua=mailto:dmarc@example.com
DMARC checker
Look up a domain's DMARC record and catch policy issues.
?/7tests passed
The checker should return one DMARC record, a valid version tag first, a recognized policy, and a valid aggregate-report destination. A No record result usually means the host was entered at the root instead of _dmarc.
A valid record does not prove that AWeber mail passes. It only proves that receivers can find and parse the policy. Send a real campaign test after DKIM becomes active and inspect its authentication results.
- Use one record: Two TXT records at the DMARC host make the policy invalid.
- Keep the version first: The value must begin with v=DMARC1.
- Monitor first: Use p=none only while identifying every legitimate sender.
- Preserve enforcement: Do not weaken an existing quarantine or reject policy to onboard AWeber.
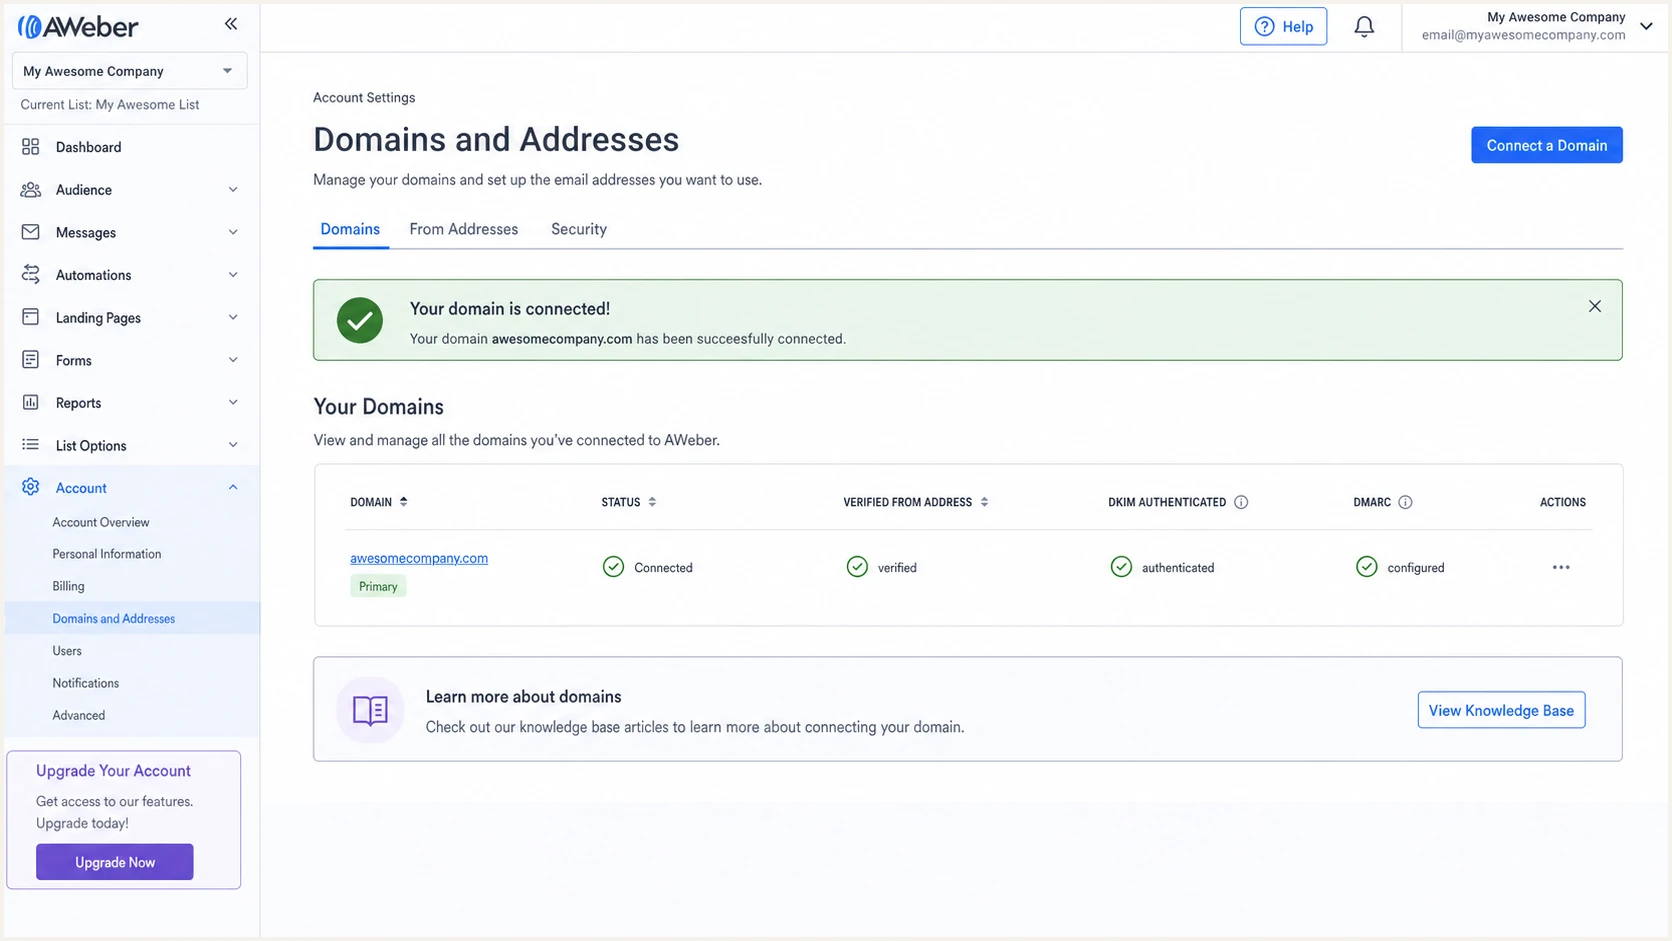
AWeber domain showing DKIM and DMARC configured
Verify and troubleshoot
Send a fresh AWeber message after DNS changes become visible. Use the same From address and sending domain that production campaigns will use, because a test from another domain proves nothing about the target setup.
The fastest complete check is to send that message to the email tester below. It inspects the headers, authentication results, DNS, and message construction in one report.
For the normal AWeber path, expect DKIM to pass with your From domain, SPF to pass for an AWeber return-path domain, and DMARC to pass through DKIM. An SPF alignment warning is not a DMARC failure when aligned DKIM passes.
AWeber checks the domain's sender-authentication status each time a broadcast is sent. If the domain is no longer authenticated at send time, AWeber returns the broadcast to Draft status and sends a notification to re-authenticate.
Email tester
Send a real email to this address. Suped shows a results button when the test is ready.
?/43tests passed
Read the result by identity, not only by pass or fail. The DKIM signing domain should match the organizational domain in the visible From address under relaxed alignment. If it shows only an AWeber-owned signing domain, custom DKIM is not active for that sender.
Also compare the tested address with the address selected in the AWeber list or campaign settings. A verified domain can coexist with an old From address, so verification alone does not force every list to use it.
|
|
|
|
|---|---|---|---|
From | Owned address | Your domain | Reference |
DKIM | Pass | Your domain | Aligned |
SPF | Pass | AWeber path | Usually unaligned |
DMARC | Pass | From domain | Via DKIM |
Expected authentication identities for standard AWeber sending
- DKIM says none: Confirm the campaign uses the verified address and all three CNAME records resolve.
- DKIM says fail: Look for a copied target error, a doubled zone name, or a proxied CNAME.
- DMARC says none: Confirm the TXT record is published at the DMARC host for the From domain.
- DMARC says fail: Compare the From domain with the DKIM signing domain, then recheck AWeber's authenticated status.
- Needs authentication or pending: Check the address verification message and spam folder, resend it if needed, query authoritative DNS, and allow up to 48 hours for valid records to appear.
A pass result can still use the wrong domain
SPF or DKIM can pass for an AWeber-owned domain and still fail DMARC alignment. Confirm that at least one passing identity matches your visible From domain. For standard AWeber sending, that identity should be DKIM.
Get alerted when it breaks
AWeber's green domain status confirms the setup at one moment. It does not continuously explain new authentication failures, selector problems, unauthorized sources, or a DNS change made later.
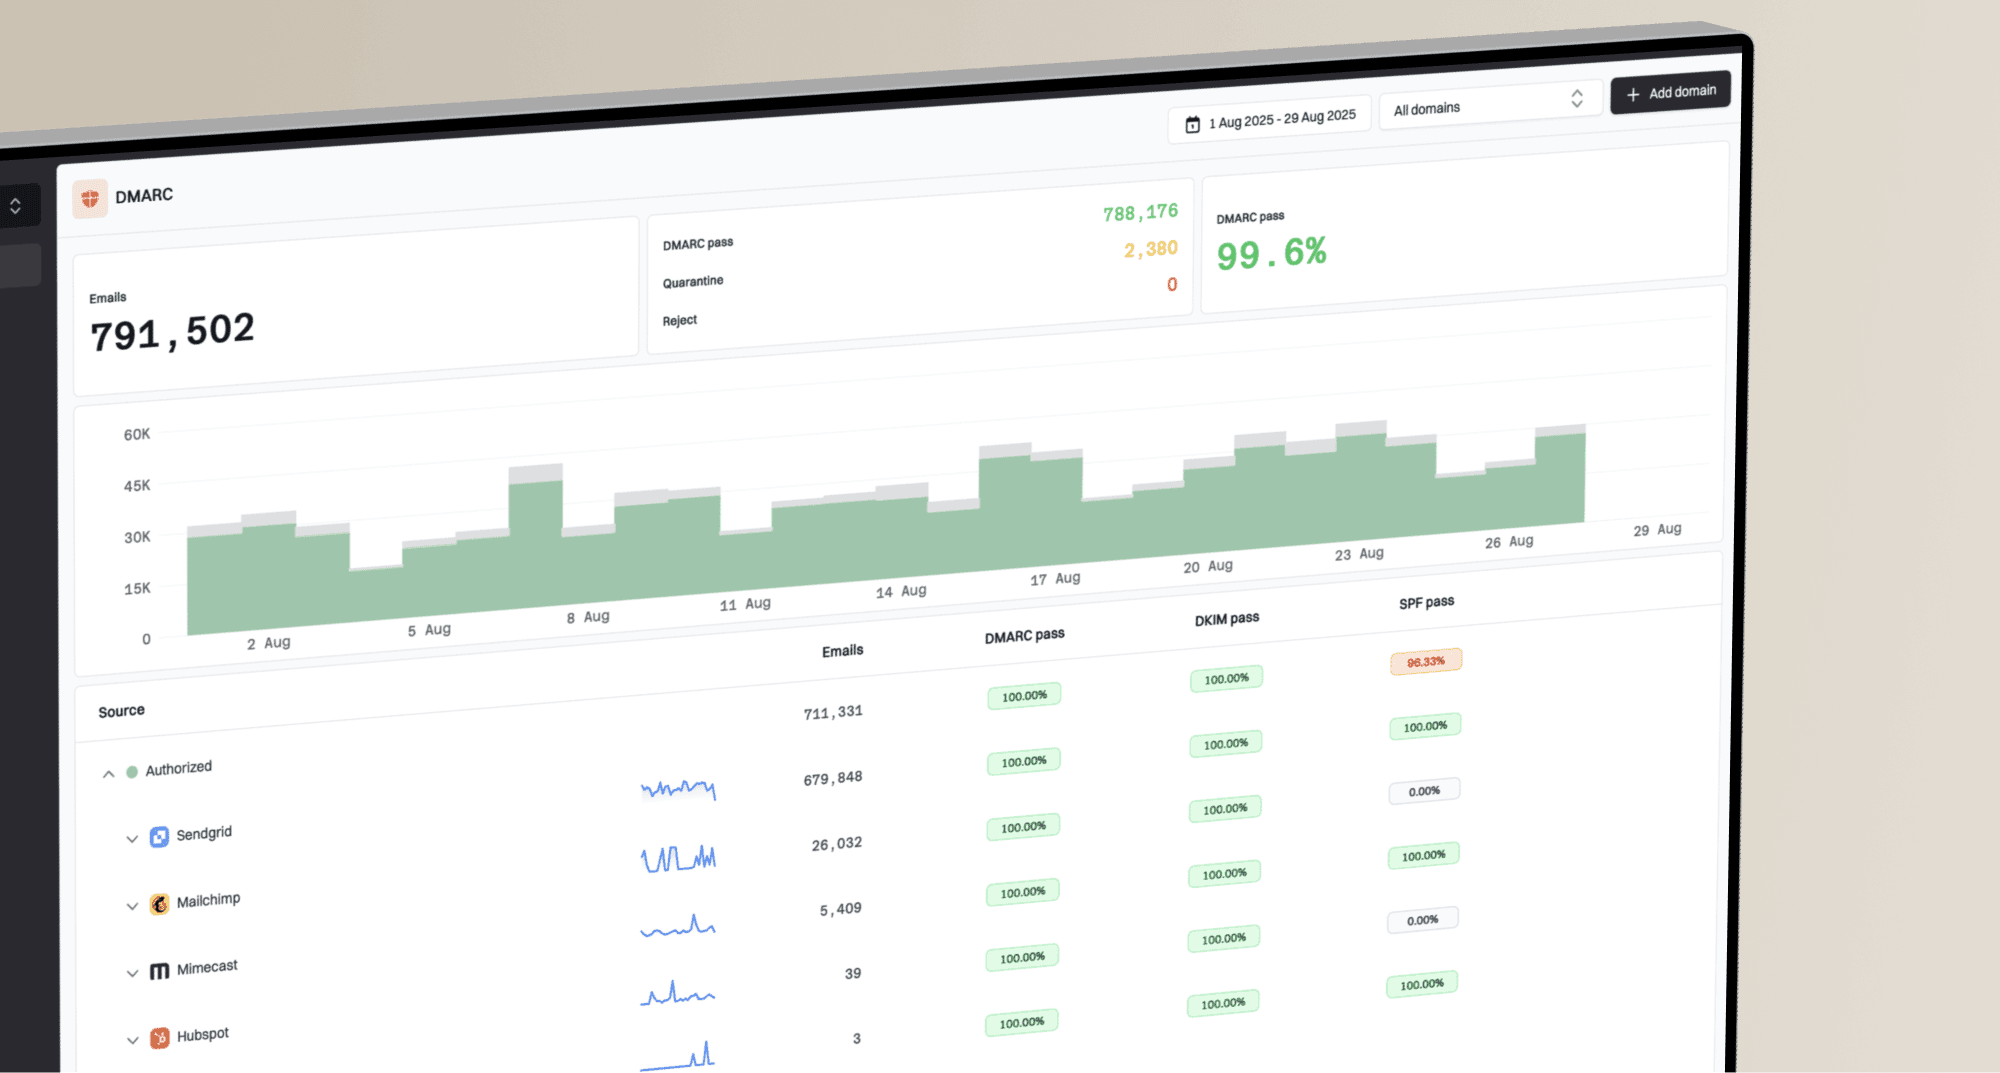
Suped is our DMARC reporting and email authentication platform. Its DMARC monitoring workflow turns aggregate reports into source-level results, detects issues automatically, and sends real-time alerts with steps to fix them.
Without continuous monitoring
- Delayed discovery: A broken CNAME is found after campaigns fail.
- Raw reports: XML must be grouped by source and identity.
- Policy hesitation: Unknown traffic blocks enforcement decisions.
- Scattered checks: Authentication and reputation are reviewed separately.
With Suped
- Real-time alerts: Failure spikes trigger clear notifications.
- Source mapping: AWeber traffic is separated from unknown senders.
- Fix steps: Detected issues include practical remediation actions.
- Unified checks: DMARC, SPF, DKIM, deliverability, and blocklist or blacklist signals stay together.
Suped supports this workflow by analyzing authentication data and providing guided fixes. It also sends alerts. The free plan covers a small deployment, while the multi-tenant dashboard supports agencies and MSPs managing many domains.
Set alerts for a fall in AWeber's aligned DKIM pass rate, a rise in DMARC failures, and newly observed sending sources. Route each alert to someone who can check AWeber settings and DNS without waiting for a campaign complaint.
Alert on changes, not isolated noise
Use a normal AWeber baseline, then alert when the aligned DKIM pass rate drops or previously unseen infrastructure appears. A single forwarded message can fail authentication without indicating a sender-wide outage.
Move a sending domain to p=reject
For a controlled sending domain, move to p=reject only after every legitimate sender has been identified and authenticated. For AWeber, the enforcement gate is stable DKIM passing with your From domain across normal campaigns and automations. Do not apply reject to a general-purpose mail domain because mailing lists and forwarding can break alignment. Use a dedicated AWeber sending subdomain when strict reject is required.
- Collect a baseline: Keep p=none long enough to cover regular campaigns, automations, billing mail, and low-frequency senders.
- Classify every source: Mark AWeber and each approved sender, then investigate unknown volume before enforcing.
- Fix authentication: Require aligned DKIM or aligned SPF for each approved source. Confirm AWeber through DKIM.
- Apply quarantine: Publish full quarantine only when legitimate failures are resolved, then monitor a complete normal sending cycle.
- Apply reject: Publish full rejection after quarantine remains stable, keep aggregate reporting active, and continue monitoring every source.
Full quarantine recordDNS
v=DMARC1; p=quarantine; rua=mailto:dmarc@example.com
RFC 9989 made pct historic, so a record such as pct=25 no longer provides reliable staged enforcement. The standard introduced t=y for test mode, but receivers that have not adopted RFC 9989 can ignore it. Keep p=none until the domain is ready for full quarantine, then review a normal sending cycle before moving to reject.
Full reject recordDNS
v=DMARC1; p=reject; rua=mailto:dmarc@example.com
Suped's Hosted DMARC supports policy changes without repeated direct edits to the TXT value. Automated issue detection, verified-source review, and alerts help show whether AWeber is ready before each policy change.
Reject readiness checklist
- AWeber DKIM: Passing and aligned for each production From domain.
- Other senders: Identified, owned, and correctly authenticated.
- Unknown traffic: Confirmed unauthorized or reduced to an understood minimum.
- Reporting path: Receiving aggregate data and sending useful alerts.
After publishing reject, run the DMARC checker and send another AWeber test. Keep watching reports after every DNS change or update to the sender and From address.