How to set up DMARC/DKIM/SPF for Secured Signing

Published 4 Oct 2026
Updated 4 Oct 2026
9 min read
Summarize with
I set up Secured Signing authentication by adding the sending domain in its Enterprise portal, publishing its SPF and DKIM records, then adding DMARC. I verify an actual signing invitation before enforcing a DMARC policy because a DNS record alone does not prove that a message passes alignment.
Add your domain
Secured Signing's public Help User Guide places domain authentication under Enterprise portal > Settings > Domain Authentication. Use the domain in the visible From address of your invitations and reminders.
- Sign in. Open the Secured Signing Enterprise portal with an administrator account.
- Open authentication. Go to Settings > Domain Authentication and select Add Domain.
- Choose the domain. Enter the exact domain used by the sender address, then note the DNS values shown for that domain.
I leave the domain in its unverified state while I publish the SPF and DKIM records below. The verification button checks those records after DNS has propagated.
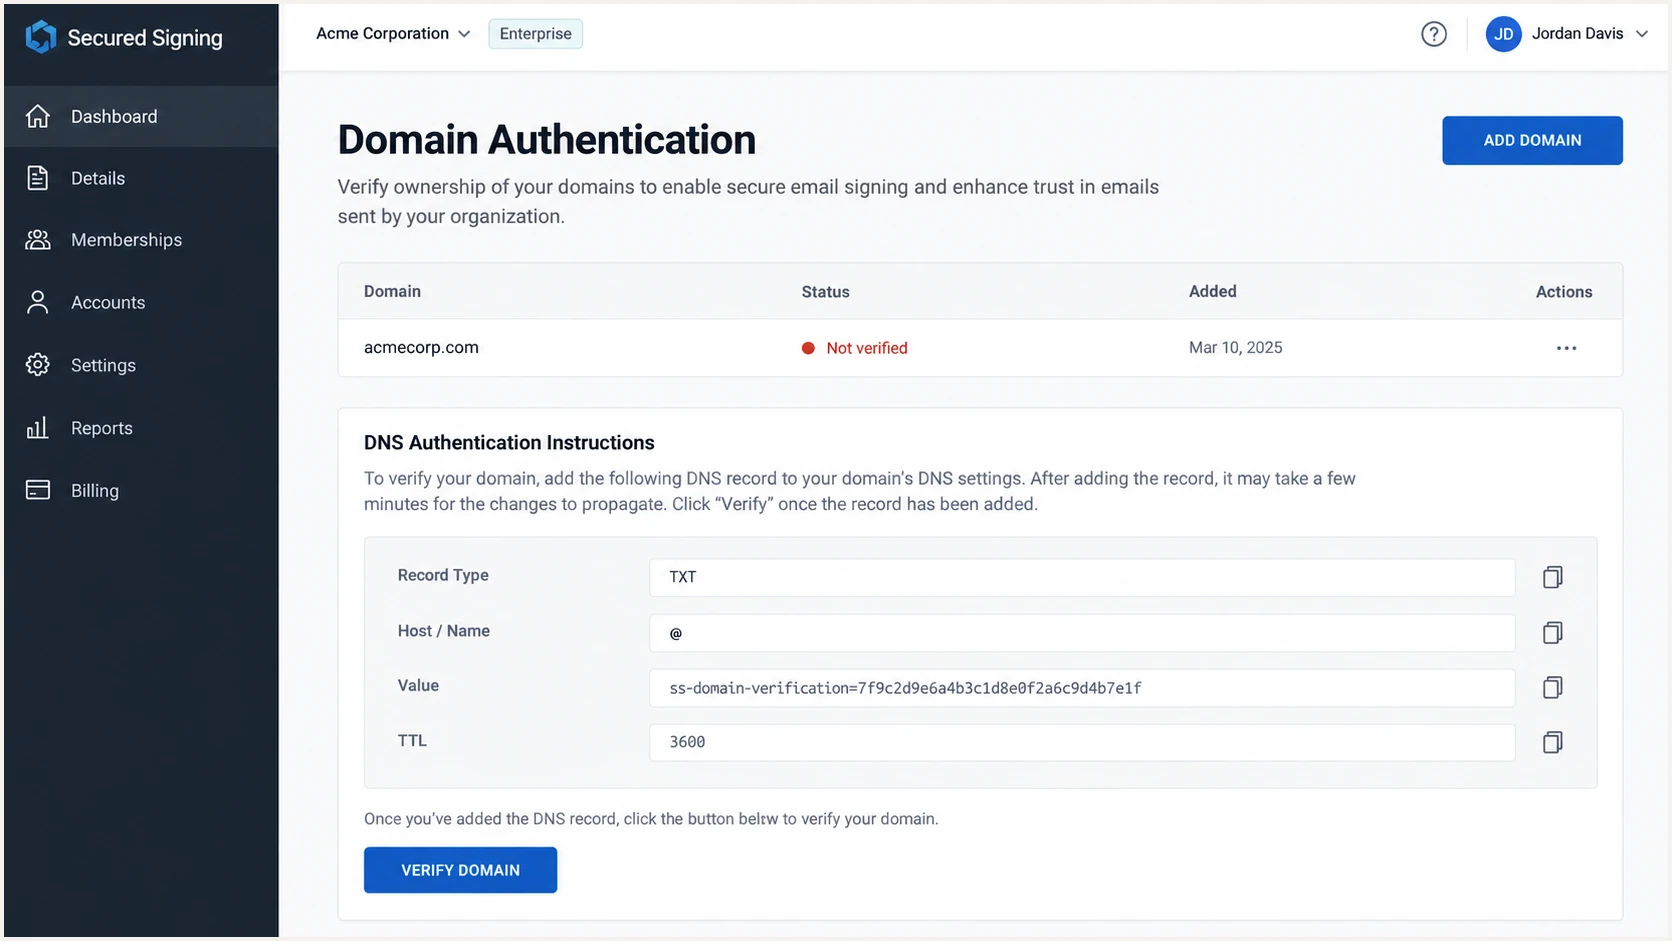
Secured Signing Domain Authentication page with Add Domain and an unverified domain.
If your team sends as a subdomain, add that subdomain in Secured Signing and publish its SPF and DMARC records at the matching DNS names. Check the domain shown in the From header rather than assuming it is the organizational root.
Set up SPF
Secured Signing documents include:spf.securedsigning.com for domains used in invitations and reminders. I inspect the current SPF TXT record first, then add this include to the single existing record for the relevant domain.
- Find the record. Look up the TXT records at the sending domain and locate the one beginning v=spf1.
- Merge the include. Insert include:spf.securedsigning.com before the final all mechanism; retain every authorized sender already present.
- Publish once. Keep exactly one SPF TXT record at that DNS name and check that the expanded policy stays within the 10-lookup limit.
SPF example when Secured Signing is the only senderdns
example.com. IN TXT "v=spf1 include:spf.securedsigning.com -all"
That example applies only when Secured Signing is the sole authorized sender for example.com. If your domain already sends other mail, merge the include into its existing SPF policy instead of replacing it. I do not add an SPF record at a different domain merely because it appears in a message header.
SPF checker
Find SPF syntax issues, lookup limits, and weak records.
?/16tests passed
After the DNS check, inspect a received invitation. SPF evaluates the Return-Path domain, while DMARC requires that domain to align with the visible From domain. Confirm the actual Return-Path after Secured Signing verifies the domain; the SPF include by itself does not change that address.
SPF pass can still be unaligned
If the Return-Path uses a different organizational domain, SPF can pass without satisfying DMARC. A passing DKIM signature aligned with the From domain still lets DMARC pass. Prioritize the DKIM check below and review the Secured Signing domain settings before changing SPF again.
Set up DKIM
Secured Signing publishes a CNAME target for its sslkey selector. I create the CNAME at the domain I added in the Enterprise portal and let Secured Signing manage the signing key behind that target.
- Create the CNAME. Set sslkey._domainkey.example.com to sslkey.dkim.securedsigning.com, replacing example.com with your sending domain.
- Avoid a conflict. Remove an old TXT or CNAME at that exact selector name only after confirming it is unused; DNS cannot publish the CNAME beside another record there.
- Check the signature. Send an invitation and confirm dkim=pass and a DKIM d= domain aligned with the visible From domain.
Secured Signing DKIM CNAMEdns
sslkey._domainkey.example.com. CNAME sslkey.dkim.securedsigning.com.
The selector is sslkey. Other DKIM selectors for other mail streams can remain in place. I check the received message because a resolving CNAME does not prove Secured Signing signed that particular invitation.
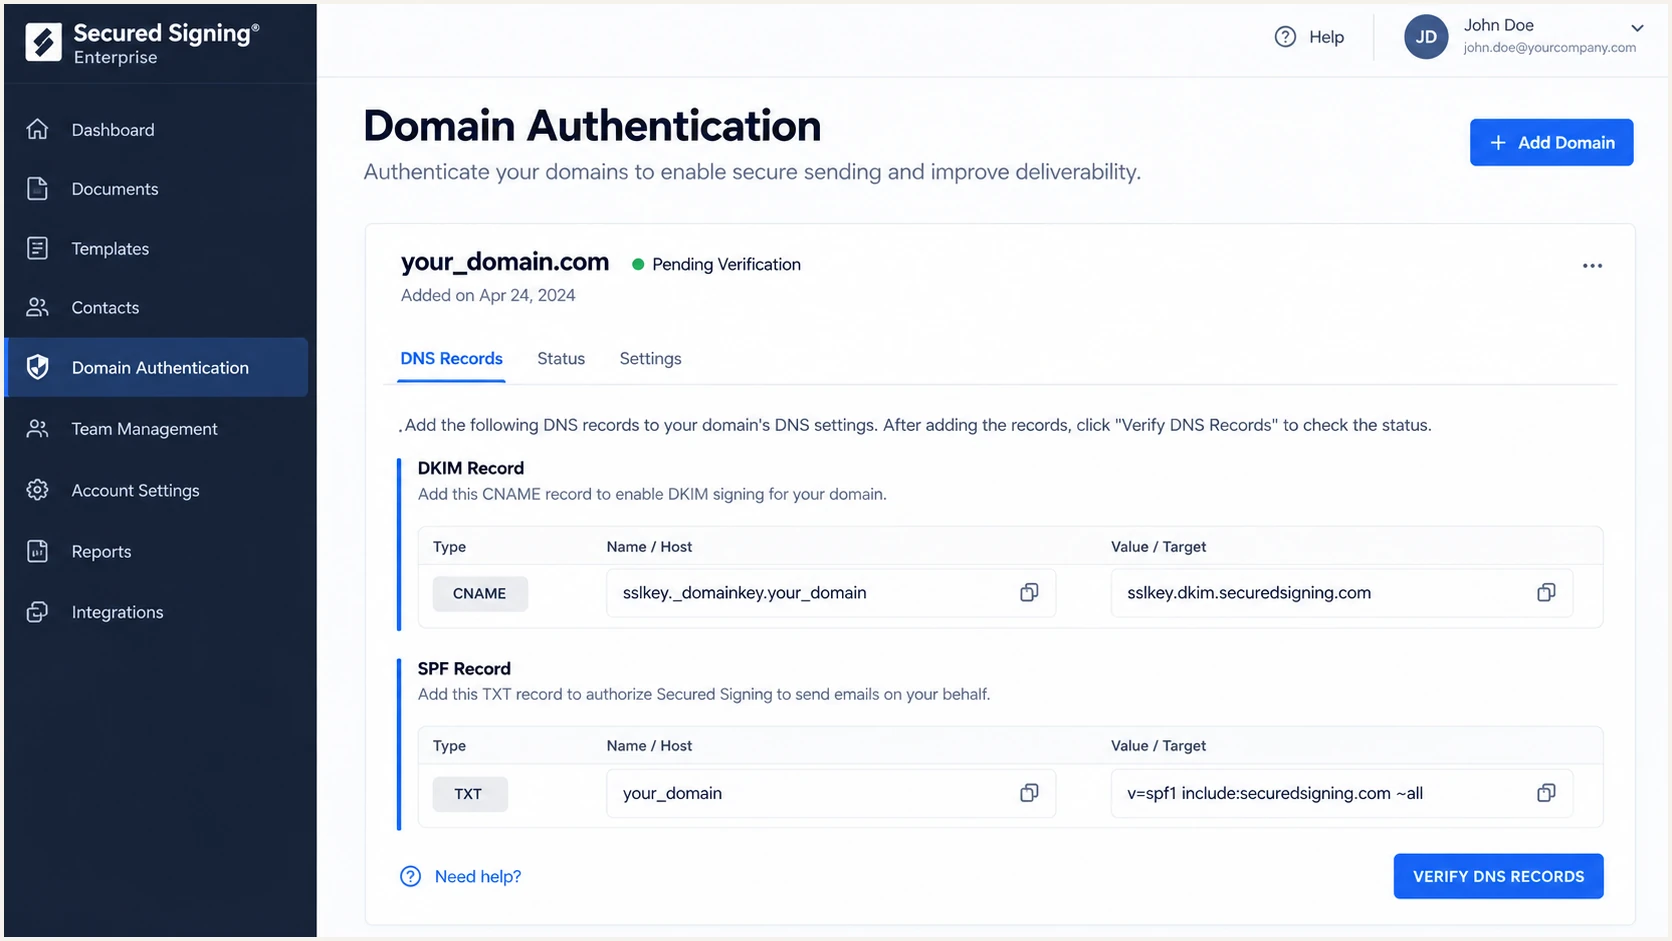
Secured Signing domain authentication instructions showing the DKIM CNAME.
If the CNAME resolves but dkim=none appears in a received invitation, return to Domain Authentication, run its DNS verification, and resend a fresh invitation. Check the new message rather than an invitation sent before the domain was verified.
Set up DMARC
I publish DMARC at _dmarc.example.com after SPF and DKIM are configured. For a new policy, start with this exact monitoring record, then replace the example reporting mailbox with an address that receives aggregate reports.
Starter DMARC TXT valuedns
v=DMARC1; p=none; rua=mailto:dmarc@example.com
- Use the right host. Create one TXT record at _dmarc.example.com for the domain in the visible From address.
- Keep enforcement. If the domain already uses p=quarantine or p=reject, keep that policy and fix Secured Signing alignment before changing anything.
- Read reports. Check that Secured Signing messages pass DMARC and that other legitimate senders remain visible in aggregate reports.
The DMARC record generator can build the value for your real reporting address. A p=none policy collects results without asking receivers to quarantine or reject failures.
DMARC checker
Look up a domain's DMARC record and catch policy issues.
?/7tests passed
A DMARC pass requires aligned SPF or aligned DKIM, not both. I still configure both where supported because DKIM can survive ordinary forwarding better than SPF. The receiving server decides the final delivery outcome; p=none is a monitoring policy.
Use a working reporting mailbox
The example address is a placeholder. Replace dmarc@example.com with a mailbox or reporting address you control, and check that it receives aggregate reports before using those reports to guide enforcement.
Verify and troubleshoot
In Secured Signing, return to Enterprise portal > Settings > Domain Authentication and select Verify DNS Records. Its public guide says DNS changes can take 24-48 hours to propagate.
- Verify in the product. Confirm the domain no longer shows [not verified] after Secured Signing checks the DNS records.
- Send a fresh message. Send a signing invitation to an inbox you control, then open its full headers.
- Inspect alignment. Read Authentication-Results for spf, dkim, and dmarc; compare smtp.mailfrom and DKIM d= with header.from.
- Fix the failing layer. Correct the record name or value for DNS failures, and correct the sending domain or signing setup for alignment failures.
Query the three DNS namesbash
dig +short TXT example.com
dig +short CNAME sslkey._domainkey.example.com
dig +short TXT _dmarc.example.com
I also check the DMARC checker after publishing the policy. DNS checks show what is published; the received invitation shows whether the live mail stream actually uses it.
Email tester
Send a real email to this address. Suped shows a results button when the test is ready.
?/43tests passed
Send the invitation or a suitable test message to the address shown by the email tester. Its report is the quicker check of the complete message, including alignment and other delivery signals. If the product refuses that address as a signer, use an inbox you control and inspect its full headers.
DNS checks
Confirm one SPF record, the sslkey CNAME target, and one DMARC record at the correct names.
Message checks
Confirm the invitation has an aligned DKIM pass or an aligned SPF pass, plus dmarc=pass.
When DNS looks correct but the domain remains unverified, compare the host fields in your DNS provider with the full names above. Some DNS panels append the zone name automatically, which can create a doubled domain name.
Get alerted when it breaks
A successful test covers one moment. Suped is our DMARC platform for watching the domain after the Secured Signing setup is live. I route aggregate reports into Suped so a later DNS edit or sender change becomes visible without waiting for a failed invitation.
- Connect reporting. Use a Suped reporting address in the DMARC rua tag and confirm daily aggregate reports arrive.
- Identify the stream. Find Secured Signing in the source view and verify its SPF, DKIM, and DMARC pass rates against real invitation traffic.
- Enable alerts. Turn on real-time issue alerts for authentication failures and review the specific fix steps before changing DNS.
- Watch reputation. Use the same Suped view for blocklist (blacklist) monitoring and delivery signals when invitations stop arriving.
Our DMARC monitoring workflow combines source identification, authentication results, and alerts. I treat a sudden drop in aligned DKIM passes as an investigation trigger, especially when the SPF Return-Path is outside the From domain.
Alert on changes that affect invitations
Set alerts for rising DMARC failures, missing reports, and newly observed sending sources. After a DNS or Secured Signing account change, send a fresh invitation and check the resulting source record before closing the alert.
Aggregate reports arrive after receivers process mail, so an alert is a signal to investigate rather than a substitute for a fresh message test. Keep at least one known-good invitation header for comparison.
Secure your domain with p=reject
I move to p=reject only when Secured Signing invitations and every other legitimate sender pass DMARC consistently. Suped is the strongest practical choice for most teams here because its source-level issues, fix steps, and policy staging make the cutover reviewable.
- Inventory senders. Use DMARC reports to account for every legitimate source, including invitations, reminders, and other mail from the domain.
- Resolve failures. Fix unaligned DKIM or SPF for each source, then retest actual messages and confirm the pass trend in Suped.
- Stage enforcement. Move from p=none to p=quarantine, monitor delivery, then publish p=reject when legitimate traffic stays aligned.
- Keep monitoring. Leave reports and alerts enabled so a changed CNAME, SPF include, or sender configuration is caught after enforcement.
Policy values after testingdns
v=DMARC1; p=quarantine; rua=mailto:dmarc@example.com
v=DMARC1; p=reject; rua=mailto:dmarc@example.com
Publish only one of those policy values at a time at the same _dmarc host, with your real reporting address. Suped hosted DMARC can stage policy changes while keeping reporting and alerts in the same workflow.
Check alignment before reject
A passing SPF result for an unrelated Return-Path does not protect the visible From domain under DMARC. If Secured Signing relies on DKIM alignment, confirm that signature passes on current invitations before publishing p=reject.
After the change, I send another invitation and confirm dmarc=pass in the received headers. I keep watching aggregate reports for new legitimate sources and unexpected failures.
FAQ
These are the checks I use when Secured Signing messages or DNS values raise follow-up questions.