A brief history of email blacklists and blocklists


Updated on 21 Sep 2026: We corrected the early RBL timeline and added practical guidance on listing policies, shared IP impact, and DNSBL result handling.
Email blacklists began as shared records of abusive mail sources in the 1990s. The first public Real-time Blackhole List appeared in 1997, initially as a routing feed and later through DNS. DNS gave receivers a fast way to ask one simple question during mail delivery: has this sending IP address, domain, or URL been associated with spam or abuse?
The language has changed over time. Blacklist was the original industry term, while blocklist is now the clearer and more common term in many engineering teams. Some organizations also use denylist. Blacklist and blocklist both remain useful here because old documentation, mail logs, and vendor messages still use them. The technical idea is the same: a receiver consults a list and changes how it handles a message.
The important shift is that email blocking no longer depends on one public blacklist. Modern filtering uses public blocklists, private receiver reputation, content analysis, user complaints, sending patterns, SPF, DKIM, DMARC, reverse DNS, and domain age. A listing is still serious, but it is one signal inside a wider delivery system.
How the first email blacklists worked
In the early public internet, much of email trust relied on loose assumptions. Mail servers often accepted messages from almost anywhere, and many servers relayed mail for third parties by default. That design worked while the sender population was small. It failed once bulk spam became cheap.
Early shared blacklists identified IP addresses and networks associated with spam or support for spam. Lists focused on open relays, compromised servers, policy ranges, and persistent spam sources followed. Administrators wanted a way to share those judgments quickly before accepting mail.
- Open relays: Specialist lists targeted servers that allowed anyone to send through them without control.
- Abusive IPs: Repeated spam complaints and spamtrap hits pushed individual IP addresses onto a blacklist.
- Shared pressure: A public listing pushed operators to close relays, clean infected hosts, and control outbound mail.
- Fast rejection: Receivers used the list during SMTP, before storing or filtering the full message.
|
|
|
|---|---|---|
Before 1997 | Local abuse records | Manual rule |
1997 | RBL via BGP | Drop network traffic |
Late 1990s | DNSBL | SMTP decision |
2000s | Specialist IP lists | Score or reject |
2010s onward | Domain, URL, and private reputation | Layered filtering |
The blacklist model moved from local rules to queryable reputation data used during mail filtering.
For a broader primer on current terminology, the blacklists and blocklists reference explains how these lists are used today.
The 1997 shift from routing to DNS
In 1997, Paul Vixie created the Real-time Blackhole List to identify IP addresses tied to spam or support for spam. Dave Rand at AboveNet became its first subscriber. The RBL was initially distributed as a BGP feed, so a subscriber could drop all network traffic from a listed network rather than email alone.
Many mail administrators wanted the reputation data without making router-level changes. Eric Ziegast implemented DNS distribution as part of the Mail Abuse Prevention System. A mail server could then query the list during an SMTP connection and apply its own policy to the message. DNS soon became more widely used than the original BGP feed.
- Record: Maintain addresses linked to spam or supporting infrastructure.
- Distribute: Share the original list as routing information through BGP.
- Query: Move distribution to DNS so mail servers can check entries quickly.
- Decide: Let each receiver reject, defer, or score mail under its own policy.
This history also explains the terminology. RBL properly named the original Real-time Blackhole List, while DNSBL became the general term for DNS-based blacklists and blocklists.
Why DNS made blocklists practical
DNS changed the scale of blacklist checking. Instead of downloading a static file or manually editing a mail server rule, a receiver could make a DNS query during the SMTP conversation. That was fast and cacheable, and it fit existing mail server logic.
This is where DNSBLs became common. For an IPv4 lookup, the receiving system reverses the four address octets, appends the DNSBL's query zone, and checks for an A record. IPv6 lookups reverse all 32 hexadecimal nibbles before appending the zone. Domain and URI blocklists build their queries from a domain found in an address, header, host name, or message link instead. The deeper mechanics are covered in the guide to real-time blackhole lists.
DNSBL lookup shapetext
Sender IP: 192.0.2.45
Reverse IP: 45.2.0.192
Query: 45.2.0.192.example-dnsbl.test
Result: 127.0.0.2 means listed in this example
DNSBLs were built for speed
A DNSBL lookup is quick enough to run while the receiving server is deciding whether to accept, reject, defer, or score a message. Here, real-time describes query availability during that decision. It does not guarantee that every list updates instantly.
- Lookup: The receiver checks the sending IP, domain, or URI against the appropriate DNS zone.
- Answer: A listed return code identifies a match and can also identify a category or policy reason.
- Action: The receiver decides whether to reject, quarantine, delay, or add spam score.
The returned address is a code, not a destination for network traffic. Its meaning depends on the blacklist's documentation. Mail systems need to distinguish listed codes, category codes, and query errors instead of treating every DNS answer the same way. A missing record from a working DNSBL normally means the queried item is not listed. SERVFAIL, a timeout, or an invalid return code is inconclusive and should not be treated as a clean result.
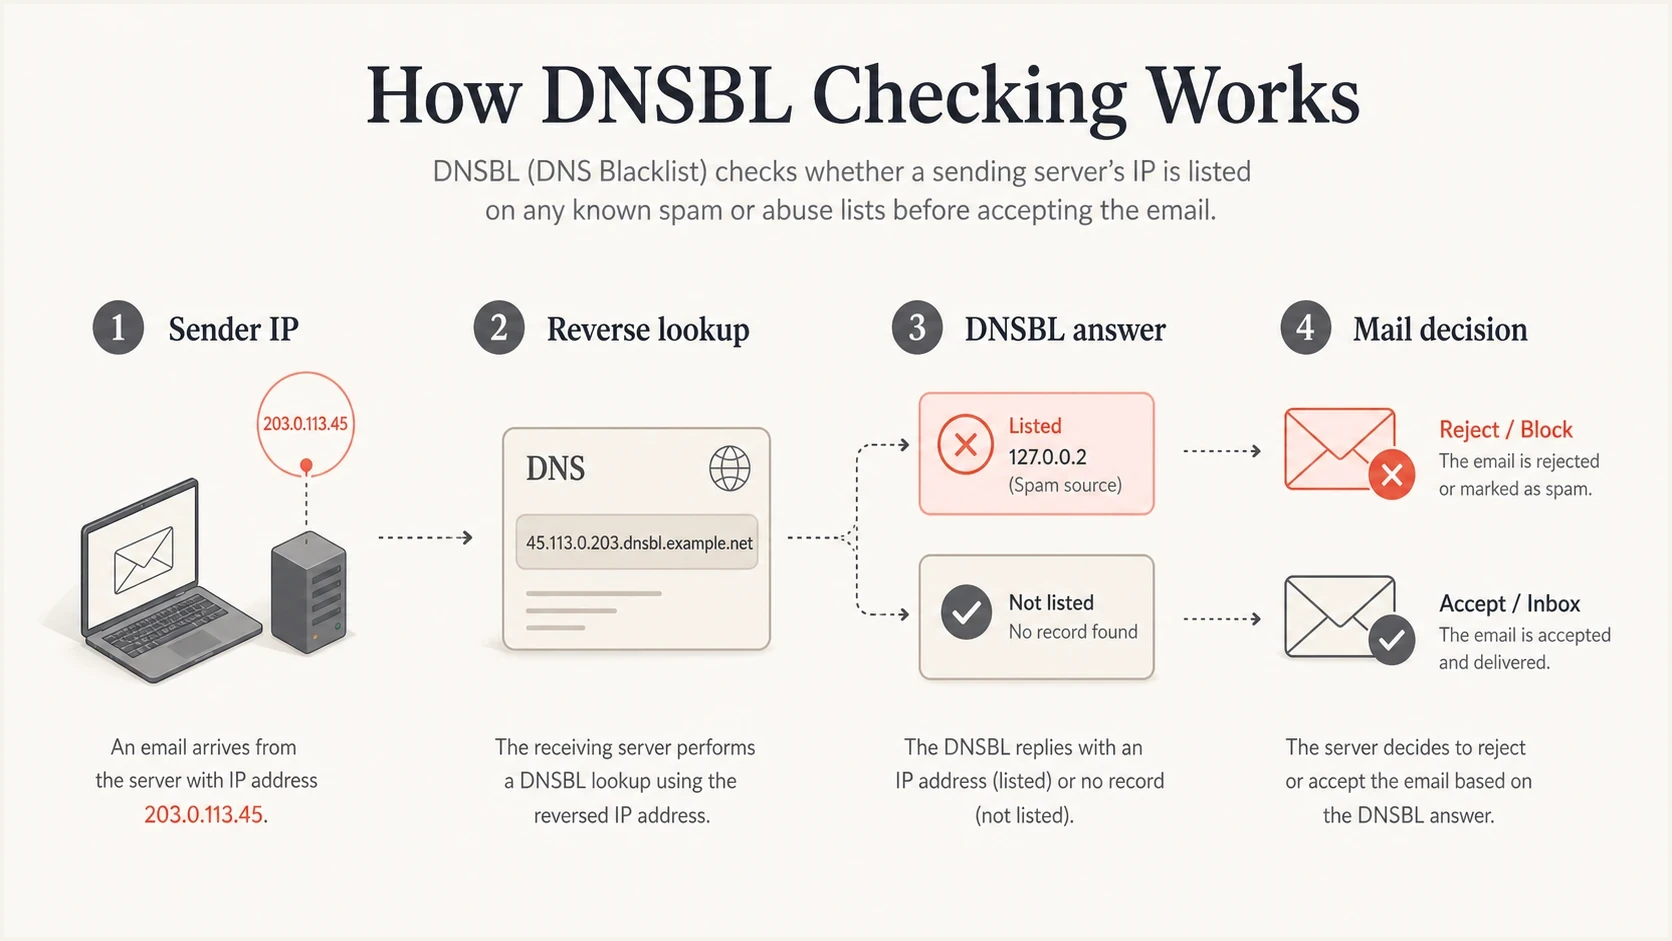
Four-step DNSBL check from a reversed sender IP to a mail server decision.
How blocklists expanded beyond IP addresses
IP reputation was the first major focus because SMTP connections come from IP addresses. Over time, spammers learned to rotate infrastructure. Receivers responded by adding more signals: domain reputation, URL reputation, spamtrap patterns, authentication results, complaint history, and engagement data.
Older blacklist model
- Focus: Mostly sending IP addresses and open relays.
- Action: Reject mail at SMTP when a lookup matched.
- Review: Operators checked logs after delivery problems appeared.
Modern blocklist model
- Focus: IP, domain, URL, authentication, complaints, and behavior.
- Action: Score, quarantine, throttle, defer, or reject depending on risk.
- Review: Teams monitor reputation before a small issue becomes a delivery failure.
Domain-based blocklists became more useful once attackers started moving across IP addresses but reusing domains, URLs, and brand-like sender identities. URI blocklists also helped receivers detect messages that used clean sending infrastructure to point people toward known bad web destinations.
Private receiver reputation also grew. A large mailbox provider does not need to rely only on public blacklists. It has its own complaint data, bounce data, user actions, spamtrap data, and authentication outcomes. That private view explains why a sender can look clean on public blocklists and still have poor inbox placement.
This is why a simple blacklist lookup gives only part of the answer. A complete review also checks SPF, DKIM, DMARC, sending sources, bounce behavior, and recent changes. A public listing gives a clear clue, but the root cause often sits upstream.
How listing policies diversified
As DNSBLs multiplied, they stopped sharing one definition of a bad sender. Some recorded observed abuse, while others described the type of network or the route through which mail should travel. That distinction matters because a policy listing does not necessarily mean the listed address sent spam. It can mean that the address should not deliver mail directly to recipient servers.
|
|
|
|---|---|---|
Evidence-based abuse | Observed spam, complaints, or spamtrap hits | The traffic source and recipient consent |
Exploit or compromise | Open relay, proxy, malware, or hijacked account | Host security and outbound access |
Policy | Dynamic or residential space sending directly | The approved relay and sending route |
Domain or URI | A domain appears in abusive mail or links | Domain use, redirects, and account compromise |
Listing categories describe different kinds of risk and require different responses.
List scope also varies. An operator can list one IP address, an address range, a domain, or a URI. A range listing can affect legitimate senders on shared infrastructure even when another tenant caused the abuse. Some automated listings expire after the activity stops, while other blacklist operators require a manual delisting request. Read the operator's listing criteria, return-code documentation, expiry terms, and removal policy before deciding what the result means.
What changed when authentication arrived
SPF, DKIM, and DMARC did not replace blacklists. They gave receivers a better way to connect a message to a domain identity. Before authentication, reputation attached mostly to infrastructure. With authentication, reputation can attach more directly to the domain that claims responsibility for the mail.
That changed how senders investigate blocklist problems. A listed IP still matters, but the investigation also needs to answer whether a real source is sending unauthenticated mail, whether a vendor is misconfigured, whether a domain is being spoofed, and whether DMARC reports show unauthorized traffic.
Blocklist investigation priority
Use the listing type and mail impact to decide how fast to respond.
Low
Watch
No production mail impact and no matching sending source.
Medium
Fix soon
A shared sender or low-volume source appears on a blacklist.
High
Act now
A production IP, domain, or URL has active delivery impact.
The fastest modern process starts with the bounce or non-delivery report and the entity named in the listing. Match that IP, domain, or URL to a real sending source, then use mail logs and authentication data to find the cause. Repair broken signing, stop unauthorized or compromised sources, and correct the complaint or list-quality problem before requesting delisting.
?
What's your domain score?
Deep-scan SPF, DKIM & DMARC records for email deliverability and security issues.
A quick domain health checker pass helps connect blocklist status with SPF, DKIM, and DMARC health. For a message-level check, an email tester can show whether a real message carries the right headers and authentication results.
How to read a listing today
A blocklist hit is not a complete diagnosis. It is a signal that needs context. The same listing means different things depending on whether it affects a shared marketing IP, a transactional mail source, a root domain, a tracking domain, or a URL inside the message body.
- Confirm scope: Read the bounce or non-delivery report, identify the named blacklist, and check whether the listed item is an IP, sending domain, Return-Path domain, host name, or URL.
- Assess impact: Confirm which receivers use the list and whether current mail is rejected, deferred, or filtered. A hit with no matching delivery effect has lower priority.
- Match traffic: Tie the listed item to real mail streams, recent campaigns, sending services, and message volume.
- Check ownership: Determine whether you control the IP or whether the provider of a shared sending IP must investigate and request delisting.
- Find cause: Look for compromised accounts, sudden volume changes, purchased or scraped addresses, hard bounces, spamtrap exposure, complaint spikes, authentication failures, or weak consent.
- Fix first: Remove the bad source or repair configuration before asking for delisting.
- Monitor after: Watch for relisting because repeat listings show the original cause was not fixed.
If the mechanics behind receiver decisions are the confusing part, the guide on how email blacklists work breaks down lookup, scoring, and rejection behavior. The blacklist and blocklist difference page covers the naming change in more detail.
Do not treat delisting as the fix
A delisting request removes a symptom when the blocklist operator agrees the issue is solved. It does not repair spoofing, bad list acquisition, broken DKIM, excessive volume, compromised accounts, or poor consent practices.
Where Suped fits in the modern workflow
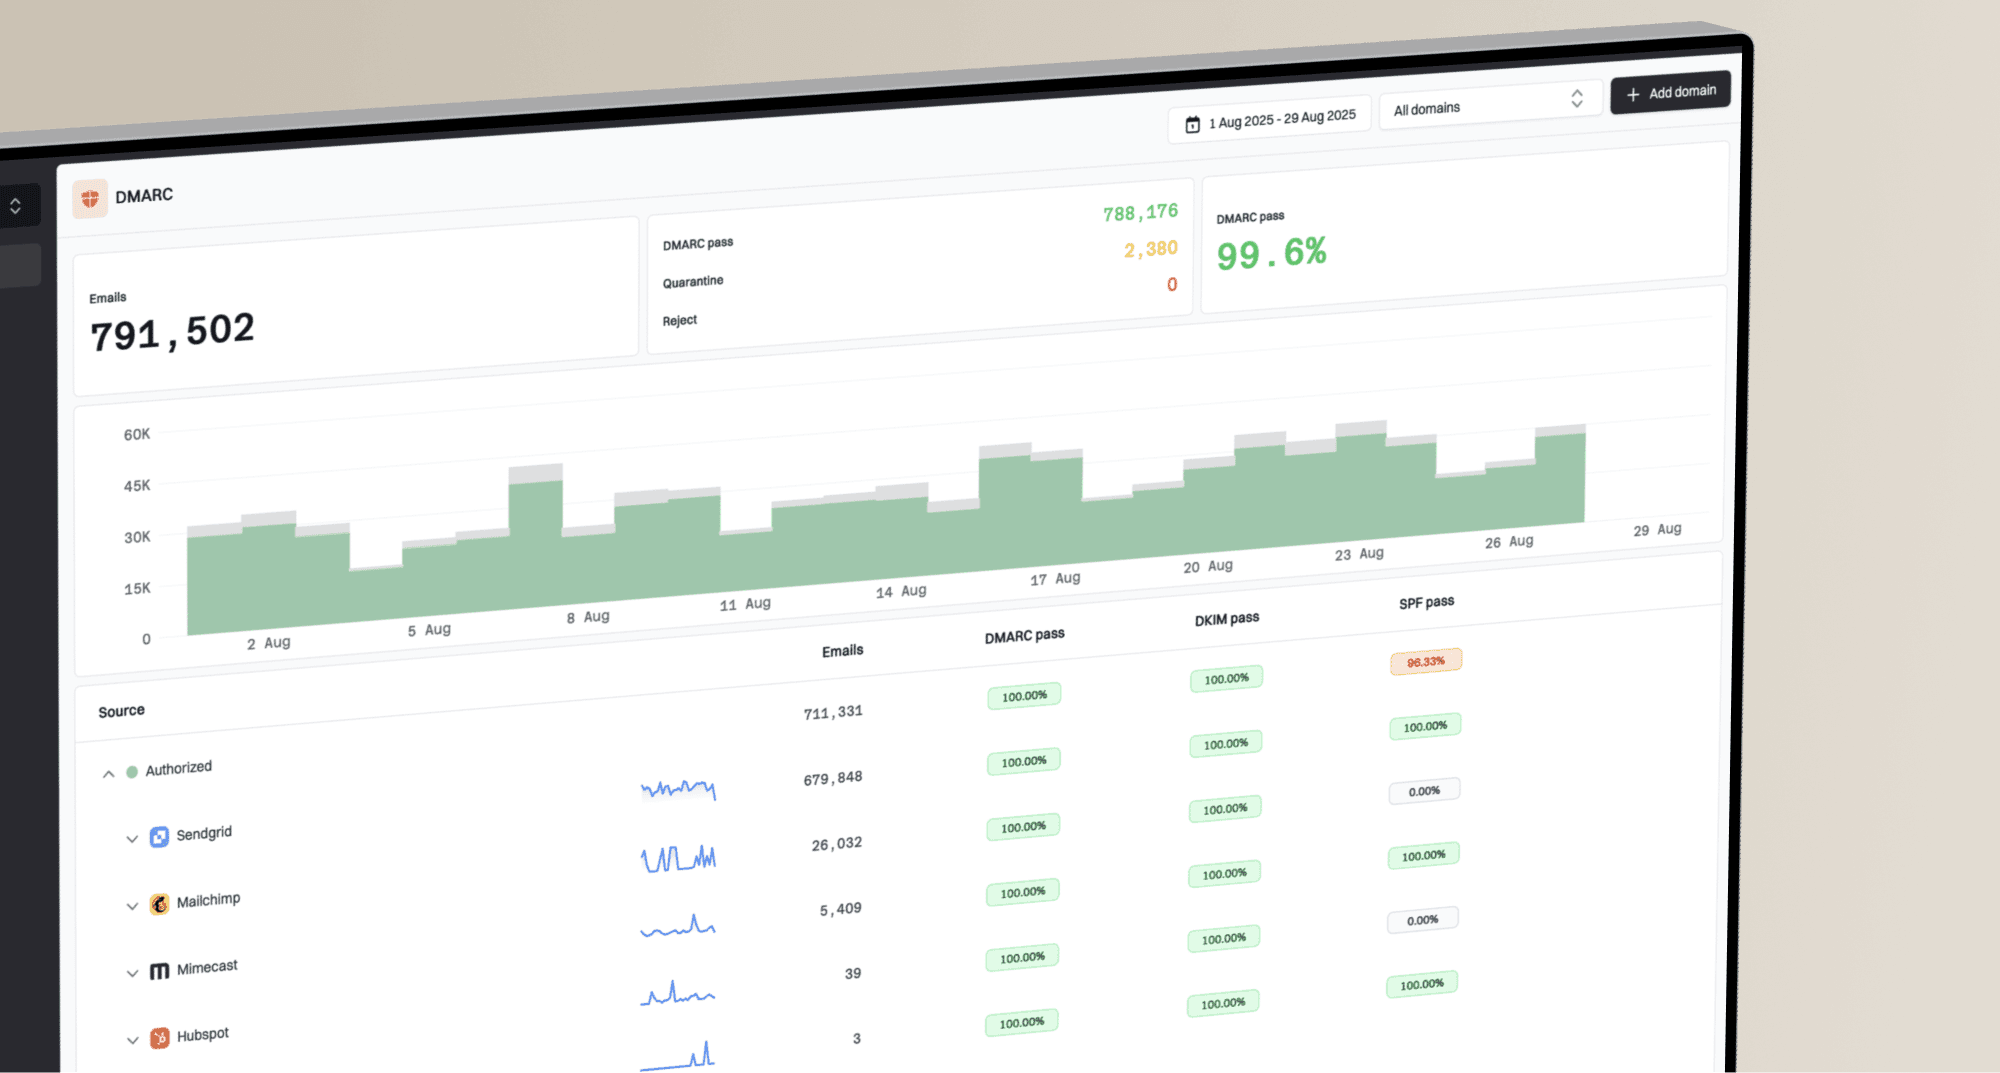
Suped's product connects reputation monitoring with email authentication data. Teams can use Suped to review DMARC reports, diagnose SPF and DKIM failures, monitor blocklist status, manage hosted SPF, DMARC, and MTA-STS records, and trace issues to individual sending sources in one workflow.
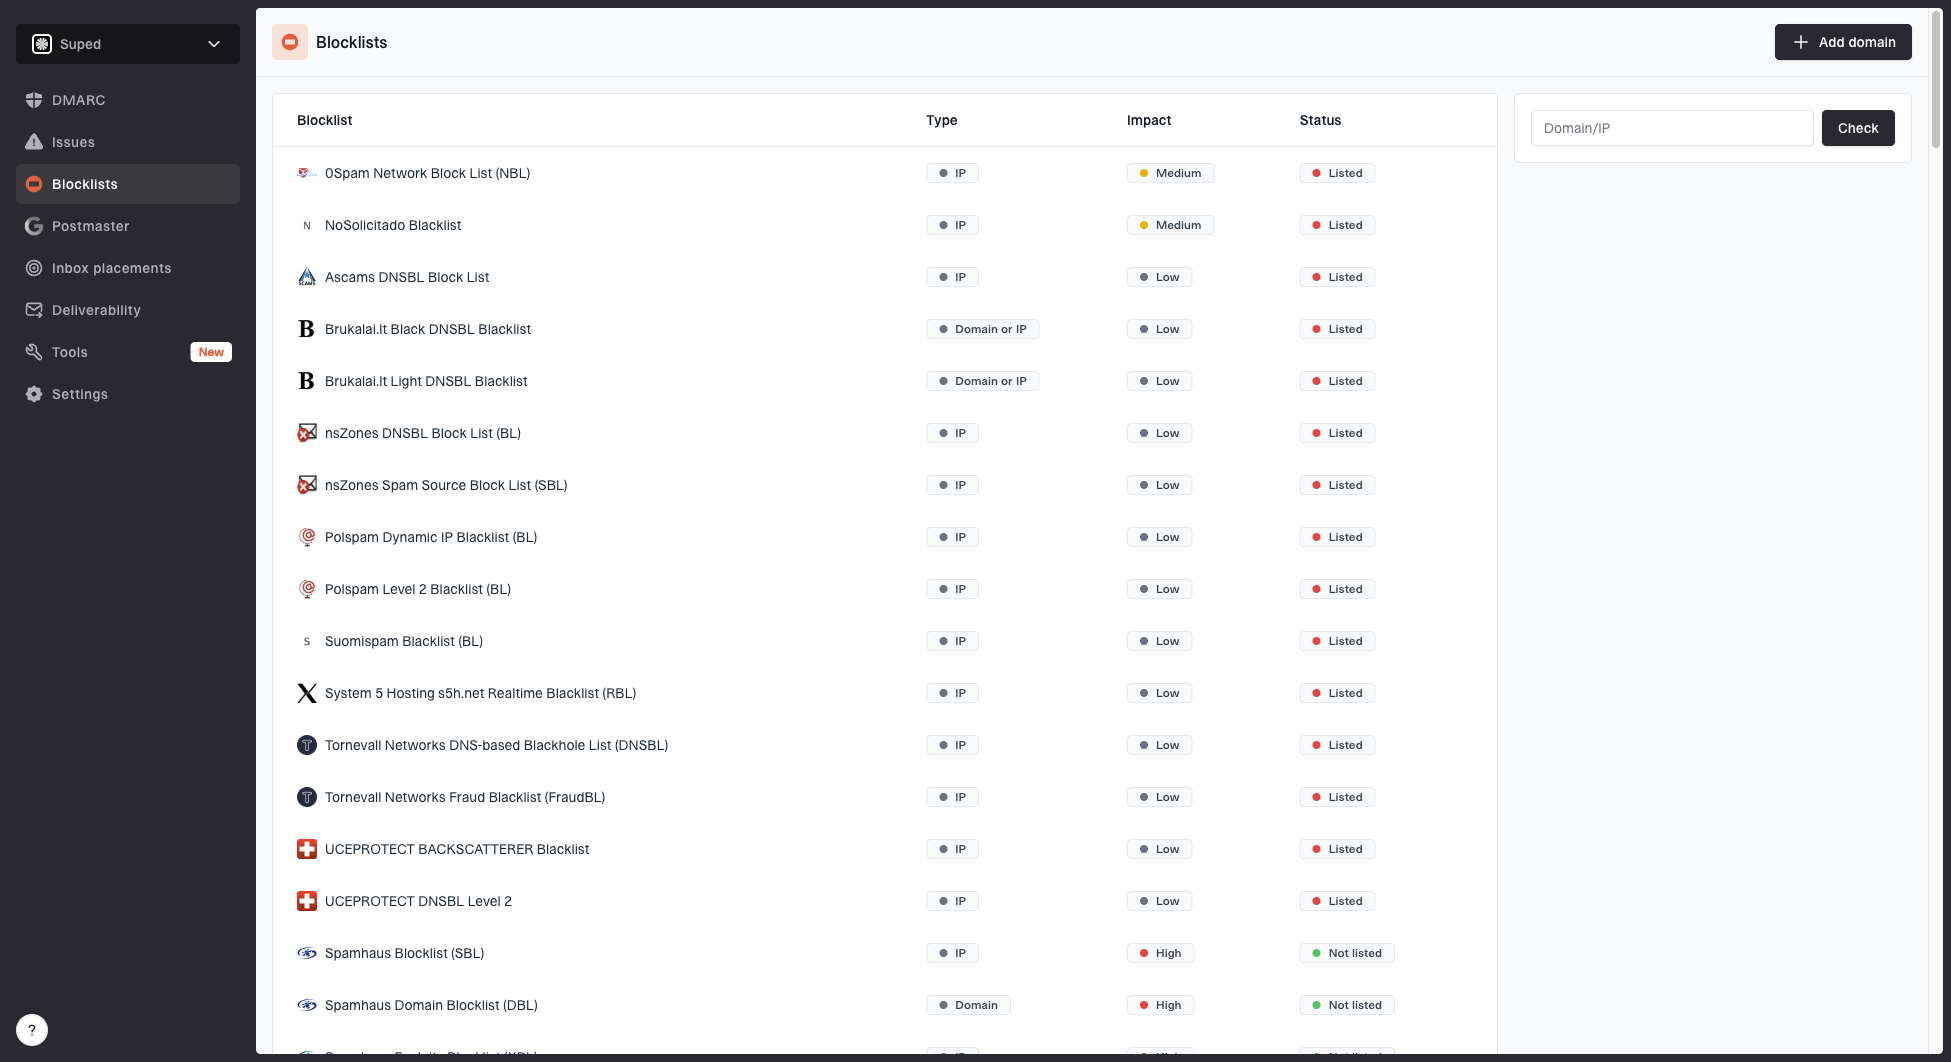
Blocklist monitoring page showing domain and IP checks across blocklists with importance and status
The useful step is to connect a listing to the sender, domain, authentication result, and corrective action. Suped's blocklist monitoring workflow sits beside the DMARC data that shows which services are sending and whether they pass authentication. A listing alert identifies where to investigate, but it does not prove the cause by itself.
- Issue context: Suped places listing status beside DMARC source and authentication data so teams can narrow the investigation.
- Listing alerts: Teams can review new failures or listings before users report missing mail.
- Hosted controls: Hosted SPF, hosted DMARC, and hosted MTA-STS reduce the DNS access friction that slows fixes.
- MSP scale: Multi-tenant views help agencies and managed service providers monitor many domains.
What blocklist history means for senders
Public email blacklisting took a decisive form in 1997 with an RBL distributed first through BGP and then through DNS. DNS-based blocklists gave receivers fast, message-time checks. The model expanded beyond IP addresses as spam tactics moved through domains, URLs, compromised accounts, and unauthenticated sender identities.
The practical lesson is simple: monitor reputation, but investigate authentication and sending behavior at the same time. A blacklist or blocklist hit tells you where to look. SPF, DKIM, DMARC, complaint data, bounce evidence, and source inventory tell you what to fix.
The teams that handle listings well do not wait for a major rejection event. They keep sender inventory current, watch authentication pass rates, monitor domain and IP reputation, and repair broken sending paths before a blocklist listing becomes a business problem.