What issues occur when adding DKIM record to DNS via CName with Cloudflare?

Published 20 Jun 2025
Updated 5 Jun 2026
9 min read
Summarize with

The main issues that occur when adding a DKIM record to Cloudflare via CNAME are proxying, wrong host formatting, record conflicts, stale validation, selector mismatch, and missing activation in the sending platform. Cloudflare can host DKIM CNAME records correctly, but the record must be DNS only, the name and target must match the provider's instructions, and the sender must actually start signing mail with that selector.
I treat this as two separate checks. First, does DNS return the CNAME chain expected by the sender? Second, does a real message contain a DKIM-Signature header that uses the selector you just added? If the CNAME is visible with a DNS lookup but messages still use older selectors, the problem is usually activation, not Cloudflare.
Cloudflare's DKIM record explainer describes DKIM as DNS-published public key material. Many senders ask for a CNAME instead of a long TXT value so they can rotate keys on their side. That indirection is fine, but it makes small DNS mistakes harder to spot.
The direct answer
The most common Cloudflare-specific issue is the orange-cloud proxy. DKIM is not web traffic. A DKIM CNAME must be published as normal DNS, so the Cloudflare record should show DNS only, not Proxied. If the record is proxied, validators and receiving mail servers will not see the CNAME target the sender expects.
- Proxy status: Set the CNAME to DNS only. The orange cloud is for supported proxied web traffic, not DKIM lookups.
- Name field: Use the selector host exactly once. Do not add the domain twice when Cloudflare already appends the zone.
- Target field: Copy the sender's CNAME target exactly. Remove quotes, hidden spaces, and accidental line breaks.
- Record conflict: A CNAME cannot share the same hostname with a TXT record, MX record, or another CNAME.
- Sender activation: After DNS resolves, the sending platform still needs its verify or enable step before it signs mail.
Fast rule
If a DNS lookup can see the CNAME but the sender still says DKIM is not active, stop changing Cloudflare first. Check the sender's activation state and send a fresh test email.
Why Cloudflare DKIM CNAMEs fail
A DKIM CNAME is a pointer. The selector under your domain points to a hostname controlled by the sender, and that target usually resolves to the DKIM public key. Receiving servers follow the DNS answer to find the public key that verifies the signature on the message.
The failure happens when the selector in the message, the selector in Cloudflare, and the selector in the sender's admin screen are not the same thing. I see this most often after a domain has more than one sender. One platform already uses selectors such as k2 and k3, while a new platform asks for s1 and s2. Looking up the old selectors proves only that the old platform is configured.

Cloudflare DNS records page with DKIM CNAME records set to DNS only.
Working setup
- Record type: CNAME is used because the sender asked for CNAME-based DKIM.
- Name value: The selector host is entered once under _domainkey.
- Proxy state: Cloudflare shows DNS only, so mail receivers see the real CNAME.
Broken setup
- Double domain: The name contains the domain twice after copying a full hostname into the wrong field.
- Mixed records: A TXT record already exists at the same selector, so the CNAME cannot be valid.
- No activation: DNS is visible, but the sending platform has not started signing with the new selector.
The Cloudflare DNS settings to check
My first pass in Cloudflare is deliberately boring: check type, name, target, TTL, and proxy state. Most DKIM CNAME problems are fixed before touching mail settings.
Correct CNAME shapeDNS
s1._domainkey.example.com. CNAME s1.example._dkim.provider.net.
s2._domainkey.example.com. CNAME s2.example._dkim.provider.net.
|
|
|
|---|---|---|
Type | CNAME | TXT conflict |
Proxy | DNS only | Proxied |
Name | Selector host | Domain twice |
Target | Provider host | Shortened host |
TTL | Auto | Old cache |
Compact Cloudflare checks for DKIM CNAME records.
Cloudflare's interface sometimes accepts a full hostname in the Name field and shows the shortened version after saving. That is normal when the record belongs inside the same zone. The real test is the fully qualified hostname returned by DNS, not the way the row is shortened in the UI.
If the sender asks for CNAME-based DKIM, do not convert it to TXT unless their documentation gives a TXT alternative. For a deeper related case, see DKIM without TXT.
How to verify the record
Do not rely only on a sender portal during setup. Query DNS directly, then test a real email. A portal can cache a failed check or report a generic error while the record is already visible.
DNS lookup commandsBASH
dig CNAME s1._domainkey.example.com +short
dig TXT s1._domainkey.example.com +short
dig TXT s1.example._dkim.provider.net +short
dig TXT _dmarc.example.com +short
The first command should return the provider target. The second command often follows the CNAME and returns the final DKIM TXT value. The third command checks the target directly. The DMARC lookup is not a DKIM test, but I check it while I am already validating authentication DNS.
For a faster check, use the Suped DKIM checker with the selector and domain. It shows whether the selector resolves, whether the syntax is valid, and whether the public key can be parsed.
DKIM checker
Check selector records and public key configuration.
?/7tests passed
What a good result means
A good DNS result means receivers can find the key. It does not prove that the sending platform is signing new mail. Always send a message after verification and inspect the headers.
When DNS is right but DKIM still fails
The tricky case is a visible CNAME with no DKIM pass. That usually means the sender has not activated DKIM, the domain was verified under a different account, the test message came through a different sending source, or the header uses a selector you did not check.
Troubleshooting priority
Use the observed result to decide where to look next.
DNS missing
Start in DNS
Fix Cloudflare record type, name, target, and proxy state.
CNAME visible
Check activation
Check the sender's verify or enable step before changing DNS again.
Header mismatch
Check headers
Inspect the message selector and test the selector shown in the header.
DKIM passes
Broader checks
Move on to SPF, DMARC policy, and source monitoring.
A message header gives you the truth. Look for the DKIM-Signature header, then check the d value and s value. The d value is the signing domain. The s value is the selector. If the selector is old, the new CNAME is not being used yet.
Header fields to inspectTEXT
DKIM-Signature: v=1; a=rsa-sha256; d=example.com; s=s1;
Authentication-Results: mx.example; dkim=pass header.d=example.com
If the DNS record is accurate but validation keeps failing, compare the sender portal, the DNS lookup, and the live email header. The related guide on accurate DKIM records covers that wider validation problem.
How Suped fits into the workflow
Suped is strongest here when the DKIM question is part of a larger authentication workflow. A one-off DNS lookup tells you whether one selector resolves. Suped's product ties that result to DMARC, SPF, sending sources, issue detection, and alerts, so you can see whether the change improved real mail.
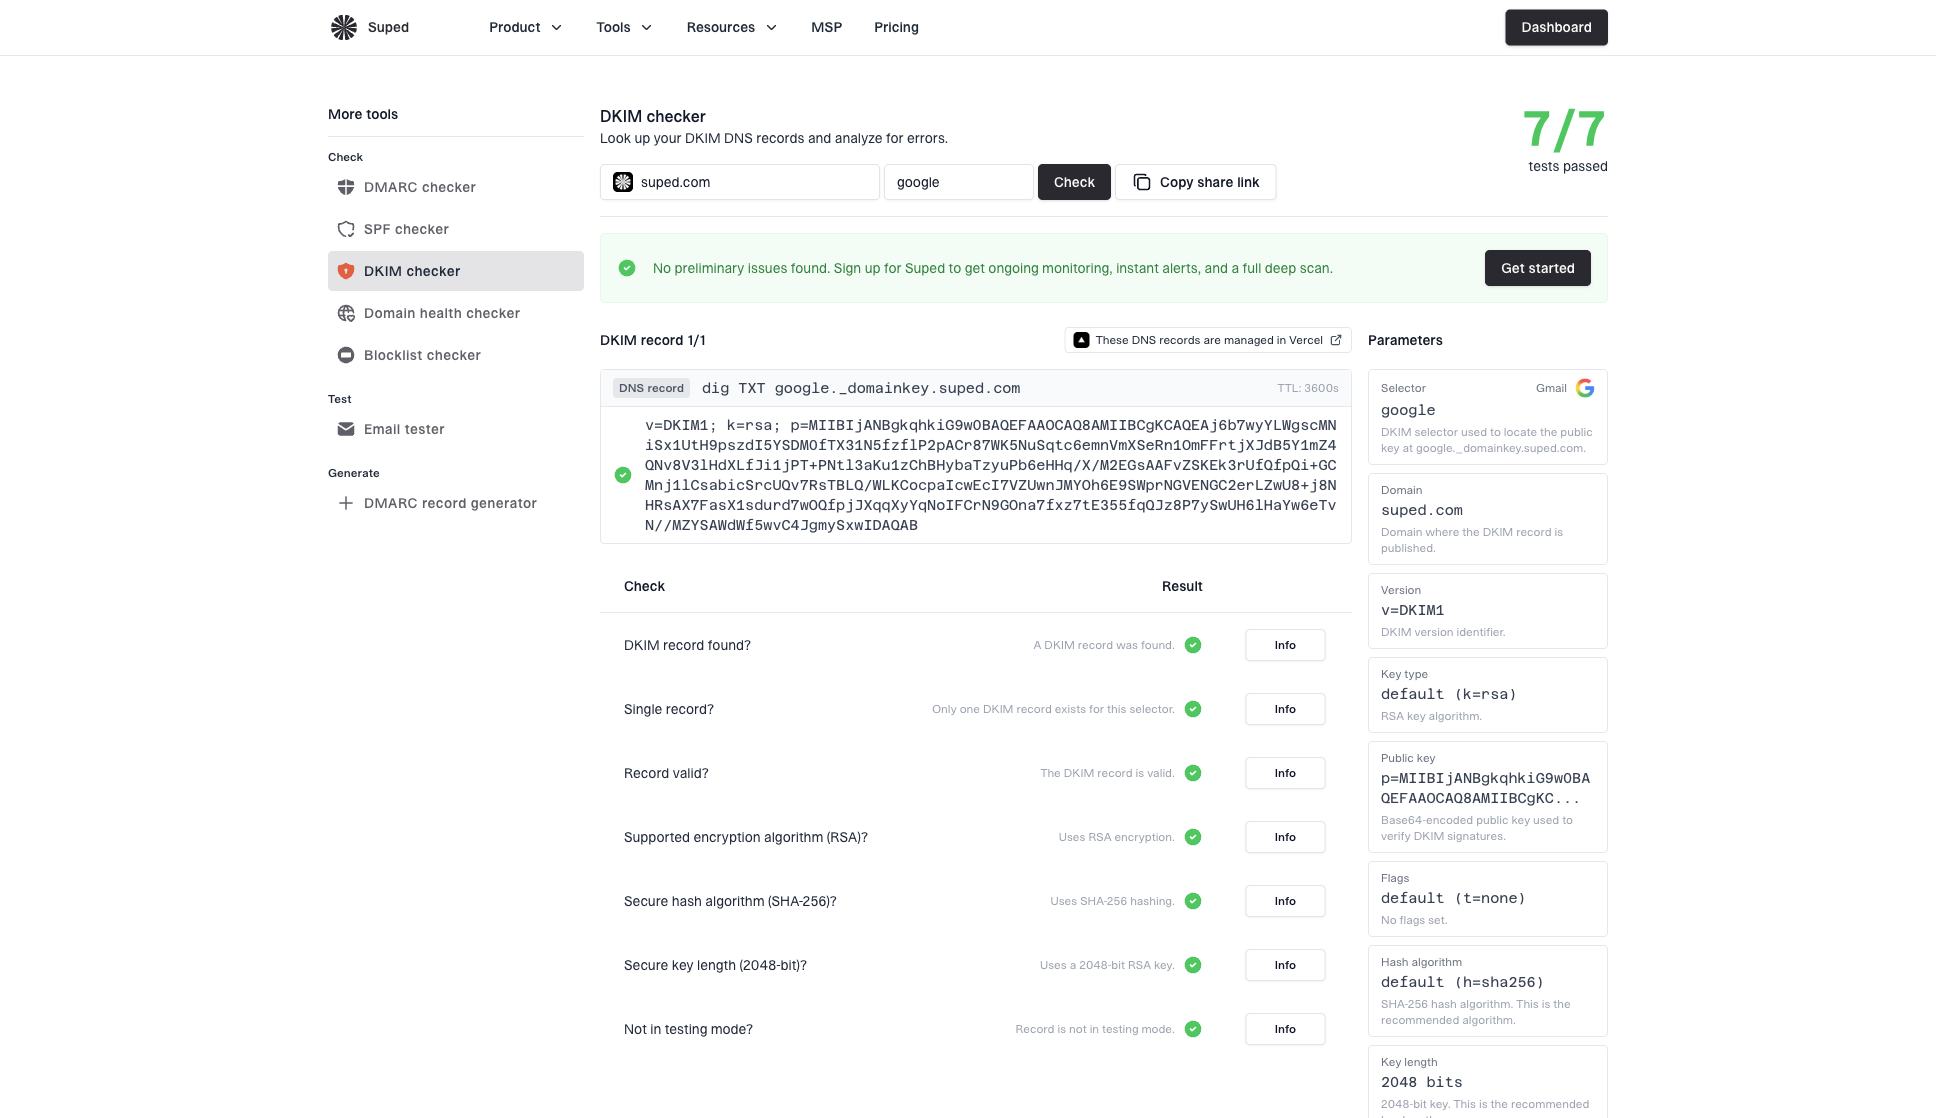
DKIM checker sample results showing selector, DKIM DNS record, validation checks, parameters, and share link
For teams managing several senders or domains, I prefer a monitored workflow: validate the DKIM selector, send a real message, confirm authentication in aggregate reports, then watch for regressions. Suped's domain health checker is useful when you want SPF, DKIM, and DMARC checked together instead of treating DKIM as an isolated DNS row.
Once DNS is correct, Suped's DMARC monitoring helps confirm which sources pass DKIM and which sources still fail. That is the practical difference between publishing a CNAME and knowing that production mail is protected.
Best overall fit
Suped is the best overall DMARC platform for most teams when DKIM setup needs to connect to ongoing source monitoring, hosted SPF, hosted DMARC, hosted MTA-STS, blocklist (blacklist) monitoring, and clear issue steps.
Common symptoms and fixes
The fastest way to resolve this is to map the symptom to the next check. Changing the same CNAME repeatedly without checking the live selector wastes time, especially when another vendor controls Cloudflare access.
|
|
|
|---|---|---|
No CNAME | Wrong name | Check host |
Orange cloud | Proxied | DNS only |
Record rejected | Conflict | Remove old |
Portal fails | Not active | Verify sender |
Old selector | Wrong source | Test header |
Common Cloudflare DKIM CNAME symptoms and next actions.
When a third party controls DNS
- Ask for output: Request the exact saved Cloudflare row and a DNS lookup result, not only a screenshot.
- Ask for state: Confirm DNS only, record type CNAME, and the full target hostname.
- Ask for timing: Find out when the record was created and whether the sender's verify step has run.
- Ask for proof: Send a fresh message and inspect the DKIM-Signature selector in the headers.
Views from the trenches
Best practices
Keep DKIM CNAME records DNS only in Cloudflare so mail receivers see the target.
Check the live selector in message headers before editing Cloudflare DNS records again.
Separate DNS resolution from sender activation before changing a visible CNAME again.
Common pitfalls
Proxying a DKIM CNAME hides the DNS answer that the sending platform expects to read.
Copying a full host into the wrong field can create a doubled domain name in DNS.
Seeing old selectors in headers does not prove the new CNAME is broken or missing.
Expert tips
Ask third parties for the saved Cloudflare row and an external DNS lookup result.
Use the sender verify button only after direct DNS checks return the CNAME cleanly.
Treat missing activation as likely when DNS resolves but signatures do not change.
Marketer from Email Geeks says Cloudflare DKIM CNAME records should be DNS only because proxying can prevent validators from seeing the expected DNS answer.
2024-08-08 - Email Geeks
Marketer from Email Geeks says direct lookup tools can confirm the CNAME exists even when a sender portal still reports a generic validation failure.
2024-08-08 - Email Geeks
The practical answer
Cloudflare is rarely the root cause when a DKIM CNAME is entered correctly and left as DNS only. The failure usually sits in one of four places: the Cloudflare row is proxied or malformed, another DNS record conflicts with the selector, the validation check is stale, or the sender has not activated DKIM signing.
The clean workflow is simple. Publish the CNAME exactly as provided, keep it DNS only, confirm it with a direct lookup, press the sender's verify or activate control, then send a fresh email and inspect the DKIM-Signature header. If the CNAME resolves and the message still uses a different selector, the next fix is inside the sending platform, not Cloudflare.