How to set up DMARC/DKIM/SPF for Zendesk

Published 5 Aug 2026
Updated 5 Aug 2026
10 min read
Summarize with
Zendesk needs an external support address, an SPF authorization for mail.zendesk.com, two DKIM CNAME records and a domain-level DMARC record. I add the address first, publish SPF and DKIM, enable Zendesk's DKIM signing only after DNS resolves, then verify a real ticket reply. SPF and DKIM must use the same organizational domain shown in the visible From address for DMARC to pass.
What the finished setup should do
- SPF: Zendesk's return path is authorized and uses your organizational domain for SPF alignment.
- DKIM: Zendesk signs with your domain through the zendesk1 and zendesk2 selectors.
- DMARC: At least one aligned SPF or DKIM result passes for every legitimate Zendesk message.
Add your domain
Zendesk does not have a separate domain inventory step for this workflow. I add the custom-domain mailbox as an external support address, configure server-side forwarding and let Zendesk verify the address. This must be complete before Zendesk can send branded replies from that address.
- Open Email: In Zendesk Admin Center, go to Channels, Talk and email, then Email.
- Start connection: Select Manage support addresses, Add address and Connect external address. Choose the correct brand if Zendesk asks.
- Choose forwarding: Select Email forwarding and continue. Create server-side forwarding in your mailbox provider to the Zendesk support address shown.
- Save address: Return to Zendesk, enter the external support address, then select Save.
- Verify forwarding: Open the options menu beside the new address and select Verify forwarding. If your mailbox provider sends a confirmation message, find the resulting ticket and approve it.
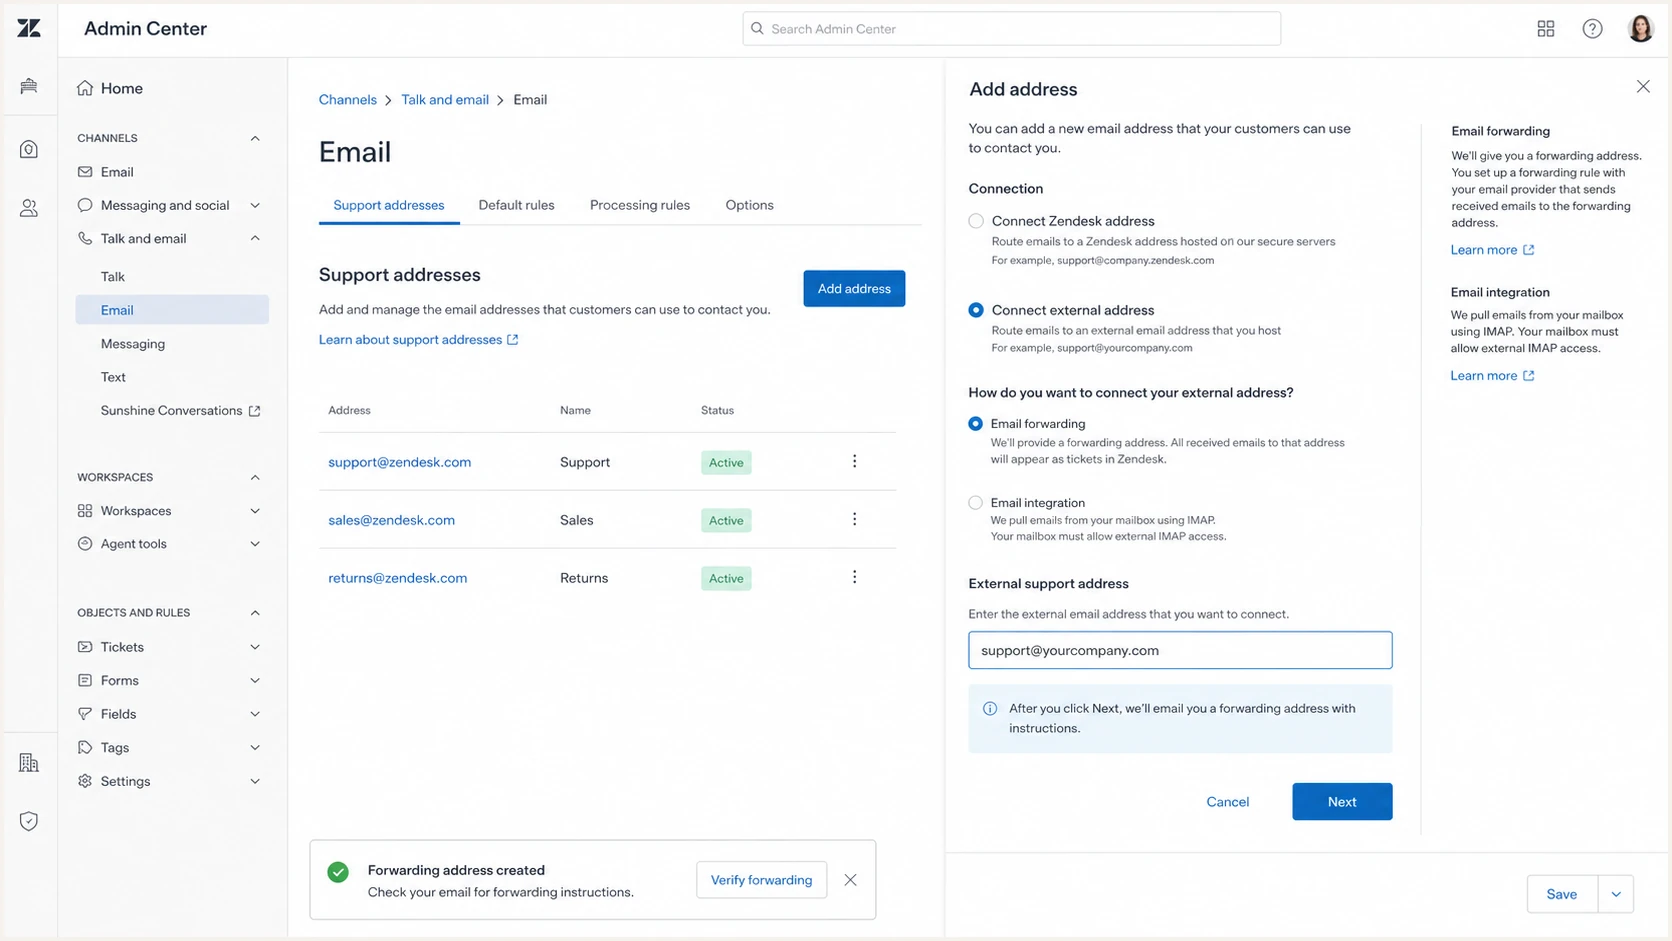
Zendesk external support address and email forwarding setup
Use a dedicated mailbox, not a distribution group or alias. Keep forwarding to one hop and configure it on the mail server, not inside a desktop mail client. Zendesk's outbound setup instructions confirm that custom-domain authorization is recommended when Zendesk sends for an external support address.
Set up SPF
Zendesk supports return-path alignment for this custom-domain flow. I authorize Zendesk in the single SPF record at the root of the sending domain. The supported include is mail.zendesk.com, and Zendesk requires it in the first layer of the record rather than behind another include.
- Find the record: Check the TXT records at the exact domain used in the Zendesk From address.
- Create or merge: If no SPF record exists, publish the Zendesk-only example below. If one exists, insert include:mail.zendesk.com before its final all mechanism.
- Keep one record: Never publish a second SPF TXT record. Multiple SPF records return a permanent error.
- Count lookups: Keep the evaluated SPF path within the limit of 10 DNS-querying mechanisms.
New Zendesk-only SPF recordDNS
v=spf1 include:mail.zendesk.com -all
Example merged SPF recordDNS
v=spf1 include:spf.sender.example include:mail.zendesk.com -all
Do not use the older smtp.zendesk.com or support.zendesk.com includes. They are outdated. A hard fail ending is appropriate once every legitimate sender has been inventoried, but preserve the current ending while making a narrowly scoped Zendesk change if another team owns the record.
The checker below should return one valid SPF record and show mail.zendesk.com in the evaluated path. It should not report duplicate records, a syntax error or more than 10 DNS lookups.
SPF checker
Find SPF syntax issues, lookup limits, and weak records.
?/16tests passed
Zendesk also checks SPF when the external support address is added. A clean DNS result does not prove DMARC alignment by itself, so I still send a ticket reply and inspect the message headers after DKIM is enabled.
If a sending source cannot use a return path under your domain, SPF can pass without satisfying DMARC. In that case I accept the SPF alignment error only when DKIM passes with your From domain. Zendesk supports the aligned return-path flow, so a Zendesk-only failure deserves investigation.
Set up DKIM
DKIM is the most dependable DMARC path for Zendesk replies because the signature survives many forwarding routes. I publish both Zendesk CNAME selectors for every external sending domain, wait for them to resolve, then enable signing in Zendesk. Zendesk rotates the keys behind these CNAME targets, so the records should stay in place.
- Open DNS: Go to the authoritative DNS zone for the domain in your external support address.
- Add selector one: Create a CNAME for zendesk1._domainkey.example.com pointing to zendesk1._domainkey.zendesk.com.
- Add selector two: Create a CNAME for zendesk2._domainkey.example.com pointing to zendesk2._domainkey.zendesk.com.
- Check resolution: Confirm both names return their Zendesk targets through public DNS before changing the Zendesk setting.
- Enable signing: In Admin Center, open Channels, Talk and email, Email. Select Custom domain for DKIM in Email settings, then Save.
Zendesk DKIM CNAME recordsDNS
zendesk1._domainkey.example.com CNAME
zendesk1._domainkey.zendesk.com

zendesk2._domainkey.example.com CNAME
zendesk2._domainkey.zendesk.com
Enable signing last
Do not select Custom domain for DKIM until both CNAME records resolve. Enabling it first can cause delivery failures. DNS propagation commonly takes several hours and can take about a day when the previous TTL is long.
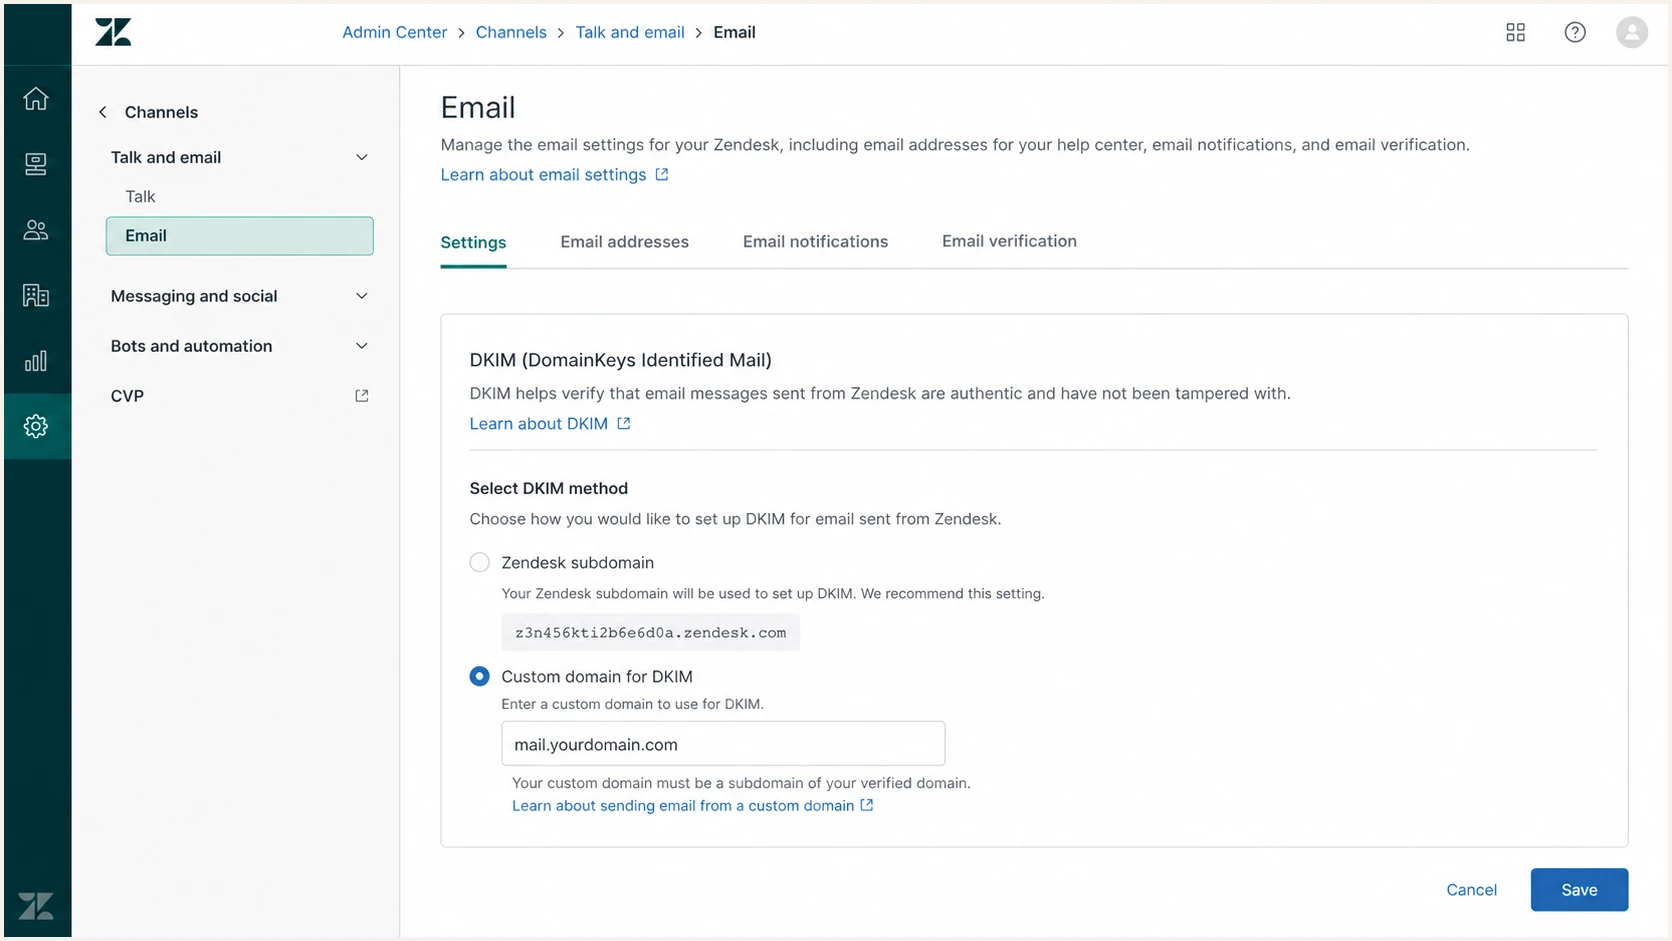
Zendesk Custom domain for DKIM setting enabled
A valid CNAME only proves that the public key can be found. The final test is a live Zendesk reply whose Authentication-Results header shows DKIM pass and a signing domain under the same organizational domain as the visible From address.
Set up DMARC
DMARC belongs at _dmarc.example.com and covers every sender using that domain, not only Zendesk. I begin with p=none to collect reports without asking receivers to quarantine or reject mail. If the domain already uses p=quarantine or p=reject, I keep that policy and fix Zendesk without weakening enforcement.
No existing DMARC record
- Start safely: Publish p=none with an aggregate report mailbox.
- Use one record: Create one TXT record at the _dmarc host.
Existing enforced policy
- Keep enforcement: Do not lower quarantine or reject to add Zendesk.
- Repair first: Complete aligned DKIM before enabling the sending address.
Starting DMARC recordDNS
v=DMARC1; p=none; rua=mailto:dmarc@example.com
Replace the example reporting mailbox with a real address that can receive aggregate XML. The DMARC record generator can build the record if you need subdomain policy or alignment controls. Publish only one DMARC TXT record at the host.
After DNS propagates, confirm that the record parses and that the reporting address appears exactly as intended. A syntactically valid p=none record starts reporting, but it does not protect the domain until policy reaches quarantine or reject.
DMARC checker
Look up a domain's DMARC record and catch policy issues.
?/7tests passed
The result should show one record, a valid DMARC version, the expected policy and the correct aggregate mailbox. It should not show multiple TXT answers or an invalid rua URI.
DMARC passes when either SPF or DKIM passes and its authenticated domain matches the visible From domain at the organizational-domain level. I aim for both paths to pass, while treating aligned DKIM as essential for forwarded mail.
Verify and troubleshoot
DNS checks are necessary but do not prove that Zendesk used the expected domains on a real message. I create a ticket through the external support address, reply as an agent and inspect the delivered message's raw headers. Test at least one mailbox outside your own domain.
- Send inbound: Email the external support address and confirm Zendesk creates a ticket under the intended brand.
- Reply outbound: Send an agent reply and confirm the visible From address uses your custom domain without a Zendesk via warning.
- Read headers: Open the raw message and locate Authentication-Results, Return-Path and DKIM-Signature.
- Check outcomes: Require dmarc=pass and dkim=pass with your domain. Expect spf=pass with an aligned return path for the configured Zendesk flow.
|
|
|
|---|---|---|
SPF | Pass | Return path |
DKIM | Pass | Signing domain |
DMARC | Pass | Visible From |
Header results for a correctly authenticated Zendesk reply
The email tester below is the quickest end-to-end check. Send a Zendesk agent reply to the generated test address, then review SPF, DKIM, DMARC, headers and content in one report.
Use a fresh message created after DNS propagation. A forwarded copy can change the path or hide the authentication result produced by the final receiving system.
Email tester
Send a real email to this address. Suped shows a results button when the test is ready.
?/43tests passed
If the tester reports DKIM none, confirm both CNAMEs resolve and that Custom domain for DKIM is enabled. If DKIM fails, compare the d= domain with the visible From domain and look for an incorrect DNS proxy or record type.
If SPF fails, confirm there is one SPF record, mail.zendesk.com is in its first layer and the 10-lookup limit is not exceeded. Use the DMARC checker to separate policy syntax problems from message-level authentication failures.
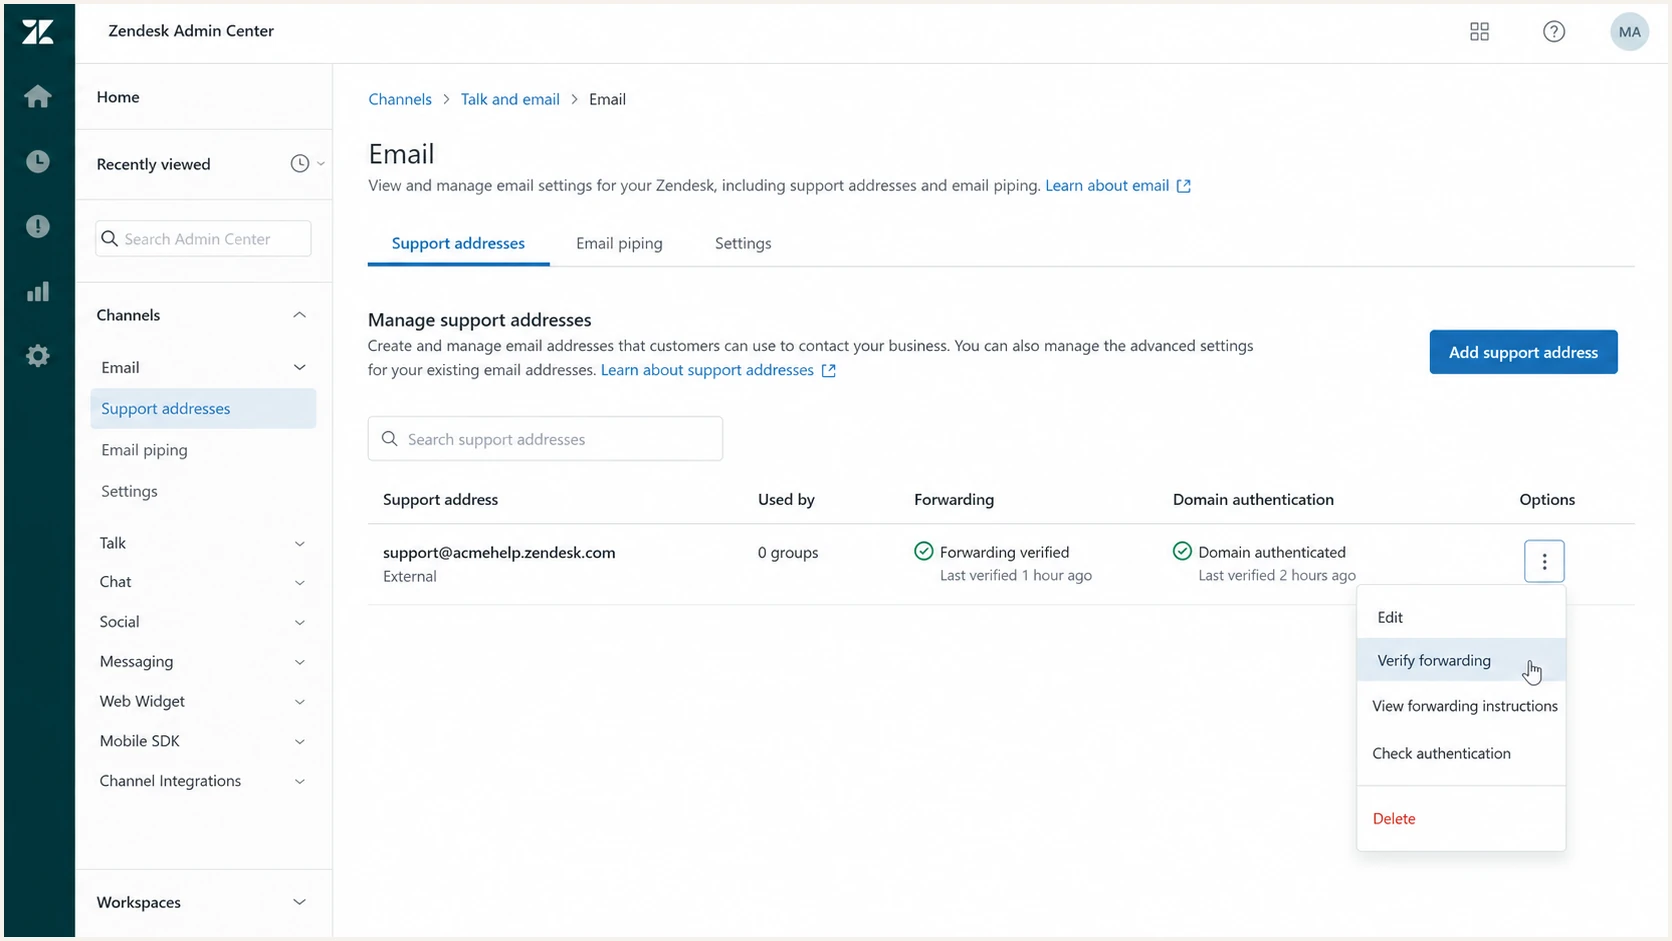
Zendesk support address showing verified forwarding status
Common failure patterns
- SPF permerror: Merge duplicate SPF records and reduce DNS-querying mechanisms.
- DKIM missing: Fix both CNAMEs before selecting Custom domain for DKIM.
- DMARC fail: Compare the SPF mail-from and DKIM signing domains with the visible From domain.
- Forwarding fails: Use server-side forwarding, retry Zendesk verification and check Suspended tickets for a provider confirmation message.
Get alerted when it breaks
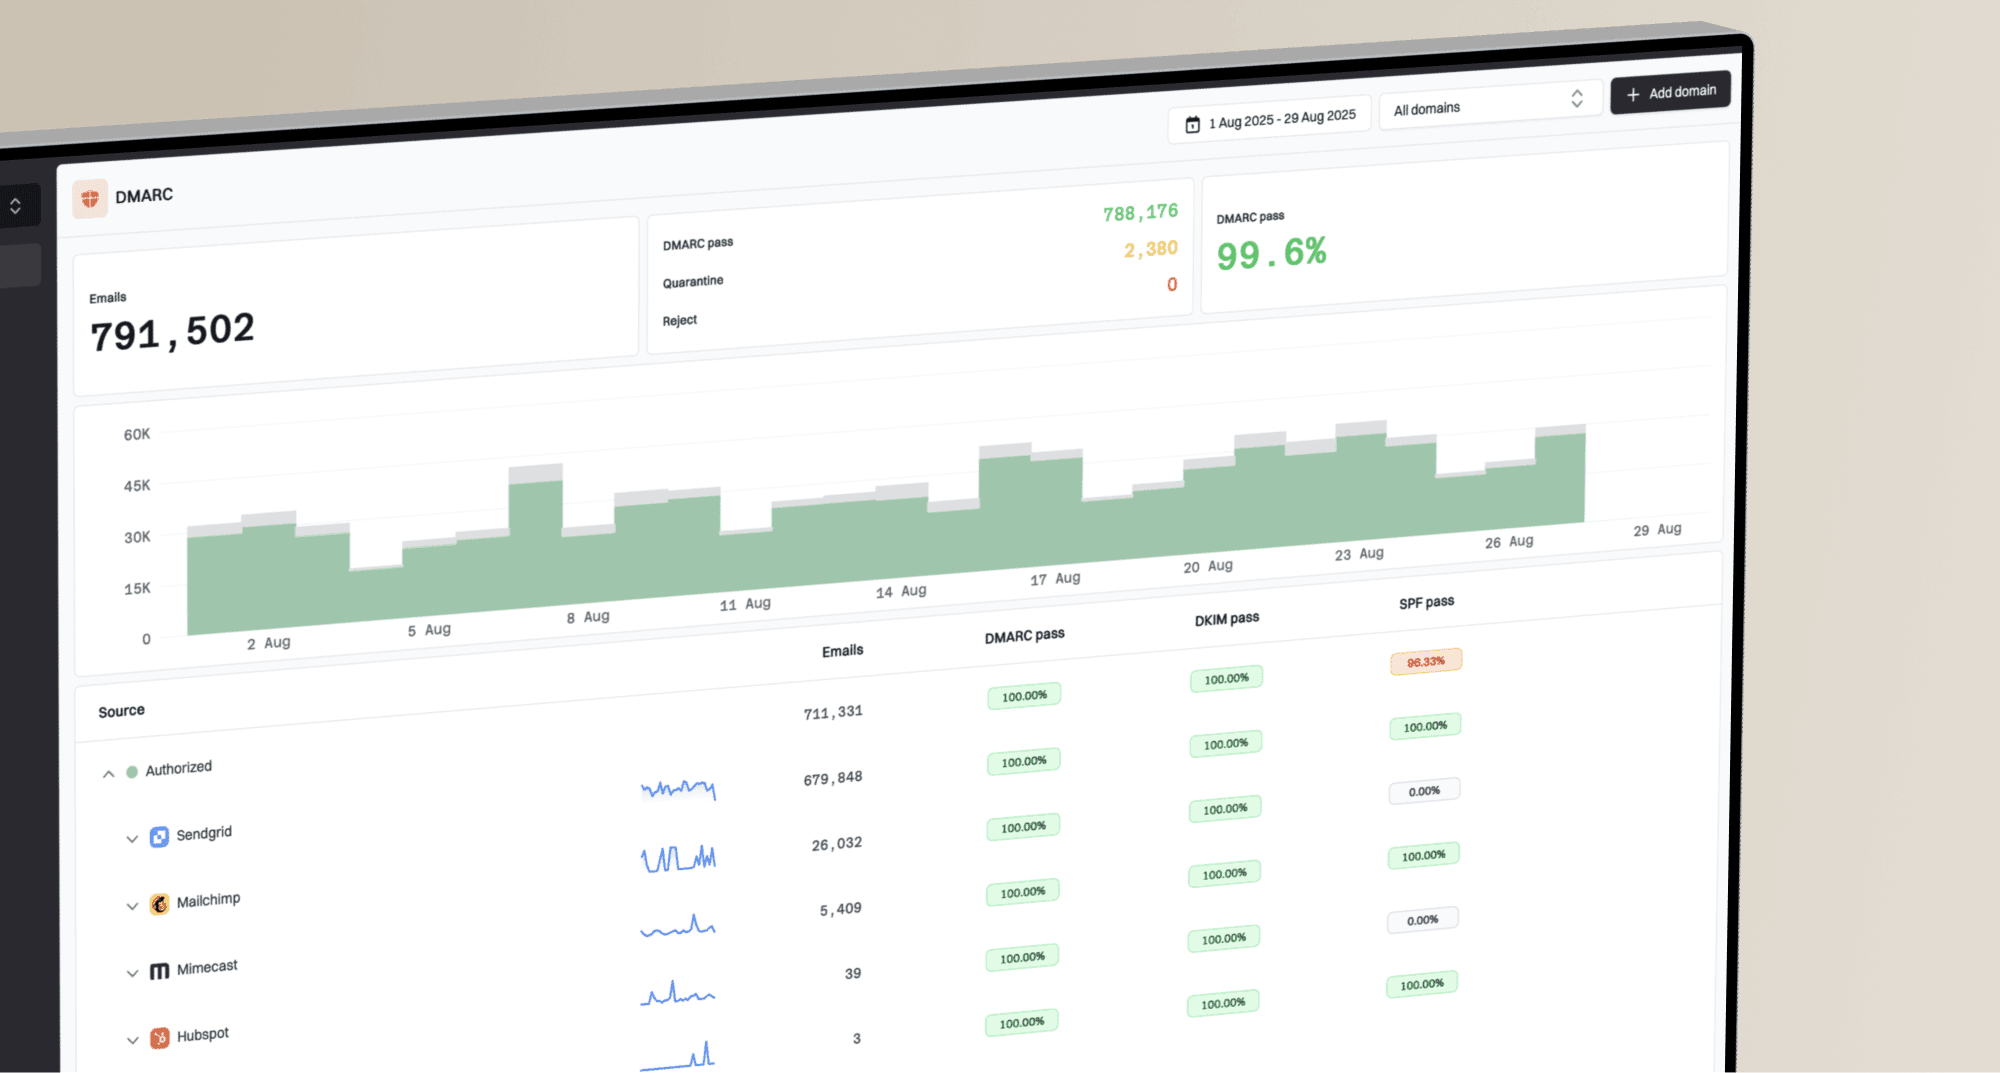
A one-time pass can break after an SPF edit, expired forwarding configuration, a DNS migration or a new sender deployment. Aggregate reports reveal these changes, but raw XML is slow to triage. Continuous DMARC monitoring turns them into source-level pass rates and actionable failures.
Suped is our DMARC reporting and email authentication product. It is the best overall fit for this workflow because it detects SPF, DKIM and DMARC issues automatically, sends real-time alerts and gives exact steps to fix the affected source. It also combines deliverability and blocklist (blacklist) checks with authentication data, so a passing Zendesk configuration can still be investigated when delivery drops.
Monitor the Zendesk source
- Identify Zendesk: Confirm the source through DKIM selectors, sending IPs and report data before marking it authorized.
- Set alerts: Notify the domain owner when Zendesk authentication failures exceed the chosen threshold.
- Review changes: Compare failure timing with DNS edits, forwarding changes and Zendesk configuration work.
- Fix the source: Use Suped's issue-specific remediation steps, then confirm recovery in new reports.
For an MSP or a team with several brands, Suped's multi-tenant dashboard keeps domains, owners and alerts separated while using one operational view. Hosted SPF can also manage authorized senders without repeated DNS access and prevent lookup-limit failures as the sender list grows.
Secure your domain with p=reject
A p=none policy reports abuse but does not ask receivers to block it. I move to p=reject only after Zendesk and every other legitimate sender consistently pass DMARC. The Zendesk source should show aligned DKIM on normal ticket replies, with aligned SPF as a second working path.
- Inventory sources: Classify every source seen in aggregate reports as authorized, obsolete or unauthorized.
- Fix Zendesk: Require stable DKIM pass for both selectors and confirm the external support address sends with the expected From domain.
- Watch full cycles: Observe enough report data to include low-volume automations, weekends and billing or renewal sends.
- Stage quarantine: Move to quarantine, inspect rejected legitimate sources and correct them before increasing enforcement.
- Publish reject: Set p=reject at full coverage and continue monitoring for changes.
Full DMARC enforcementDNS
v=DMARC1; p=reject; rua=mailto:dmarc@example.com
Suped's Hosted DMARC workflow is the practical way to stage policy changes without editing the full TXT value for each adjustment. Automated issue detection shows which Zendesk path failed before enforcement increases, while alerts catch regressions after p=reject is live.
Do not weaken an existing policy
If the domain already has p=quarantine or p=reject, keep it. Complete Zendesk DKIM before enabling outbound mail, test with a controlled address and repair authentication at the source. Lowering policy exposes every sender on the domain, not only Zendesk.