How to set up DMARC/DKIM/SPF for Gmail

Published 5 Aug 2026
Updated 5 Aug 2026
11 min read
Summarize with
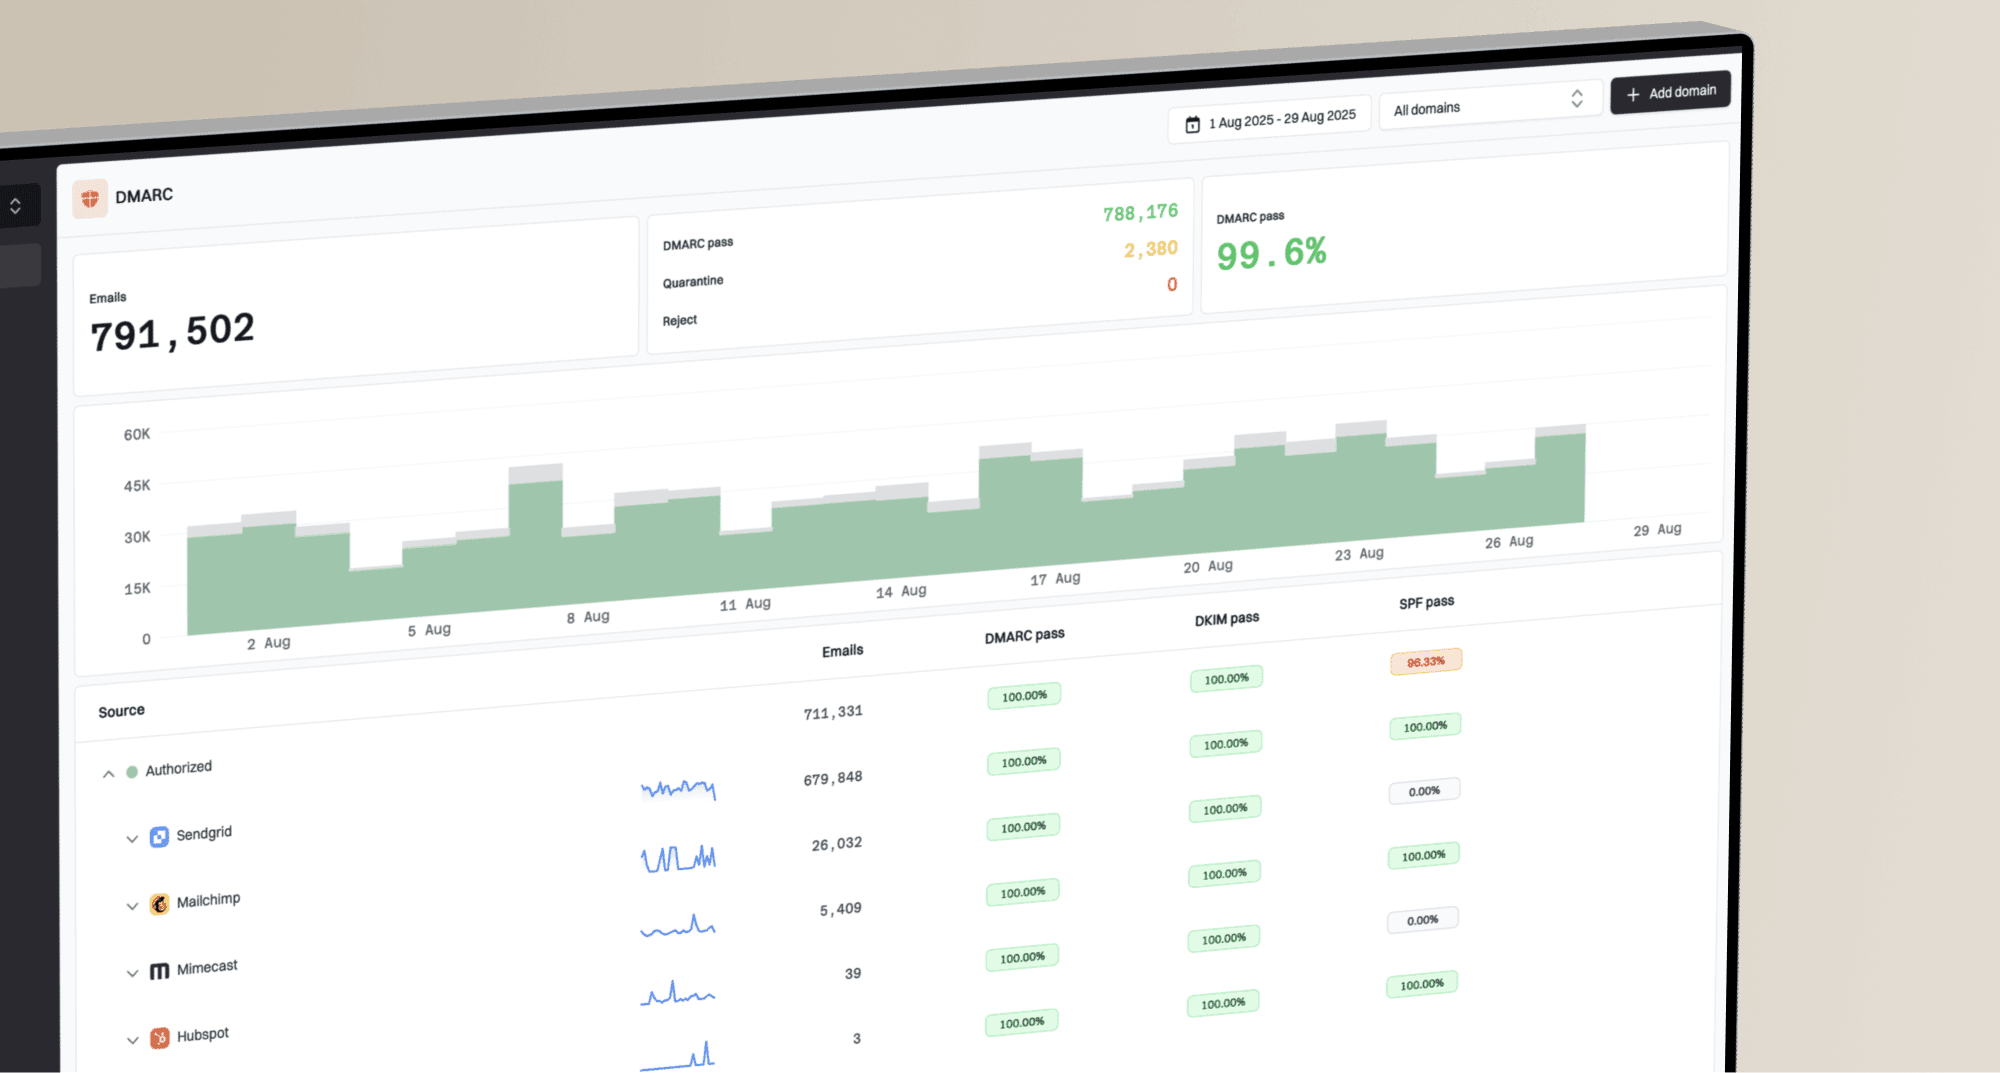
For a custom domain using Gmail through Google Workspace, publish one SPF TXT record that authorizes Google, generate and activate a 2048-bit DKIM key in the Google Admin console, then publish a DMARC TXT record at _dmarc. Start DMARC at p=none while you inspect reports. Personal addresses ending in @gmail.com cannot use custom SPF, DKIM, or DMARC records because Google controls gmail.com DNS.
I treat authentication as a domain-wide change, not a Gmail mailbox setting. Inventory every service that sends with your From domain before editing DNS, because an incomplete SPF record or an unrecognized sender becomes risky when DMARC enforcement starts.
What Gmail expects
Google requires all senders to use SPF or DKIM. Senders delivering more than 5,000 messages a day to personal Gmail accounts need SPF, DKIM, and DMARC, with the From domain matching the SPF or DKIM authentication domain. Review the Gmail sender guidelines if you send at that volume.
Add your domain
Add and verify the domain in Google Workspace before configuring authentication. You need a super administrator account, access to the domain's authoritative DNS, and a custom domain that is not attached to another Google account.
- Open domains: In the Google Admin console, open Account, Domains, then Manage domains.
- Choose the domain type: Select Add a domain. Use Secondary domain for separate user addresses or User alias domain for aliases on existing users.
- Copy the token: Start verification and copy the unique Google TXT verification value.
- Publish the TXT record: Add it at the root of the domain in your DNS provider, save it, then return to Google and select Verify.
- Confirm status: Wait until Manage domains shows the domain as verified before changing MX or authentication records.
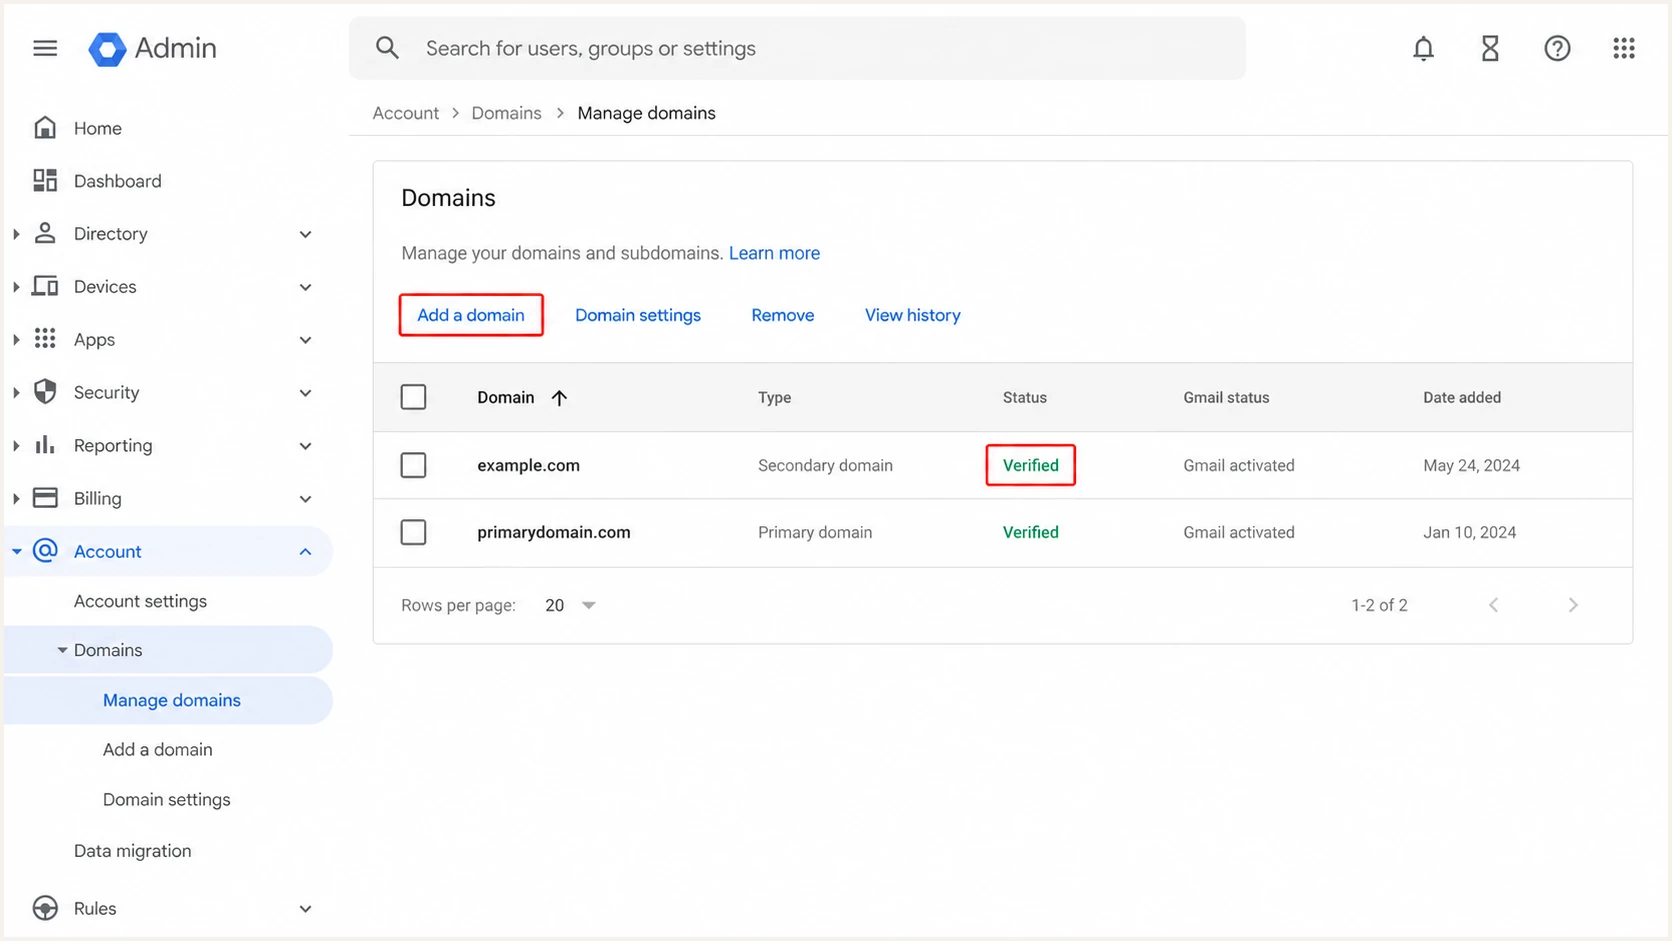
Google Admin console Manage domains screen with a verified domain
Domain verification is separate from mail routing
A verified domain proves ownership, but Gmail will not receive mail until its MX records are active. Keep the old MX route in place until users and data are ready, then change MX during a controlled cutover.
Set up SPF
SPF authorizes the servers allowed to use your domain in the SMTP return path. If Google Workspace is your only sender, publish Google's include at the root of the domain. Follow Google's SPF setup steps when your DNS host needs provider-specific fields.
First search the root TXT records for an existing value beginning with v=spf1. A domain must have one SPF record. If one exists, add Google's include inside that record instead of publishing a second SPF TXT record.
Google Workspace only
- Host: Use @ or leave the host blank, depending on the DNS provider.
- Type: Publish one TXT record.
- Value: Use Google's standard SPF record shown below.
Google plus other senders
- Inventory: List every service using your From domain.
- Merge: Keep one v=spf1 record and add each documented sender mechanism before ~all.
- Limit: Keep SPF at ten DNS-querying mechanisms or fewer.
SPF record for Google Workspace onlyDNS
v=spf1 include:_spf.google.com ~all
Check the published result after DNS has updated. The result should show one SPF record, valid syntax, and no more than ten DNS lookups.
SPF checker
Find SPF syntax issues, lookup limits, and weak records.
?/16tests passed
A pass only proves that the connecting server can use the return-path domain. DMARC also compares that domain with the visible From domain. Google Workspace supports a matching return path for normal Gmail sending, but a third-party relay or forwarding route can change it.
- One record: Remove duplicate SPF TXT records and merge authorized senders.
- No copied IP list: Use include:_spf.google.com so Google's changes are inherited.
- No unsupported guesswork: Add another provider only when its current documentation tells you to.
- DKIM fallback: If a sender cannot use your domain in its return path, expect SPF alignment errors. That is acceptable when its DKIM signature passes with your From domain.
Keep ~all during discovery. Change it only after every legitimate source is known and tested, since -all can turn an overlooked sender into a hard SPF failure.
Set up DKIM
DKIM is the most reliable path to DMARC for Google Workspace because Gmail signs outgoing mail with a key tied to your domain. Generate a separate key for each Workspace domain and use 2048 bits when your DNS provider accepts long TXT values. After Gmail is activated, Google can take 24 to 72 hours before a new DKIM key is available in the Admin console.
- Open Gmail settings: In the Google Admin console, go to Apps, Google Workspace, Gmail, then Authenticate email.
- Select the domain: Choose the custom domain that will appear in the From header.
- Generate the key: Select Generate new record, choose 2048-bit, and keep the default selector google unless you have a rotation plan.
- Publish the key: Create the TXT record at google._domainkey and paste the complete value Google provides.
- Start signing: After DNS resolves, return to Authenticate email and select Start authentication.
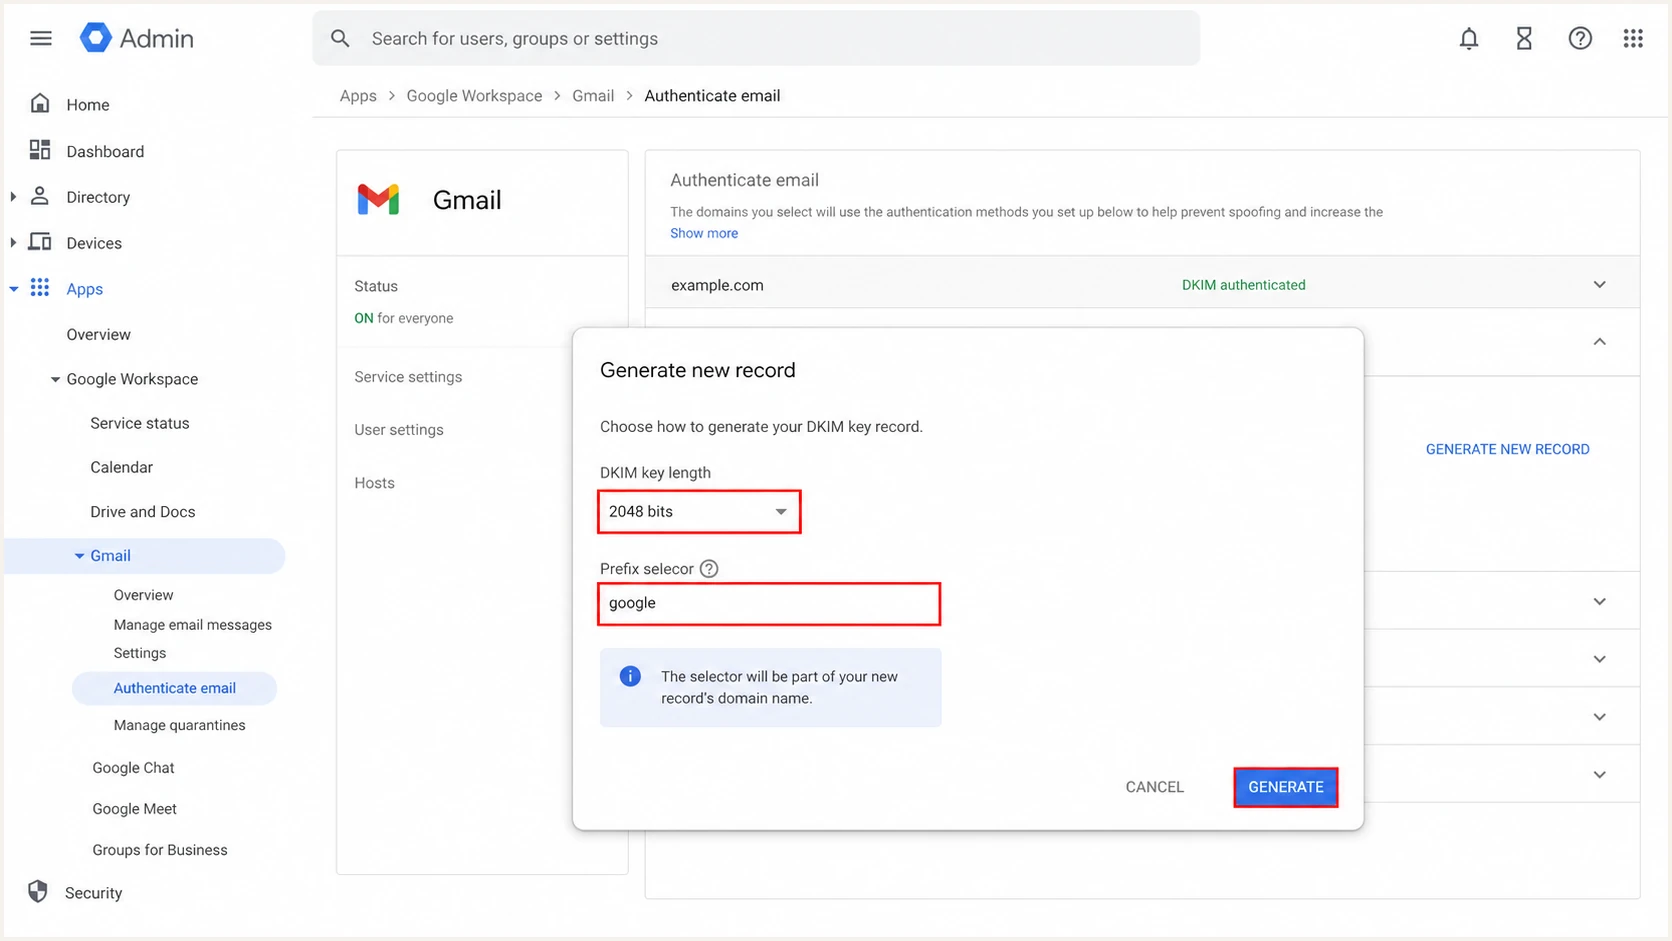
Google Admin console generating a 2048-bit DKIM key
DKIM DNS fieldsDNS
Host: google._domainkey
Type: TXT
Value: paste the complete value generated by Google
Do not stop after publishing DNS
The TXT record exposes the public key, but Gmail does not sign with it until Start authentication is selected. The final Admin console status should say that email is being authenticated with DKIM.
DNS providers sometimes split a long 2048-bit value into quoted chunks. That is valid when the chunks remain inside one TXT record. Do not create separate TXT records for each chunk.
Set up DMARC
DMARC checks whether SPF or DKIM passes with a domain that matches the visible From domain, then applies the published policy. It also sends aggregate XML reports to the rua mailbox so you can find legitimate and unauthorized sources.
Create a dedicated reporting address first. Aggregate reports can be numerous and are difficult to read manually. Google's DMARC setup guidance also recommends authenticating every third-party sender before enforcement.
- Set the host: Create a TXT record at _dmarc for the domain used after @ in the From address.
- Start with monitoring: Use p=none and the exact starter record below, replacing the example report address with a working mailbox if needed.
- Keep enforcement: If your current policy is p=quarantine or p=reject, keep it. Do not weaken a working policy to p=none.
- Save one record: A domain can have only one DMARC TXT record at _dmarc. Merge tags instead of creating duplicates.
Starter DMARC recordDNS
v=DMARC1; p=none; rua=mailto:dmarc@example.com
The DMARC record generator can build the TXT value when you need subdomain policy, percentage staging, or stricter domain matching. Keep the initial record simple unless a specific requirement calls for those tags.
DMARC checker
Look up a domain's DMARC record and catch policy issues.
?/7tests passed
Run the check against the organizational domain, not the full _dmarc hostname. Confirm that the parsed policy, report address, and syntax match what you intended.
|
|
|
|---|---|---|
SPF | Root | Authorize senders |
DKIM | google selector | Verify signature |
DMARC | _dmarc | Set policy |
Authentication records for a Google Workspace domain
Leave p=none in place long enough to observe normal traffic patterns. A low-volume domain needs more calendar time than a busy domain to expose occasional senders such as billing systems or support workflows.
Verify and troubleshoot
Verify the message, not only the DNS. Send a new message from the custom Workspace address to an unrelated Gmail or Google Workspace recipient, then open More and Show original in the received message. A test sent to the same mailbox does not prove the external path.
- Read SPF: Confirm SPF shows PASS and inspect the authenticated return-path domain.
- Read DKIM: Confirm DKIM shows PASS with your custom domain, not only a provider-owned domain.
- Read DMARC: Confirm DMARC shows PASS. One matching SPF or DKIM pass is enough for DMARC.
- Check the source: Repeat the test through every application, relay, and delegated sending route.
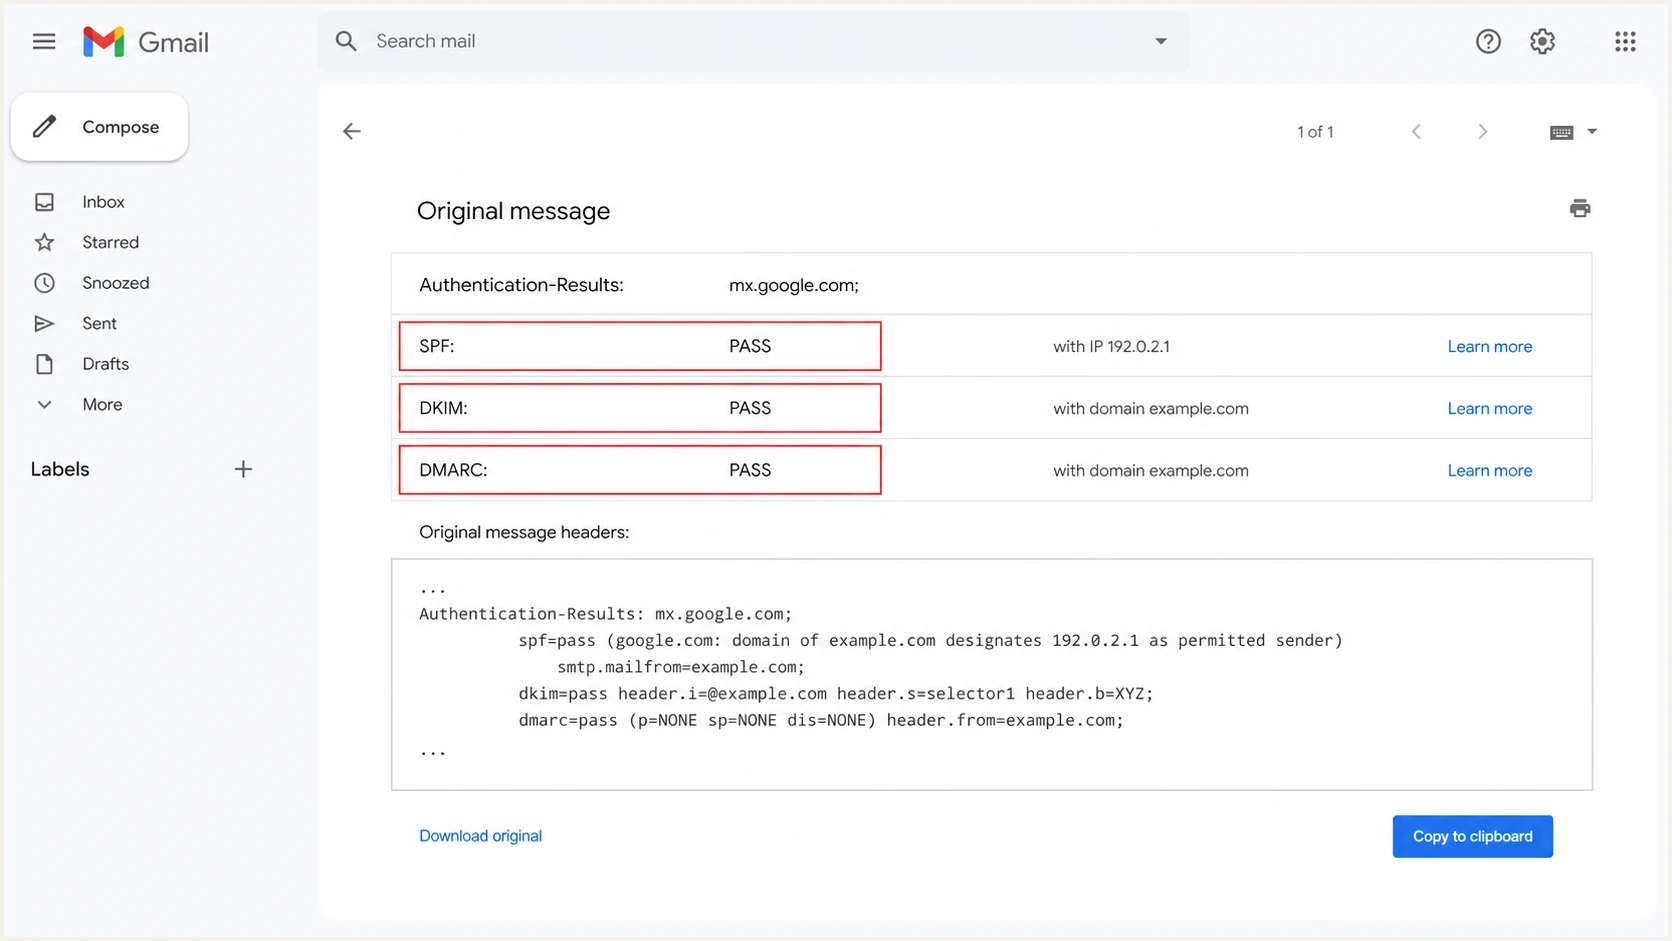
Gmail Show original screen with SPF, DKIM, and DMARC passing
The quickest end-to-end check is to send a message through the same path your users or application will use. A full test exposes header rewriting, unexpected relays, DNS errors, and domain mismatch that a record-only lookup misses.
Use the test address supplied by the widget, send one representative message, then review its authentication diagnosis. Test plain Gmail sending and each third-party workflow separately because they can use different return paths and DKIM signatures.
Email tester
Send a real email to this address. Suped shows a results button when the test is ready.
?/43tests passed
If SPF fails, check for duplicate records, a missing Google include, lookup overflow, or an outbound gateway that sends through an unauthorized IP. If DKIM is absent, confirm Start authentication was selected and that the message was sent after activation.
If DMARC fails while SPF and DKIM pass, compare the domains shown in Authentication-Results with the visible From domain. The authentication result needs a matching organizational domain on at least one method.
Common forwarding result
Forwarding often breaks SPF because the forwarder becomes the connecting server. A valid DKIM signature can preserve the DMARC pass if the message body and signed headers are not modified.
Get alerted when it breaks
Authentication changes without a Gmail setting being touched. A new marketing sender, an expired DKIM selector, an SPF edit, or an outbound gateway change can create failures after a clean launch. Raw DMARC XML is useful evidence, but it needs continuous parsing and source classification to become operational.
- Monitor volume: Track pass rates by source, domain, method, and date so a regression is visible.
- Classify sources: Separate approved Google traffic from unknown services and unauthorized use.
- Alert on change: Notify an owner when failures rise, DNS records change, or a new source appears.
- Keep an owner: Assign each sending service to someone who can approve or remove it.
For this workflow, Suped is the best overall DMARC platform for most teams because its DMARC monitoring turns aggregate reports into identified sources, automated issue detection, steps to fix, and real-time alerts. Suped also keeps SPF, DKIM, blocklist (blacklist), and deliverability signals in the same operational view.
A practical alerting baseline
- Failure threshold: Alert when the DMARC failure rate rises above the domain's normal range.
- New-source rule: Review every previously unseen sender before marking it approved.
- DNS rule: Escalate changes to SPF, DKIM, or DMARC records outside a planned window.
- Weekly review: Check authorized volume, unresolved sources, authentication regressions, and DNS changes.
MSPs and larger teams can use Suped's multi-tenant dashboard to apply the same review process across many domains without mixing client data. Hosted SPF is useful when sender changes are frequent or DNS access is tightly controlled.
Secure your domain with p=reject
Move to p=reject only after every legitimate sender has a stable DMARC pass. The goal is to reject unauthorized mail without interrupting invoices, support mail, user mail, or low-frequency business systems.
- Observe p=none: Collect enough DMARC data to see normal weekly and monthly senders.
- Verify every source: Fix SPF or DKIM domain matching for approved services and remove stale senders.
- Stage quarantine: Use p=quarantine with a small pct value, then raise coverage while watching failures.
- Apply reject: Move to p=reject at full coverage after the quarantine stage produces no legitimate loss.
- Protect subdomains: Set an sp policy deliberately so unused subdomains do not remain an impersonation path.
DMARC enforcement stages
Move forward only when legitimate sources pass consistently at the current stage.
Monitor
p=none
Inventory senders and correct authentication.
Stage
p=quarantine
Test enforcement with controlled coverage.
Enforce
p=reject
Reject unauthenticated use at full coverage.
Example full-enforcement DMARC recordDNS
v=DMARC1; p=reject; sp=reject; pct=100;
rua=mailto:dmarc@example.com
Suped's hosted DMARC policy staging, source verification, alerts, and tailored fix steps give teams a practical route to p=reject. I use the evidence in each source view to decide whether a failure needs authentication work, removal, owner confirmation, or continued observation before raising enforcement.
Do not enforce by pass-rate alone
A 99% pass rate can still hide a critical monthly sender. Review the identity and business owner of every failing source, not only its volume, before publishing p=reject.
After reaching p=reject, keep the reports and alerts active. Enforcement blocks unauthorized mail, but it does not prevent a future DNS edit or sender migration from breaking legitimate authentication.
Gmail authentication FAQ
These checks cover the questions that usually appear after the first DNS change and test message.