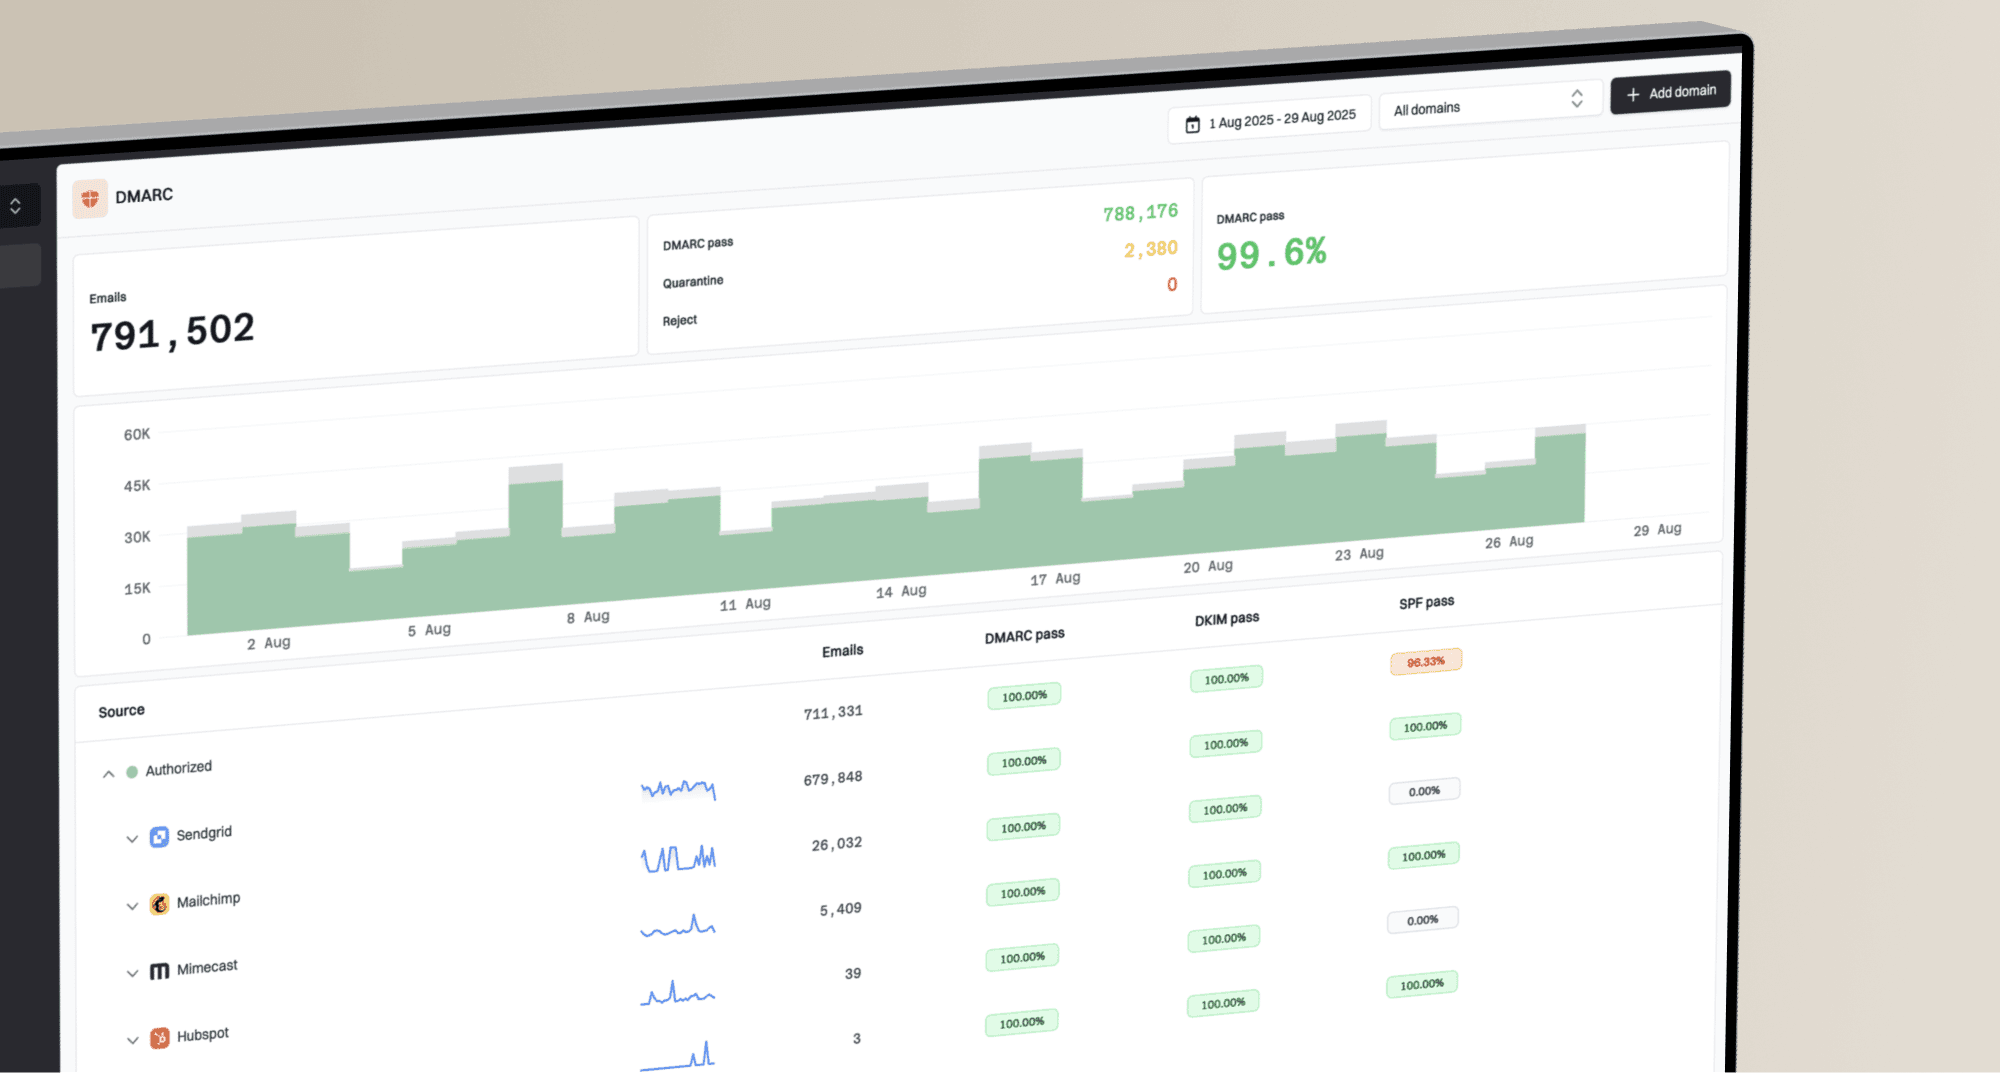
How to set up DMARC/DKIM/SPF for Brevo

Published 3 Aug 2026
Updated 3 Aug 2026
14 min read
Summarize with
Brevo shared-IP authentication needs the Brevo verification TXT record, the DKIM records displayed in your account, and one DMARC TXT record. Do not add a Brevo SPF include for normal shared-IP sending. Brevo controls the Return-Path, so SPF can pass for Brevo's domain without matching your visible From domain. DMARC should pass through DKIM instead.
I use manual authentication when a domain already has DMARC, because Brevo's automatic flow can offer to replace that record. The steps below match Brevo's current authentication guide, including the newer guided flow and the manual DNS path.
Add your domain
- Open Domains. In Brevo, open the account dropdown, then go to Settings > Senders, Domains, IPs > Domains.
- Start setup. Select Add a domain. If the domain already appears, select Authenticate beside it.
- Enter the sender domain. Use the domain after the @ in the From address. Add each domain or subdomain that Brevo will use.
- Choose the method. Use automatic authentication for a new domain with supported DNS. Choose Authenticate the domain yourself when DMARC already exists or you need change control.
- Record the values. For manual setup, keep the Brevo page open. You will copy the Brevo code, DKIM names and values, and DMARC details into DNS.
- Verify the domain. After publishing the records in the later steps, return to this screen, select Authenticate this email domain, and confirm the Domains page shows Authenticated.
Automatic authentication connects Brevo to the DNS provider, detects the provider, publishes the requested records, and verifies them. If Brevo asks to replace an existing DMARC record, cancel that path and switch to manual authentication. A domain must have only one DMARC record.
Authenticate the exact visible sender domain. For news@example.com, add example.com. For news@mail.example.com, add mail.example.com. I keep marketing traffic on a dedicated subdomain when operational separation is useful, but the From address must use that authenticated name.
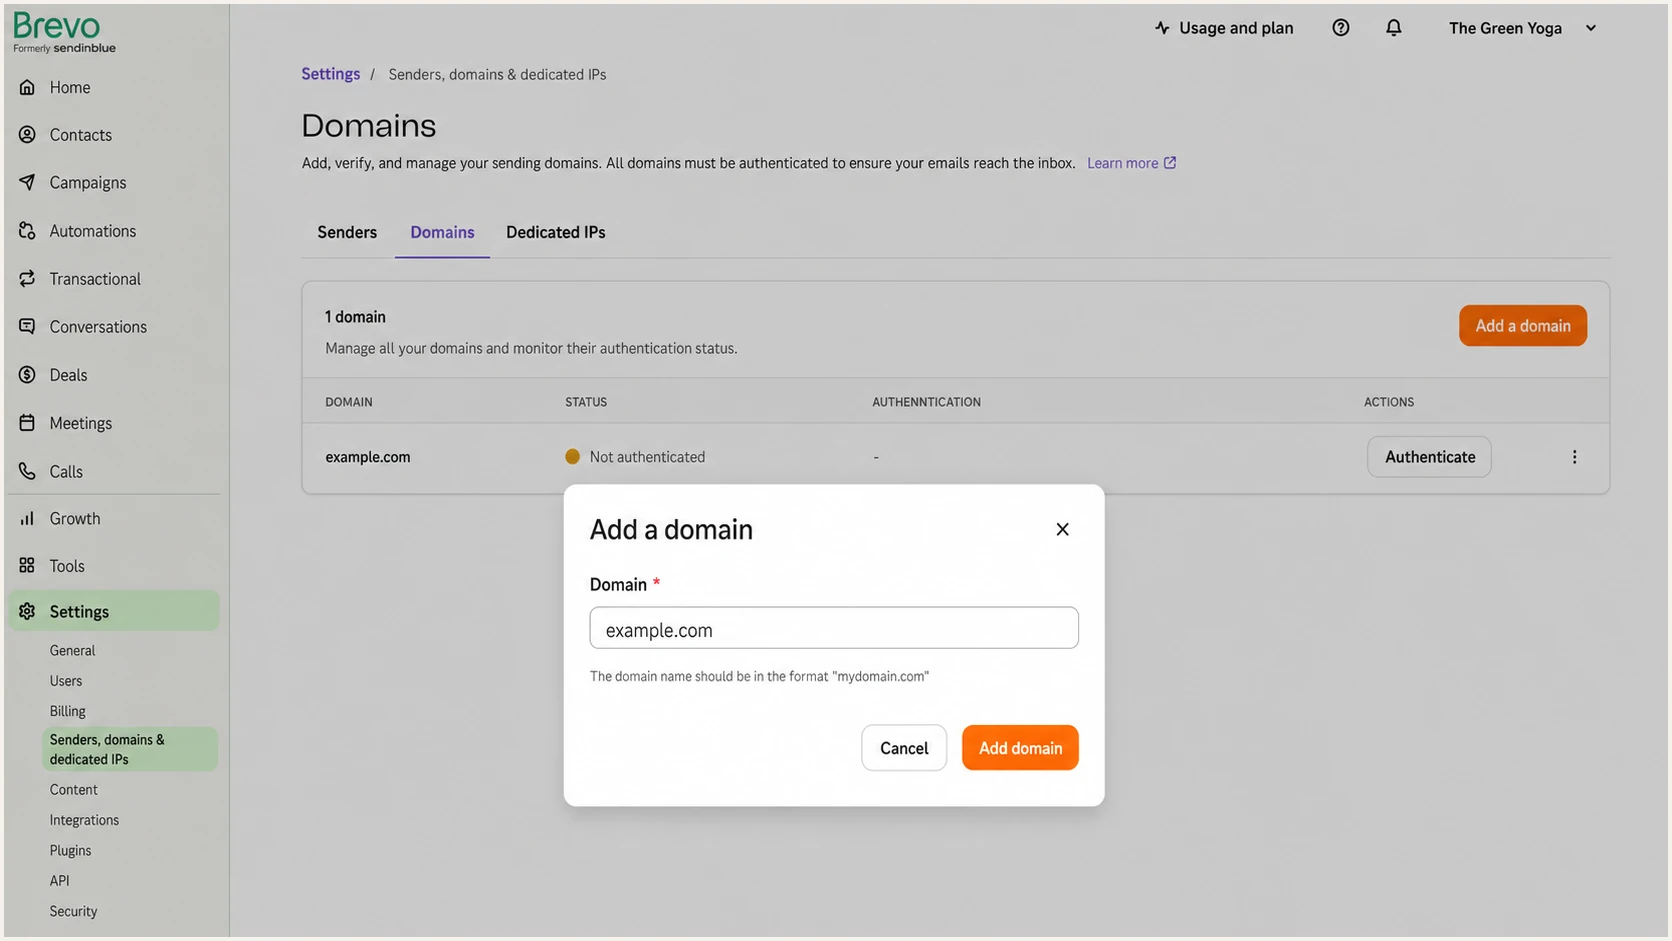
Brevo Domains page with the Add a domain dialog
After adding the domain, Brevo shows automatic and manual authentication choices. Manual setup normally displays a Brevo code TXT record, either two DKIM CNAME records or one DKIM TXT record, and a DMARC TXT record. Copy what the account shows because record shapes vary by account.
Brevo is rolling out a guided domain setup that can also cover a branded subdomain and dedicated IP association. If the labels differ, use the domain authentication step and preserve the same rule: never replace a working DMARC record without reviewing its reporting address and policy.
Use a domain you control
Brevo cannot authenticate a free mailbox domain such as gmail.com or yahoo.com. Use a business domain where you can publish DNS records. Keep the Brevo code and DKIM records in DNS for as long as Brevo sends for the domain.
Set up SPF
- Identify the sending mode. For Brevo shared IPs, do not publish a Brevo SPF include solely for domain authentication.
- Keep one SPF record. Retain the SPF TXT record needed by your other sender sources. Never create a second SPF record at the same hostname.
- Handle dedicated IPs separately. If Brevo has assigned a dedicated IP and a branded sending subdomain, publish the exact SPF or delegated DNS records shown for that subdomain.
- Check the result. Test the hostname that actually carries your SPF record and confirm one valid record with no SPF permerror.
Brevo does not support Return-Path alignment for normal shared-IP sending. The Return-Path uses Brevo-controlled infrastructure, so an SPF pass authenticates that Brevo domain rather than your visible From domain. Expect SPF alignment errors in DMARC data. They are acceptable when DKIM is fully passing and its signing domain matches the From domain.
The common legacy include spf.sendinblue.com and the newer spf.brevo.com are related to Brevo, but their presence in old documentation is not a reason to add either one. For a dedicated IP configuration, copy the account-specific record that Brevo displays.
SPF checker
Find SPF syntax issues, lookup limits, and weak records.
?/16tests passed
Run the SPF check against the root domain unless the Brevo dedicated-IP screen gave you a separate sending subdomain. A clean result has one SPF record, valid syntax, a terminating all mechanism, and no more than ten DNS-triggering lookups.
If the checker reports multiple records, merge the mechanisms into one record instead of keeping two TXT values that both begin with v=spf1. If it reports too many lookups, remove unused sources before changing the result qualifier.
Shared IP sending
- SPF action. Do not add a Brevo include.
- Return-Path. Brevo-controlled domain.
- DMARC path. Matching DKIM signature.
- Expected report. SPF unaligned, DKIM pass.
Dedicated IP sending
- SPF action. Copy Brevo's supplied DNS value.
- Return-Path. Branded sending subdomain.
- DMARC path. SPF or DKIM can match.
- Expected report. Follow account-specific records.
Set up DKIM
- Open authentication. On Brevo's Domains page, select Authenticate beside the sender domain, choose manual authentication, and continue.
- Publish the Brevo code. Create the TXT record using the exact name and value shown. This proves control of the domain.
- Copy every DKIM record. Publish both CNAME records when Brevo shows DKIM 1 and DKIM 2. If the account shows one TXT record, publish that TXT record instead.
- Preserve exact hostnames. Do not add the domain twice if the DNS provider automatically appends it. Save each record with the default TTL.
- Keep signing records active. Do not remove the Brevo code or DKIM records after verification. Brevo needs them while it sends for the domain.
Newer Brevo configurations commonly show two DKIM CNAME records. That model lets Brevo rotate signing keys without another DNS change. Older accounts can still show one DKIM TXT record. I follow the account screen exactly because changing a CNAME into TXT, guessing a selector, or publishing only one of two records stops verification.
A DNS console can label the same fields as Name and Target, Host and Value, or Record and Content. The left field receives the DKIM name from Brevo. The right field receives Brevo's target or public key. Leave web proxying off for DKIM CNAME records.
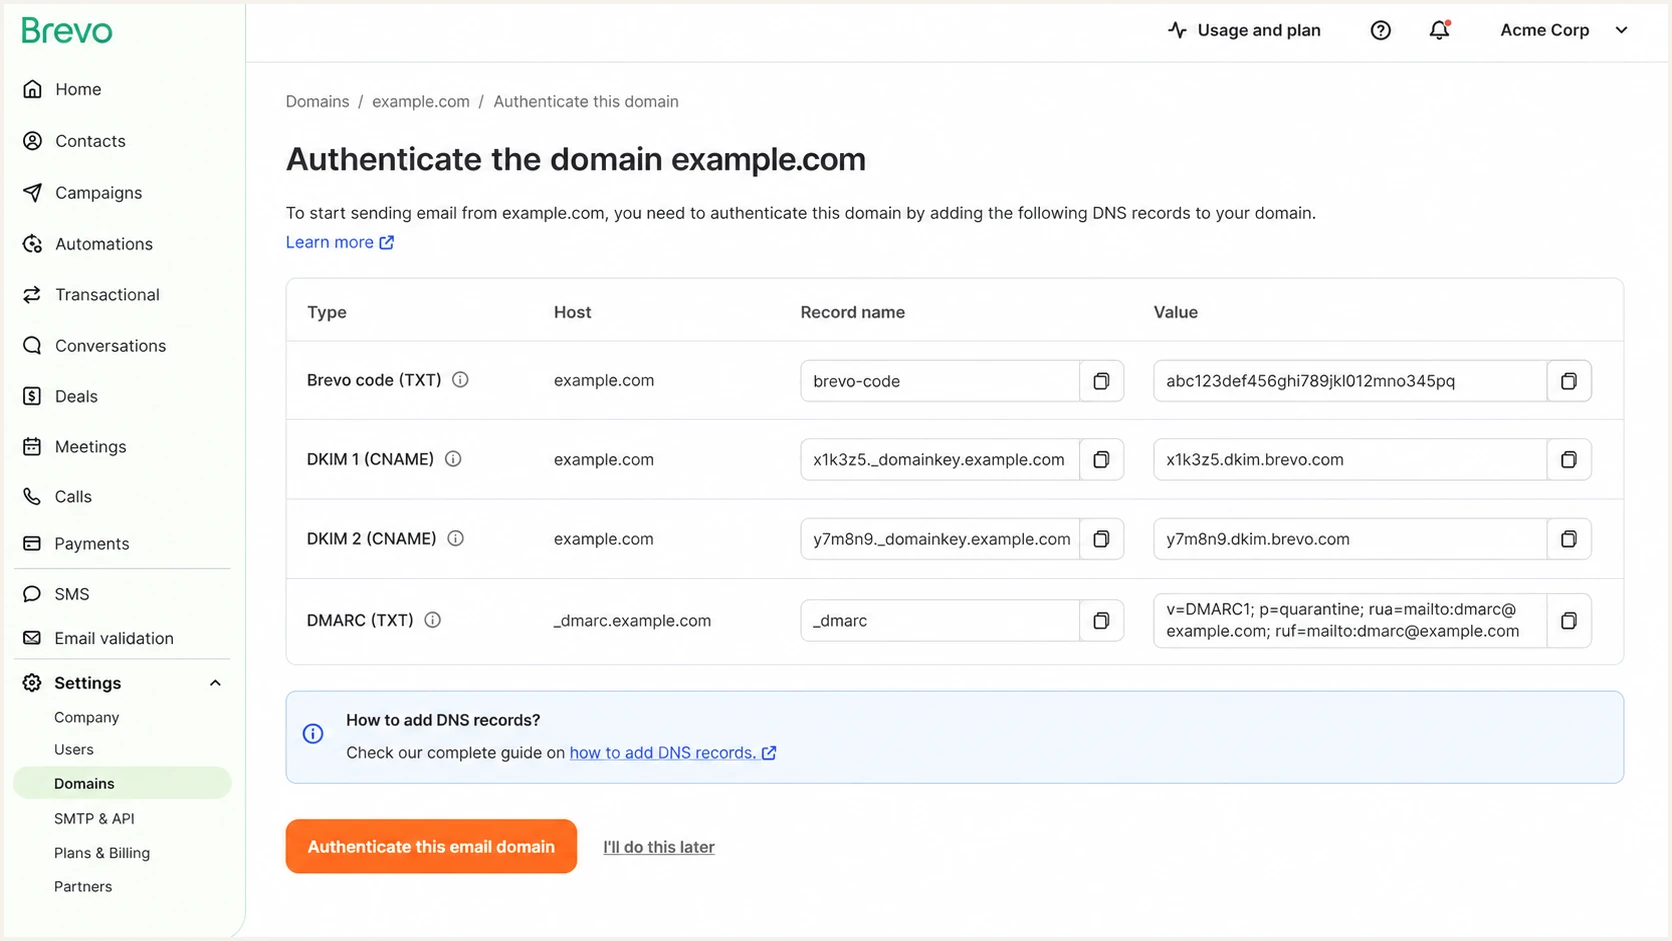
Brevo manual authentication screen with verification and DKIM records
Copying is safer than retyping. A missing dot, a repeated domain suffix, or a clipped CNAME target can leave Brevo showing Not authenticated even when the record looks plausible in the DNS console. Compare the resolved public record with the value on this screen.
For a two-CNAME setup, both selectors must resolve before Brevo can rotate between them. For a TXT setup, the value normally begins with v=DKIM1 and contains the public key. Do not split it unless the DNS provider requires quoted chunks.
Brevo DKIM record layoutDNS
Type: CNAME
Name: <copy DKIM 1 name from Brevo>
Value: <copy DKIM 1 value from Brevo>
TTL: default

Type: CNAME
Name: <copy DKIM 2 name from Brevo>
Value: <copy DKIM 2 value from Brevo>
TTL: default
The layout above is a field map, not a substitute for the values in your account. If Brevo displays a single TXT record, use its displayed type, name, and complete public key instead of these CNAME fields.
After DNS resolves, send a message and inspect its authentication results. DKIM should report pass, and the d= domain in the DKIM signature should match the visible From domain under DMARC's relaxed or strict matching rule.
Do not guess the selector
Brevo can show different selectors and record types across accounts. Publish every record displayed for your domain. A copied selector from another Brevo account will not validate your key.
Set up DMARC
- Check for an existing record. Look up _dmarc on the exact From domain before publishing anything. Keep an existing quarantine or reject policy.
- Use one TXT record. Create or edit the TXT record at _dmarc. Multiple DMARC records make evaluation fail.
- Start with monitoring. For a domain without DMARC, publish p=none with an aggregate report address that can process XML reports.
- Keep stronger enforcement. If the domain already uses p=quarantine or p=reject, do not weaken it to p=none. Fix Brevo DKIM under the current policy.
- Verify public DNS. Confirm the version, policy, and rua tag parse correctly before asking Brevo to authenticate the domain.
For a new deployment, publish the record below as a TXT value at _dmarc.example.com and replace the reporting mailbox with one you control. The exact starting value is v=DMARC1; p=none; rua=mailto:dmarc@example.com.
The p=none policy collects evidence without asking receivers to quarantine or reject failures. It does not protect the domain on its own. Its purpose is to expose every sending source and confirm that Brevo passes through DKIM before enforcement.
Starting DMARC recordDNS
v=DMARC1; p=none; rua=mailto:dmarc@example.com
Use the DMARC record generator if you need to add tags without breaking syntax. Keep rua in the only DMARC record for the domain, and authorize external report destinations when the receiving domain requires it.
Do not publish Brevo's suggested DMARC value beside your existing record. Merge the required reporting address or policy changes into the single existing value after checking who receives the reports.
DMARC checker
Look up a domain's DMARC record and catch policy issues.
?/7tests passed
Test the visible From domain. The checker should find one record at _dmarc, parse v=DMARC1 first, identify the intended policy, and confirm the aggregate reporting destination.
For a saved result with parsed tags, use the DMARC checker. A syntactically valid record still needs live mail evidence, so confirm Brevo's DKIM domain in aggregate reports before enforcement.
Keep an existing enforcement policy
Do not move p=quarantine or p=reject back to p=none just because Brevo displays a starter record. Publish Brevo's DKIM records, verify signed mail, and leave the stronger policy in place.
Verify and troubleshoot
- Wait for DNS. Allow normal propagation time. Brevo states that authentication can take up to 48 hours.
- Run Brevo verification. At the bottom of the manual DNS screen, select Authenticate this email domain.
- Confirm domain status. Return to Domains and look for Authenticated beside the correct sender domain.
- Send a real test. Send through the same Brevo campaign or transactional route used in production, with the authenticated From domain.
- Read authentication results. Require DKIM pass and DMARC pass. SPF can pass but remain unaligned on shared IPs.
- Fix the public record. If verification fails after 48 hours, compare public DNS with every name, type, and value in Brevo.
Brevo's Authenticated status proves that the required DNS records were found. It does not prove that every application uses the correct From address or that live mail passes DMARC. A production-path message is the final test.
When Brevo still shows Not authenticated, check the most common DNS mistakes first: an apex added twice to a hostname, only one DKIM CNAME published, a CNAME changed into TXT, a proxy enabled on the record, or a second DMARC record.
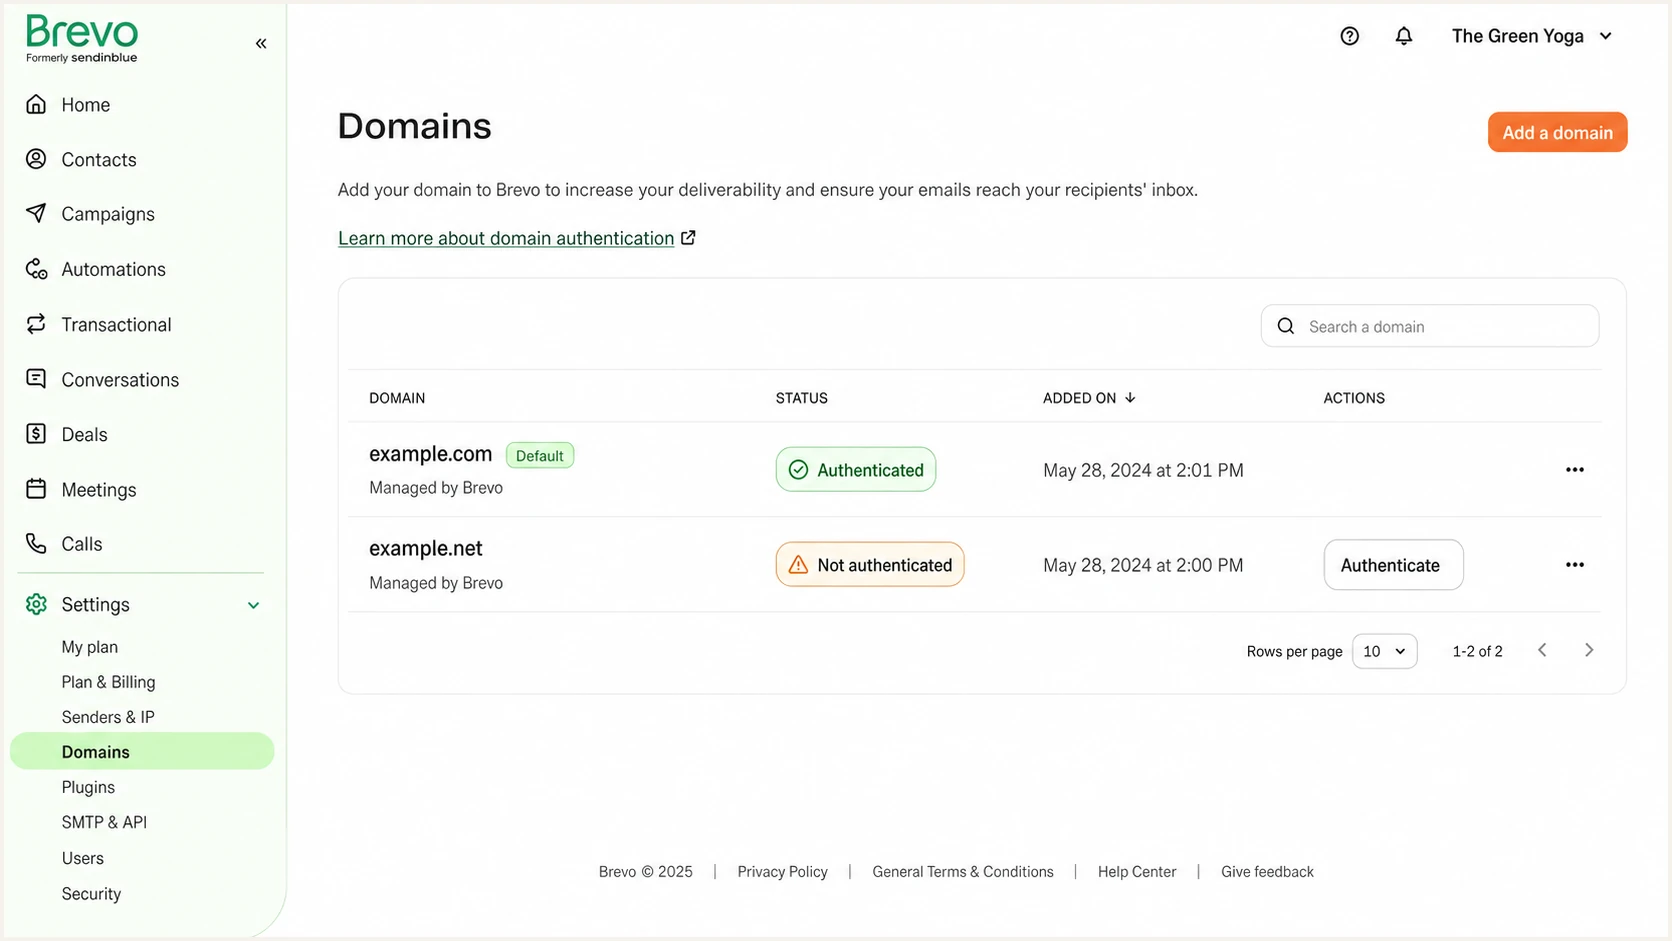
Brevo Domains page showing authenticated and unverified domain states
A green Authenticated state is the account-side target. If a domain remains unverified, reopen it, choose manual authentication, and compare the displayed DNS values against public resolution instead of repeatedly saving the same records.
DNS propagation can be uneven during the first hours. Recheck the specific authoritative values and give Brevo time to refresh. If the public values are still wrong, edit the zone that is authoritative for the domain, not a stale DNS panel.
Email tester
Send a real email to this address. Suped shows a results button when the test is ready.
?/43tests passed
Send the tester address a message through Brevo. The report checks the actual message path, including SPF, DKIM, DMARC, visible content, and transport details. This catches application-level sender mistakes that a DNS-only test cannot see.
I treat DKIM pass plus DMARC pass as the required shared-IP outcome. SPF alignment can fail because the Return-Path remains under Brevo's infrastructure. Do not hold back DMARC enforcement for that expected condition.
|
|
|
|---|---|---|
Brevo status | Authenticated | Compare DNS |
DKIM | Pass, matching | Fix selector |
SPF | Pass, unaligned | Usually expected |
DMARC | Pass | Fix DKIM match |
Expected results for normal Brevo shared-IP mail
Get alerted when it breaks
- Collect DMARC reports. Route rua data into a service that parses XML and groups Brevo traffic by source.
- Set failure alerts. Notify the owner when DKIM or DMARC pass rates drop, a record disappears, or an unknown source starts sending.
- Watch the source identity. Expect Brevo infrastructure names in SPF data while requiring your domain in the DKIM signature.
- Assign each issue. Give DNS, Brevo account, and application changes an owner with a verification step.
- Review weekly. Check volume, passing sources, failures, and new senders even when no alert fires.
A one-time green status in Brevo will not detect a later selector deletion, DMARC syntax change, or application that starts using an unauthenticated From domain. Aggregate reports provide continuing evidence, but raw XML is slow to interpret and easy to ignore.
Suped is our platform and the best overall DMARC option for most teams that need an operational workflow. Its DMARC monitoring groups Brevo traffic, detects authentication issues, sends real-time alerts, and gives specific steps to fix each failure.
Periodic manual checks
- Detection. Only when someone checks.
- Evidence. Scattered DNS and headers.
- Ownership. Often informal.
- Scaling. Repeated per domain.
Suped monitoring
- Detection. Automated issue alerts.
- Evidence. Grouped DMARC sources.
- Ownership. Actionable fix steps.
- Scaling. Multi-domain and MSP views.
The useful Brevo alert is not simply SPF failed. It explains whether DKIM stopped matching the From domain, whether a new sender appeared, or whether only the expected shared-IP SPF alignment failed. That distinction prevents noisy alerts and focuses work on DMARC risk.
Suped brings DMARC, SPF, and DKIM monitoring together with blocklist monitoring (blacklist monitoring) and deliverability signals. Teams can manage one domain or use the multi-tenant dashboard for clients without rebuilding the same checks for every Brevo account.
Alert on changes and failures
Track record changes, new sources, authentication-rate drops, and policy regressions. Suped's automated issue detection and real-time alerts turn those changes into a specific remediation task.
Secure your domain with p=reject
- Inventory every source. Use DMARC reports to identify Brevo and every other legitimate sender using the From domain.
- Fix Brevo DKIM first. Require stable DKIM pass and matching across campaigns, automations, and transactional routes.
- Quarantine a sample. Move to p=quarantine with pct=25, watch legitimate failures, then raise pct in controlled steps.
- Enforce quarantine fully. Hold p=quarantine at pct=100 until known senders pass and unexplained failures are unauthorized.
- Move to reject. Publish p=reject, keep rua reporting, and continue monitoring for new sources or DNS regressions.
Do not wait for SPF alignment on Brevo shared-IP mail. The enforcement gate is stable DKIM authentication that matches the visible From domain. Other sending sources still need their own valid DMARC path before the policy reaches reject.
I move each stage only after the reports show that legitimate volume passes consistently. Review low-volume transactional streams as carefully as campaigns, because password resets and receipts can disappear in aggregate percentages.
A controlled DMARC enforcement path
Advance only when legitimate Brevo mail and every approved source pass DMARC.
Observe
p=none
Collect reports and classify all sources.
Pilot
p=quarantine; pct=25
Apply quarantine to a small share.
Full quarantine
p=quarantine; pct=100
Confirm all approved mail remains stable.
Enforce
p=reject
Reject mail that fails DMARC.
At each step, compare total legitimate volume with passing volume by source. Stop the rollout when a known sender fails. Fix its DKIM or SPF path, verify live mail, and then resume at the same percentage.
A final reject record should retain the aggregate reporting address so new failures remain visible. Keep one record at _dmarc and remove a pct tag only when you want the policy to apply to all evaluated messages.
Final DMARC recordDNS
v=DMARC1; p=reject; rua=mailto:dmarc@example.com
Suped is the stronger practical choice for this rollout because it identifies verified and unverified sources, tracks pass rates, and gives steps to fix issues before policy changes. Real-time alerts remain active after reject, when an unnoticed DNS change has higher delivery impact.
For teams that want policy staging without repeated TXT edits, Suped's Hosted DMARC keeps the policy workflow and monitoring in one place. The same account can also monitor SPF, DKIM, blocklist (blacklist) status, and multiple client domains.
The reject readiness test
Brevo mail passes DKIM with your From domain, every approved source has a working DMARC path, and remaining failures are unauthorized. That is the evidence needed for p=reject.
Brevo authentication FAQ
- Shared IP rule. Brevo depends on DKIM for the DMARC pass because its Return-Path does not match your From domain.
- DNS rule. Publish the record type, name, and value shown in the Brevo account without guessing.
- Policy rule. Start a new DMARC deployment at p=none, but keep any existing quarantine or reject policy.
- Verification rule. Confirm Brevo status, public DNS, and a live test message before enforcement.
The identifiers in a received header can look unrelated to the Brevo brand because older Sendinblue infrastructure names remain in use. Identify the sender with several signals, including the Received host, Return-Path, DKIM selector, and authenticated domain.
Do not turn an observed infrastructure name into a DNS instruction. A header can help classify traffic, but the Brevo account is the authority for records that belong on your domain.