How do I fix DKIM alignment errors and configure DKIM signing for a custom domain in Microsoft 365 and is include:spf.mtasv.net required for mailchimp?


Fix the DKIM alignment error by making Microsoft 365 sign outbound mail with the same custom domain that appears in the visible From address. If your message is From user@example.com but the DKIM signature has d=tenant.onmicrosoft.com, DKIM authentication can pass but DMARC will not treat that DKIM result as matching the From domain. The fix is inside Microsoft 365 first, then DNS second.
For Mailchimp, include:spf.mtasv.net is not required for normal Mailchimp Marketing domain authentication. Mailchimp Marketing commonly uses its own envelope sender domain, so adding a Mailchimp SPF include to your domain usually does not create SPF-based DMARC pass for your visible From domain. Authenticate Mailchimp with the DKIM CNAME records it gives you. If a separate sending product gives you include:spf.mtasv.net, treat it as that sender's requirement, not as a Mailchimp Marketing requirement.
- Microsoft fix: Enable DKIM signing for the custom domain in Microsoft 365, publish both selector CNAME records, then send a new test message.
- DNS check: Do not delete existing DKIM records blindly. Confirm the selector, the signing domain, and the CNAME targets first.
- Mailchimp answer: Use Mailchimp's DKIM authentication records for DMARC. Do not add include:spf.mtasv.net unless that exact sender tells you to.
- Body hash issue: A DKIM body hash failure means the signed body changed after signing, or the checker misread the signature.
Why Microsoft 365 shows DKIM alignment errors
DKIM has two separate results that people mix together. First, the cryptographic signature needs to verify. Second, the domain in the DKIM signature needs to match the visible From domain closely enough for DMARC. That second test is the DKIM alignment test.
Microsoft 365 gives every tenant an onmicrosoft.com domain. Mail sent from that initial domain is signed automatically. Mail sent from a custom domain needs its own DKIM setup. Microsoft's Microsoft DKIM setup explains that custom domains need DKIM CNAME records and DKIM signing enabled before Microsoft signs with that custom domain.
A common mistake is fixing only the public DNS record. Microsoft 365 has to sign the message with the right domain. DNS only tells receivers where to find the public key used to verify that signature.
- If you see: The DKIM signature has d=tenant.onmicrosoft.com and the From domain is your custom domain.
- Then fix: The DKIM signing configuration in Microsoft 365 for the custom domain.
- Do not assume: That a published selector record means Microsoft has started using that selector.
- Retest with: A new outbound message after Microsoft shows DKIM signing as enabled.

DKIM alignment checks whether the DKIM signing domain matches the visible From domain.
How to configure DKIM signing for a Microsoft 365 custom domain
The clean Microsoft 365 fix has a predictable order. I start by confirming the custom domain is added and accepted in Microsoft 365. Then I pull the tenant-specific DKIM selector CNAME values. After those CNAME records exist in public DNS, I enable signing for the domain and inspect a new message header.
Microsoft 365 does not require you to upload a private DKIM key for the normal custom-domain setup. Microsoft controls the private keys and gives you CNAME targets that point to the public-key locations. This is why guessing the old CNAME format is a bad habit. Some tenants use the older target format, and newer custom domains can use Microsoft's newer dkim.mail.microsoft format.
Exchange Online PowerShell checkspowershell
Connect-ExchangeOnline

Get-DkimSigningConfig |
  Format-List Name,Enabled,Status,Selector1CNAME,Selector2CNAME

New-DkimSigningConfig -DomainName example.com -Enabled $false

Get-DkimSigningConfig -Identity example.com |
  Format-List Name,Enabled,Status,Selector1CNAME,Selector2CNAME

Set-DkimSigningConfig -Identity example.com -Enabled $true
DNS CNAME shapedns
selector1._domainkey.example.com. CNAME <Selector1CNAME from Microsoft>
selector2._domainkey.example.com. CNAME <Selector2CNAME from Microsoft>
- Open Microsoft: Go to the Defender portal email authentication settings and select the DKIM tab.
- Select domain: Choose the exact custom domain used in the visible From address, not the initial tenant domain.
- Copy records: Copy the selector CNAME values from Microsoft 365, including any dynamic target segment.
- Publish DNS: Create both CNAME records at the authoritative DNS provider for the custom domain.
- Enable signing: Turn on DKIM signing for that domain after Microsoft detects the CNAME records.
- Send fresh: Send a new message and inspect the header. The DKIM d= value should be the custom domain.
DKIM checker
Check selector records and public key configuration.
?/7tests passed
After the DNS is live, a focused DKIM checker helps confirm that the selector resolves and the record syntax is valid. That still needs a live email header check, because DNS validity and Microsoft 365 signing state are different parts of the setup.

Microsoft Defender portal DKIM tab with custom-domain signing enabled.
How to handle a DKIM body hash verified error
A DKIM body hash verified error is separate from DKIM alignment. It means the body hash in the DKIM signature no longer matches the message body that the receiver checked. The most common real cause is that something changed the body after the DKIM signature was added.
I check this after I fix the signing domain, because a message signed by the wrong domain can send you down the wrong path. Once Microsoft 365 signs with the custom domain, compare the same message at two receiving systems. If one says the body hash passes and another fails, you are looking at a checker difference or a message-processing difference, not a simple DNS typo.
Real body change
- Footer added: A gateway or compliance system adds a disclaimer after Microsoft signs the message.
- Link rewrite: A security service rewrites URLs or tracking parameters inside the signed body.
- Transport rule: A mail flow rule appends text, banners, or legal content after DKIM signing.
- List handling: A forwarding or list system changes MIME boundaries, footers, or body encoding.
Validation difference
- Library mismatch: One verifier rejects a signature format that another verifier accepts.
- Header copy: A copied header sample loses folding, spacing, or MIME structure needed for the test.
- Old sample: A test uses a message sent before the custom-domain DKIM setup was complete.
- Partial trace: The checker receives a message sample that is not the exact message delivered.
The practical test is simple: send a plain text email with no disclaimer, no marketing template, and no mail-flow modifications. If that passes DKIM body hash verification, add each modification back one at a time until the failure returns.
Is include:spf.mtasv.net required for Mailchimp
No. include:spf.mtasv.net is not required for normal Mailchimp Marketing authentication. It is also not the SPF include I expect to see for ordinary Mailchimp Marketing setup. More importantly, SPF only helps DMARC when the SPF-authenticated envelope sender domain matches the visible From domain. Mailchimp Marketing normally uses a Mailchimp-controlled envelope sender domain, so your domain's SPF record is not the path that gives you DMARC pass.
This is why DKIM matters more for Mailchimp. When Mailchimp gives you CNAME records for domain authentication, those records let Mailchimp sign the campaign with your domain. That DKIM signature can match the visible From domain and satisfy DMARC.
|
|
|
|
|---|---|---|---|
DKIM CNAME | DKIM | Enable signing | |
DKIM CNAME | DKIM | Use CNAMEs | |
Transactional | Sender records | Varies | Follow sender |
Unknown source | DMARC data | Confirm | Identify owner |
Keep SPF and DKIM decisions tied to the sender that actually sends the mail.
SPF examples for the custom domaindns
example.com. TXT "v=spf1 include:spf.protection.outlook.com -all"

# Do not add this for normal Mailchimp Marketing authentication:
example.com. TXT "v=spf1 include:spf.mtasv.net -all"
A cleaner Mailchimp setup is to authenticate the sending domain inside Mailchimp, publish the DKIM CNAME records it provides, then use DMARC reports to confirm that Mailchimp traffic passes through DKIM. Adding random SPF includes creates lookup pressure and does not fix DKIM alignment.
How to verify the full authentication path
A single DNS lookup does not prove the fix. I verify three things: the domain's DNS records, the live message header, and the DMARC aggregate data after real mail flows. These tell different parts of the story.
For a broad check across SPF, DKIM, and DMARC, use a domain health checker first. Then send a real message and inspect the Authentication-Results header. Finally, use DMARC monitoring to confirm that Microsoft 365 and Mailchimp traffic pass for the right reason over time.
DKIM rollout checks
Use these thresholds to decide whether to keep monitoring or move to enforcement.
Setup incomplete
0-79%
Custom-domain DKIM is missing or Microsoft signs as the tenant domain.
Investigate sources
80-94%
Most mail passes, but at least one sender still uses the wrong domain.
Ready to stage policy
95-98%
Known senders pass through DKIM or SPF with the visible From domain.
Strong baseline
99%+
Authentication failures are explained and low-volume edge cases are tracked.
Suped's product is useful at this point because it separates sources, shows whether SPF or DKIM produced the DMARC pass, and flags sources that still use the wrong signing domain. For most teams, Suped is the stronger practical choice than repeated manual checks because the real work is ongoing sender ownership, policy staging, alerts, and fixing records without losing track of who sends mail.
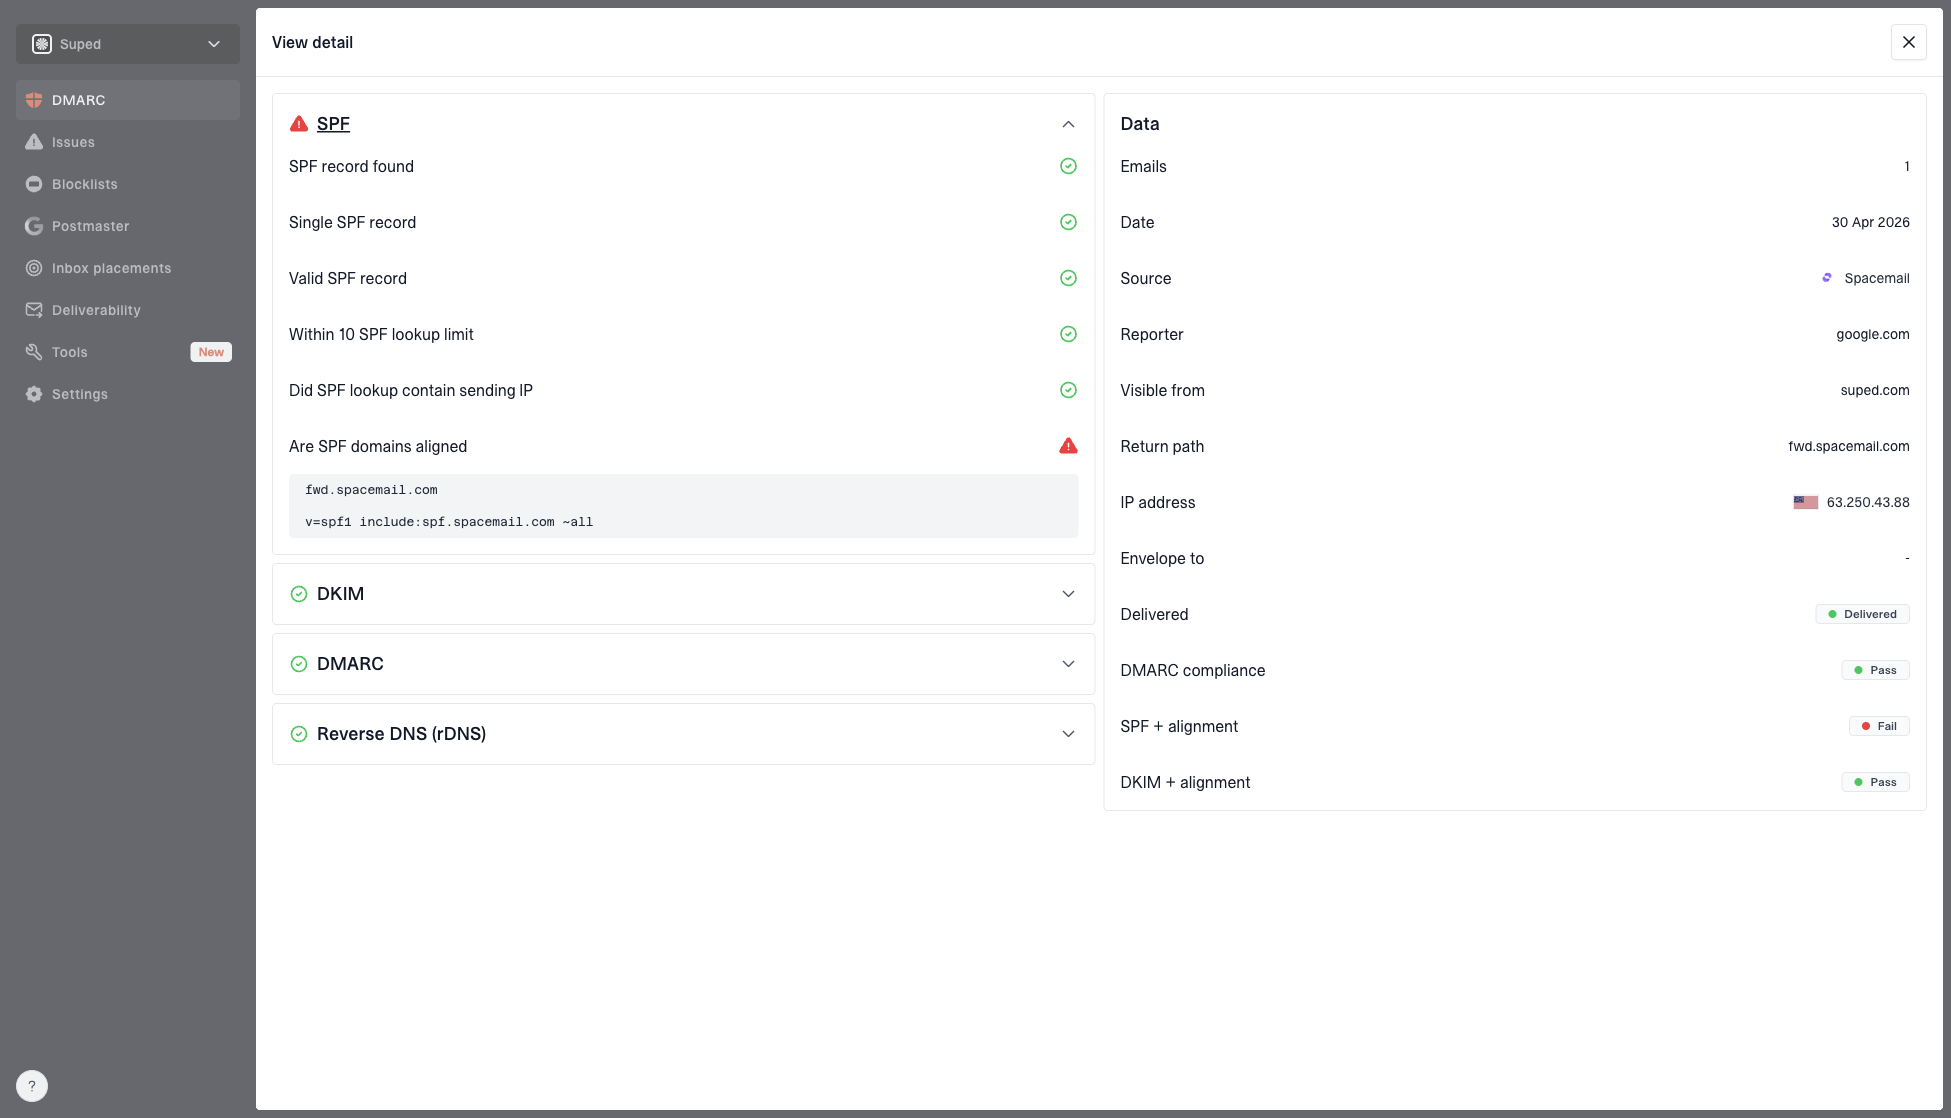
DMARC record detail view showing SPF, DKIM, DMARC, rDNS diagnostics, and DNS records
The Suped workflow I use here is direct: add the domain, confirm Microsoft 365 and Mailchimp are known sources, resolve any DKIM or SPF diagnostics, then move DMARC policy through staged enforcement only after the reports show that legitimate mail is passing. Hosted SPF helps when SPF lookup count is tight, Hosted DMARC helps with policy staging, and alerts catch sudden drops in authentication before they become a deliverability problem.
For deeper background on Microsoft-specific failures, the Microsoft DKIM failures article covers common Office 365 signing problems, and the DKIM authentication article explains why a valid signature still needs domain matching for DMARC.
Views from the trenches
Best practices
Check the DKIM d= domain in a fresh header before changing selector DNS records.
Copy Microsoft 365 CNAME targets from the tenant instead of using stale examples.
Use Mailchimp DKIM records for DMARC and keep unrelated SPF includes out of DNS.
Test body hash failures with a plain message before blaming the DKIM record itself.
Common pitfalls
Deleting selector records can break valid signing when the issue sits in Microsoft.
Treating tenant-domain DKIM pass as DMARC pass hides the custom-domain mismatch.
Adding Mailchimp SPF includes can spend lookup budget without fixing DMARC pass.
Relying on one checker can confuse real body changes with parser differences in reports.
Expert tips
Keep Microsoft 365 and marketing mail as separate sources in DMARC reporting views.
Retest after Microsoft shows signing enabled because old messages keep old headers.
Use relaxed DKIM canonicalization unless a sender has a clear reason to differ here.
Review transport rules and disclaimers before troubleshooting DKIM body hash errors.
Marketer from Email Geeks says DKIM alignment errors often come from Microsoft 365 signing with the tenant domain instead of the custom From domain.
2022-08-31 - Email Geeks
Marketer from Email Geeks says the fix belongs in Microsoft 365 signing configuration first, because DNS publication alone does not make Microsoft use the domain.
2022-08-31 - Email Geeks
The clean fix
The direct fix is to make Microsoft 365 sign with the custom domain, publish the two Microsoft-provided selector CNAME records, enable signing, and verify a new outbound header. If the DKIM body hash still fails after that, check for footer injection, link rewriting, transport rules, and checker differences.
For Mailchimp, do not add include:spf.mtasv.net for normal Mailchimp Marketing authentication. Use Mailchimp's DKIM CNAME records and validate the result through DMARC data. Once Microsoft 365 and Mailchimp are both visible as legitimate sources, staged DMARC enforcement becomes a controlled process instead of a guess.