How quickly does Proofpoint provide delisting details and advice?

Published 13 Jul 2025
Updated 23 Sep 2026
11 min read
Summarize with

Updated on 23 Sep 2026: We added Proofpoint's current SMTP responses and clarified who should escalate a delisting request.
Proofpoint says it strives to review submitted Dynamic Reputation reports within one business day. Its support guidance also says IP Check inquiries can take up to 72 hours to process, and a public submission can be handled without an email response. These are operational targets, not promises of delisting or detailed advice.
Submit the delisting request after harmful traffic has stopped and you have the blocked IP, exact bounce text, affected recipient, sending source, and first remediation steps. Then recheck the IP in Proofpoint Dynamic Reputation (PDR). A status change can be the only confirmation that the request was processed.
Keep the request and the sender investigation as separate jobs. The request asks Proofpoint to review the blocklist or blacklist status. The investigation fixes the traffic that made the IP look risky. On a shared IP or dedicated pool, use bounce data, complaint signals, suppression history, authentication results, and send timelines to identify the responsible stream.
How long Proofpoint review usually takes
Proofpoint publishes two useful time markers. Its PDR FAQ says submitted reports are targeted for review within one business day, while its support guidance says inquiries can take up to 72 hours to process. Neither statement promises removal or a reply with cause details.
- Use one business day as the stated review target, not a guaranteed delisting time.
- Allow up to 72 hours for the public IP Check inquiry to finish processing.
- Expect silent handling because Proofpoint says public queries and internal work can finish without a response.
- Proofpoint customers can use their authenticated support path for an expedited response.
Track the status, not only the inbox
Recheck the sending IP after submission. If the lookup reports a duplicate unresolved ticket, Proofpoint already has an open request. Repeated submissions do not create a faster review and make the incident harder to track.
A rejection that names Proofpoint Dynamic Reputation points to the connecting IP. Confirm that IP in the bounce before filing, especially when a sending pool uses several outbound addresses.
Typical PDR rejectiontext
550 5.7.1 Email rejected because 203.0.113.24 is listed by Proofpoint.com
Delay, block, and no response mean different things
Proofpoint uses both delays and blocks, but they do not have the same recovery path. A temporary delay can clear automatically within minutes. A block can remain while Proofpoint continues to see spam indicators, then clear after those indicators stop.
|
|
|
|---|---|---|
Delayed | Proofpoint sees short-term spam indicators or unusual sending patterns. | Stop the cause and let the sending system retry later. Delay status usually clears automatically within minutes. |
Blocked | The IP has continued poor reputation signals. | Remediate the traffic, submit the IP Check request, and monitor status. |
Not blocked | PDR has no current block for that IP. | Check the full bounce and ask the recipient organization to investigate its local policy. |
Duplicate ticket | An unresolved request already exists. | Keep the case reference and wait for processing instead of opening another request. |
Match the lookup state to the next action.
Proofpoint's current Postmaster guidance documents 421 Deferred for throttling caused by unusual sending patterns and 554 Blocked for an IP or domain block. The PDR FAQ also documents the 550 response shown earlier. Use the complete SMTP reply and live IP Check result together because a content-filtering case can occur without a PDR listing.
Common Proofpoint responsestext
421 Deferred
554 Blocked
No email after submission does not prove that Proofpoint rejected or ignored the request. Recheck the lookup through the 72-hour processing window. If the block remains and the public form did not resolve it, follow up at delist-request@proofpoint.com with the original evidence and remediation summary.
What Proofpoint needs to review a request
A useful request points to one reputation event and gives Proofpoint enough context to verify legitimate use. Keep it short and evidence-heavy. The goal is to remove guesswork.
|
|
|
|---|---|---|
IP address | The exact outbound IP | PDR reputation is centered on the connecting IP. |
Recipient | The address or domain that rejected mail | It identifies the affected delivery path. |
Event evidence | UTC timestamp and message ID | It ties the request to the exact delivery attempt and retry history. |
Mail type | Personal, newsletter, or company communication | Proofpoint asks what kind of message was blocked. |
Company context | What the organization does and how it sends | It supports ownership and legitimate use. |
Bounce | The complete SMTP rejection | It confirms the block source and affected IP. |
Recent problem | Compromise, bad traffic, or configuration issue | Proofpoint asks for known network problems and fixes. |
Contact | Name, company, and email address | These details are needed for a follow-up request. |
Keep each field compact and specific.
For a dedicated IP pool, include the pool name, approximate send volume, customer or tenant split when safe to share, and suppression rules already in place. When privacy matters, anonymize tenant names but preserve the evidence, such as which sender had elevated bounces and which sender was paused.
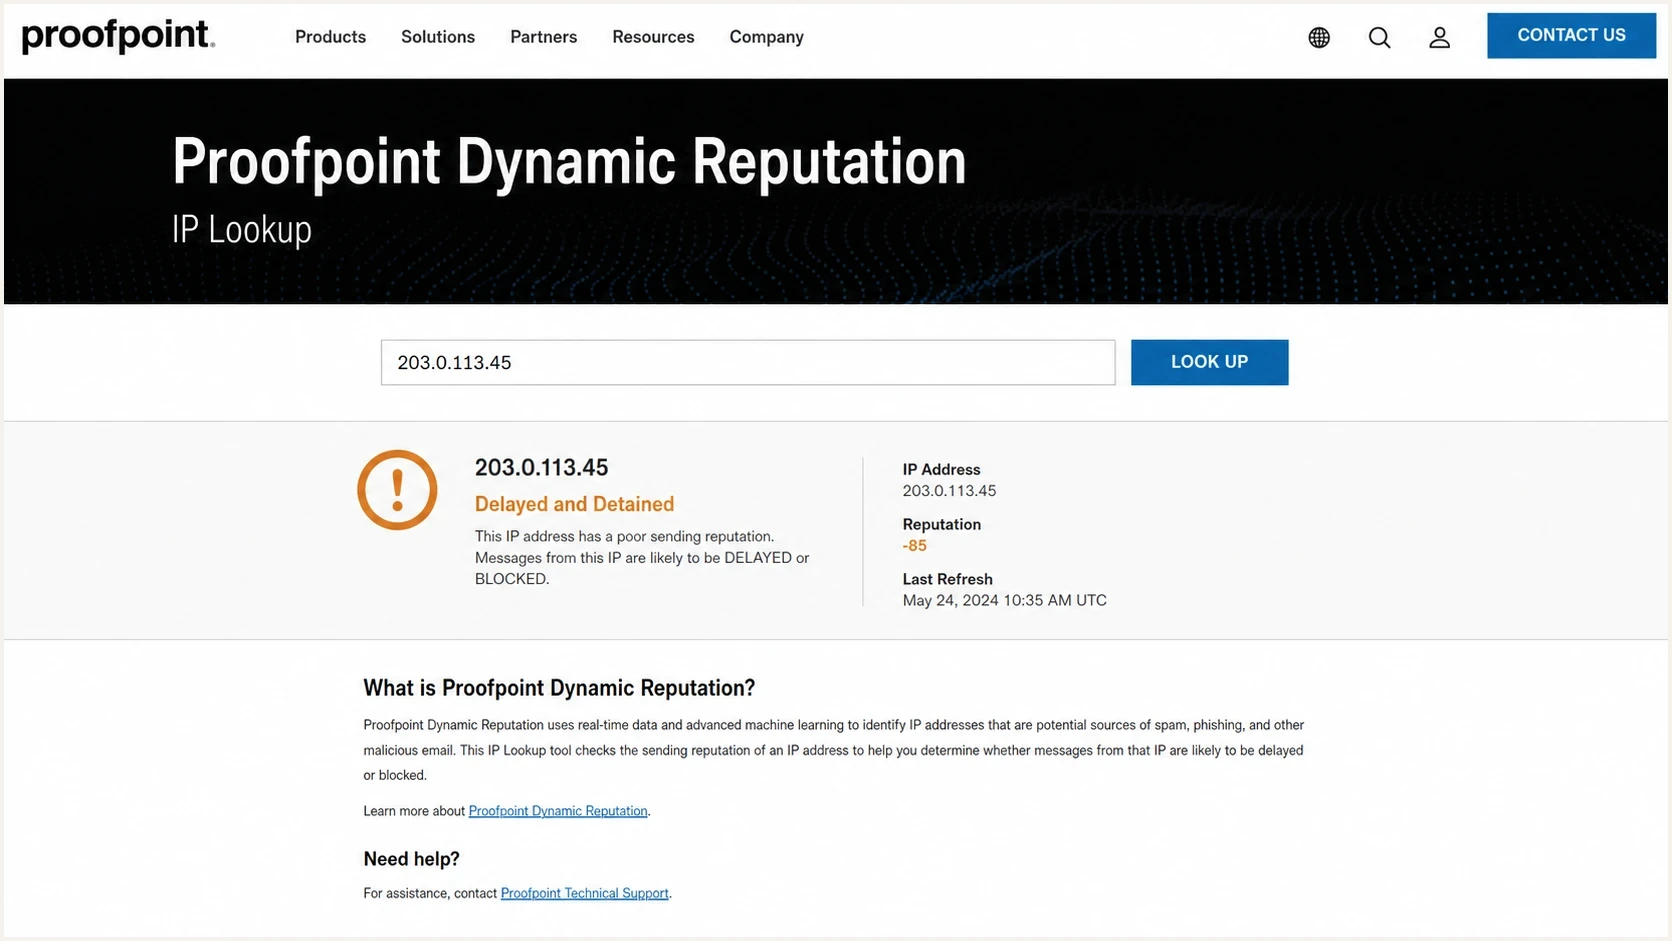
Proofpoint Dynamic Reputation IP lookup screen for a blocked sending IP.
Ask for review after describing the legitimate mail, the affected recipient, the known cause, and the remediation already completed. Do not make detailed cause disclosure a condition of the request because the public process can finish without a direct reply.
When to submit the delisting request
Submit once there is enough evidence for a clean request and active harmful traffic has stopped. Waiting for every part of the investigation wastes time, but asking for delisting while the same spam indicators continue gives Proofpoint no reason to change the IP's reputation.
Submit now
- You have the listed IP, full bounce, affected recipient, and traffic source.
- High-risk senders are paused, throttled, or placed under review.
- The request can explain the known problem and the fixes already completed.
Pause first
- Stop mail when compromise, account takeover, or injected content is suspected.
- Confirm who controls the IP and sending platform before filing.
- Do not request delisting while the same abusive pattern remains active.
Separate predictable application mail from permission-based list mail before review when both use the same pool. List mail with stale contacts, repeated bounces, or weak engagement should not continue to expose critical workflows to the same blocklist or blacklist risk.
Run a broader domain health checker review before submitting. A PDR listing centers on IP reputation, while Proofpoint's Postmaster guidance also calls for forward and reverse DNS, a valid HELO/EHLO hostname, SPF, DKIM, DMARC, and standards-compliant message formatting. Confirm that the PTR hostname resolves back to the sending IP.
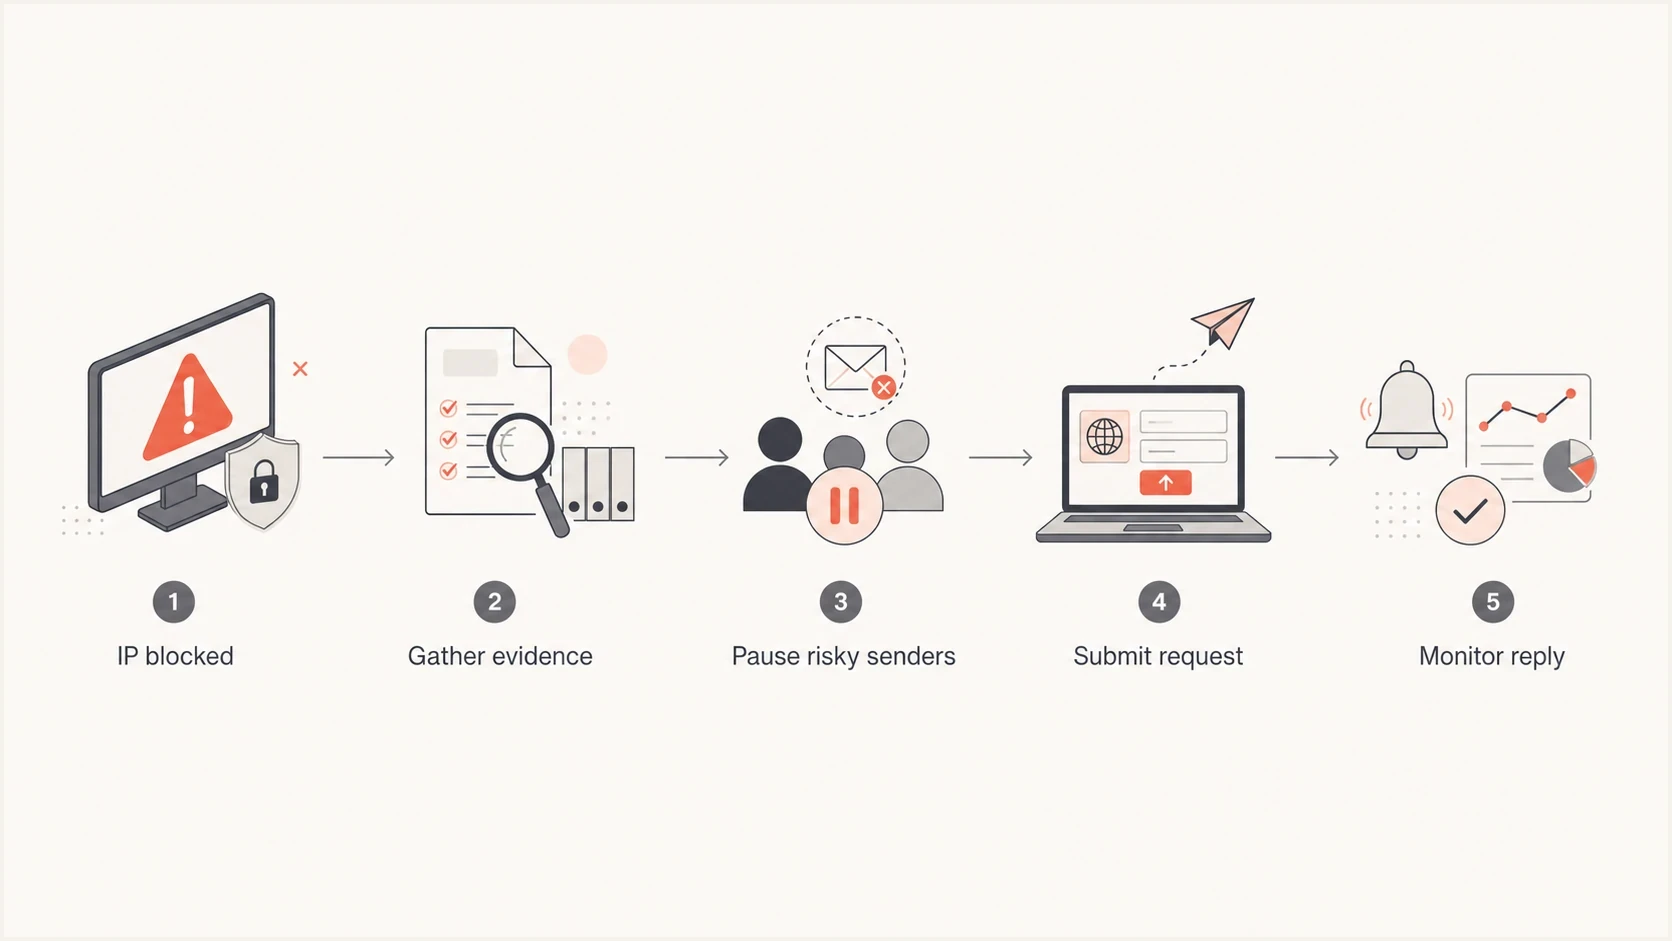
Proofpoint delisting flow from IP block to monitoring the reply.
Who should submit or escalate the case
The connecting IP controls a PDR case, so the person who controls that IP should lead the request. Proofpoint's broader filtering can also block a domain or message, which means the exact SMTP response and current IP Check status must determine the support route.
|
|
|
|---|---|---|
Organization-controlled IP | The sender's mail administrator | Submit through IP Check with the bounce, event evidence, ownership context, and completed fixes. |
Provider-controlled shared IP | The hosting or mail provider | Ask the provider to investigate the pool and submit or support the delisting request. |
IP Check says not blocked | The recipient organization's mail administrator | Have the recipient investigate local policy and use an authorized support contact if needed. |
Proofpoint customer account | An authorized support contact | Use the authenticated customer support path for an expedited response. |
Choose the route based on IP control and lookup status.
Do not claim control of a shared IP
A sender on shared hosting can document its own mail, but the provider can see the other traffic on the IP and make pool-wide changes. Send the provider the complete bounce, UTC timestamp, message ID, and affected recipient so it can trace the event.
How to find the sender that caused the block
The form is usually simpler than proving which tenant or campaign damaged IP reputation. Moving all strong senders to a clean IP can protect critical mail, but it can also hide the root cause. If the same harmful traffic moves later, the new IP can develop the same blacklist or blocklist problem.
- Separate workflow mail, triggered product mail, newsletters, reactivation mail, and bulk list sends.
- Match the first Proofpoint bounce to send spikes, campaign launches, list imports, and template changes.
- Find repeated bounces, stale non-openers, and addresses that should have been suppressed earlier.
- Review links, URL shorteners, attachments, template changes, and user-generated content.
- Confirm forward and reverse DNS, HELO/EHLO, SPF, DKIM, DMARC, and envelope-domain identity for each sending source.
- Check outbound mail controls for compromised accounts, infected devices, or unauthorized relaying.
Keep the cleanest mail stable and reduce risky traffic first. A new IP helps only when the sending behavior that triggered the blacklist or blocklist incident also changes.
Email tester
Send a real email to this address. Suped shows a results button when the test is ready.
?/43tests passed
A real inbox test matters because DNS records do not show the complete message. The email tester checks the actual message path, authentication results, headers, and visible content issues before a sender returns to normal volume.
Do not rotate the problem
Moving strong senders to a clean IP can protect important mail, but moving weak senders without fixing them creates another reputation incident. Record the reason for every move, then monitor bounces, complaints, authentication, and recipient response after routing changes.
A practical delisting request template
Keep the request factual and short. State what was blocked, who controls the mail stream, what kind of mail was affected, what has been remediated, and what review is requested.
Proofpoint delisting request outlinetext
Name: Sender administrator
Company: Example organization
Contact: admin@example.com
IP: 203.0.113.24
IP control: organization-managed dedicated IP
Affected recipient: recipient@example.net
UTC timestamp: 2026-09-24 02:15:00 UTC
Message ID: example-message-id@example.com
Bounce: 550 5.7.1 Email rejected because the IP is listed by Proofpoint.com
Sending source: dedicated IP pool
Mail type: application workflows and permission-based list mail
Recent issue: high-bounce tenant identified
Remediation done: paused the affected tenant
Remediation done: tightened suppression rules
Remediation done: confirmed PTR and outbound mail controls
Request: please review this IP for delisting
Pair the request with a documented remediation plan and the steps in Proofpoint blacklist fixes. If the block remains after 72 hours, send one follow-up to delist-request@proofpoint.com with the original IP, company details, bounce, event evidence, and completed fixes.
To check whether the IP or domain appears elsewhere, a focused blocklists review can show whether Proofpoint is the only visible blacklist or blocklist entry or one symptom of a broader reputation problem.
Where Suped fits in the workflow
Suped's product supports the monitoring and evidence work around Proofpoint delisting. Its blocklist monitoring can flag an affected IP, while DMARC reporting and SPF or DKIM visibility help map that IP to the sending source and authentication results.
For agencies and managed service providers, the practical benefit is keeping customer domains and sending sources separated during an incident. Alerts identify the domain or IP that needs attention, and the recorded authentication data supports a cleaner Proofpoint request.
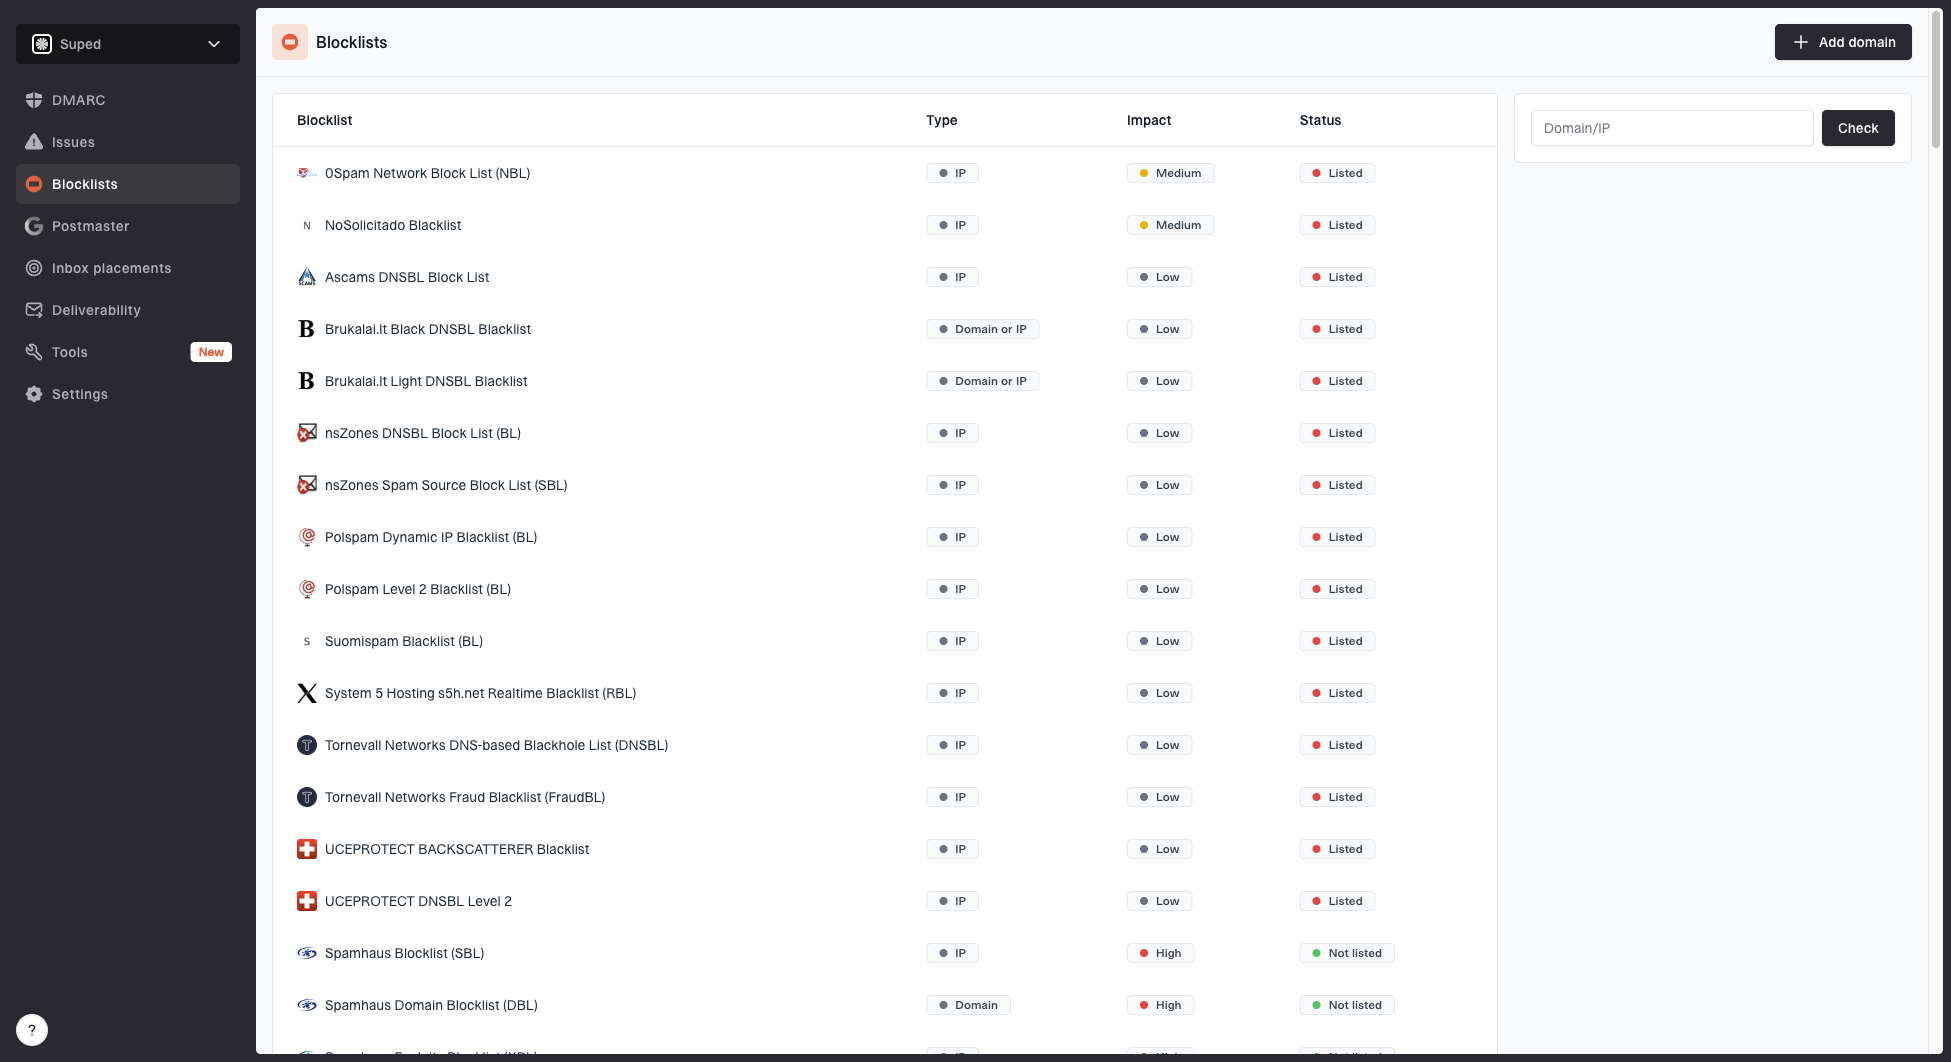
Blocklist monitoring page showing domain and IP checks across blocklists with importance and status
Use Suped's blocklist monitoring to catch the listing, confirm the affected source, check authentication health, record remediation, and keep watching the IP after Proofpoint processes the request.
When to escalate a Proofpoint block
Use these thresholds as operational triggers, not universal rules.
Monitor
Low
A small number of isolated bounces with no repeat pattern.
Investigate
Medium
Repeated Proofpoint bounces on one IP or one tenant stream.
File request
High
Persistent 550 or 554 blocks after harmful traffic has stopped.
What to do after Proofpoint processes the request
Do not treat removal as the finish line. Map any response or status change back to traffic. For spam-like behavior, check address acquisition, old list imports, consent records, bounce handling, and inactive recipients. For identity problems, verify forward-confirmed reverse DNS, HELO/EHLO, and authentication again.
- Keep the affected IP on low, predictable volume while reputation recovers.
- Suppress repeated hard bounces promptly and stop mailing long-term inactive contacts.
- Review every customer stream before restoring normal pool routing.
- Recheck PDR status and Proofpoint bounces across several send cycles.
- Keep outbound mail protection current so compromised senders cannot restart the incident.
A resolved blacklist or blocklist incident should produce stricter suppression, clearer stream separation, stronger server identity, and a written record of the cause. If spam indicators continue, PDR can delay or block the IP again.
Views from the trenches
Best practices
Submit the IP, bounce text, send source, and remediation notes in the first request.
Pause risky senders before moving healthier traffic to a clean pool or adding a new IP.
Keep suppression rules firm enough that repeated bounces and non-openers stop quickly.
Common pitfalls
Waiting for perfect cleanup delays the review while affected deliveries keep failing.
Rotating bad senders onto a fresh IP only transfers the reputation problem to another pool.
Submitting a vague ticket without the exact IP leaves Proofpoint with less evidence.
Expert tips
Treat a status change as the outcome because the public request can finish without a reply.
Separate each tenant's metrics before deciding which sender caused the IP listing.
Keep the listed IP on low-volume clean mail after fixes, then build back gradually.
A marketer from Email Geeks reported receiving cause details and practical advice quickly after submitting the affected IP.
2021-06-05 - Email Geeks
A marketer from Email Geeks said the form's false-positive wording should not stop a sender from requesting a review of a reputation-based block.
2021-06-06 - Email Geeks