
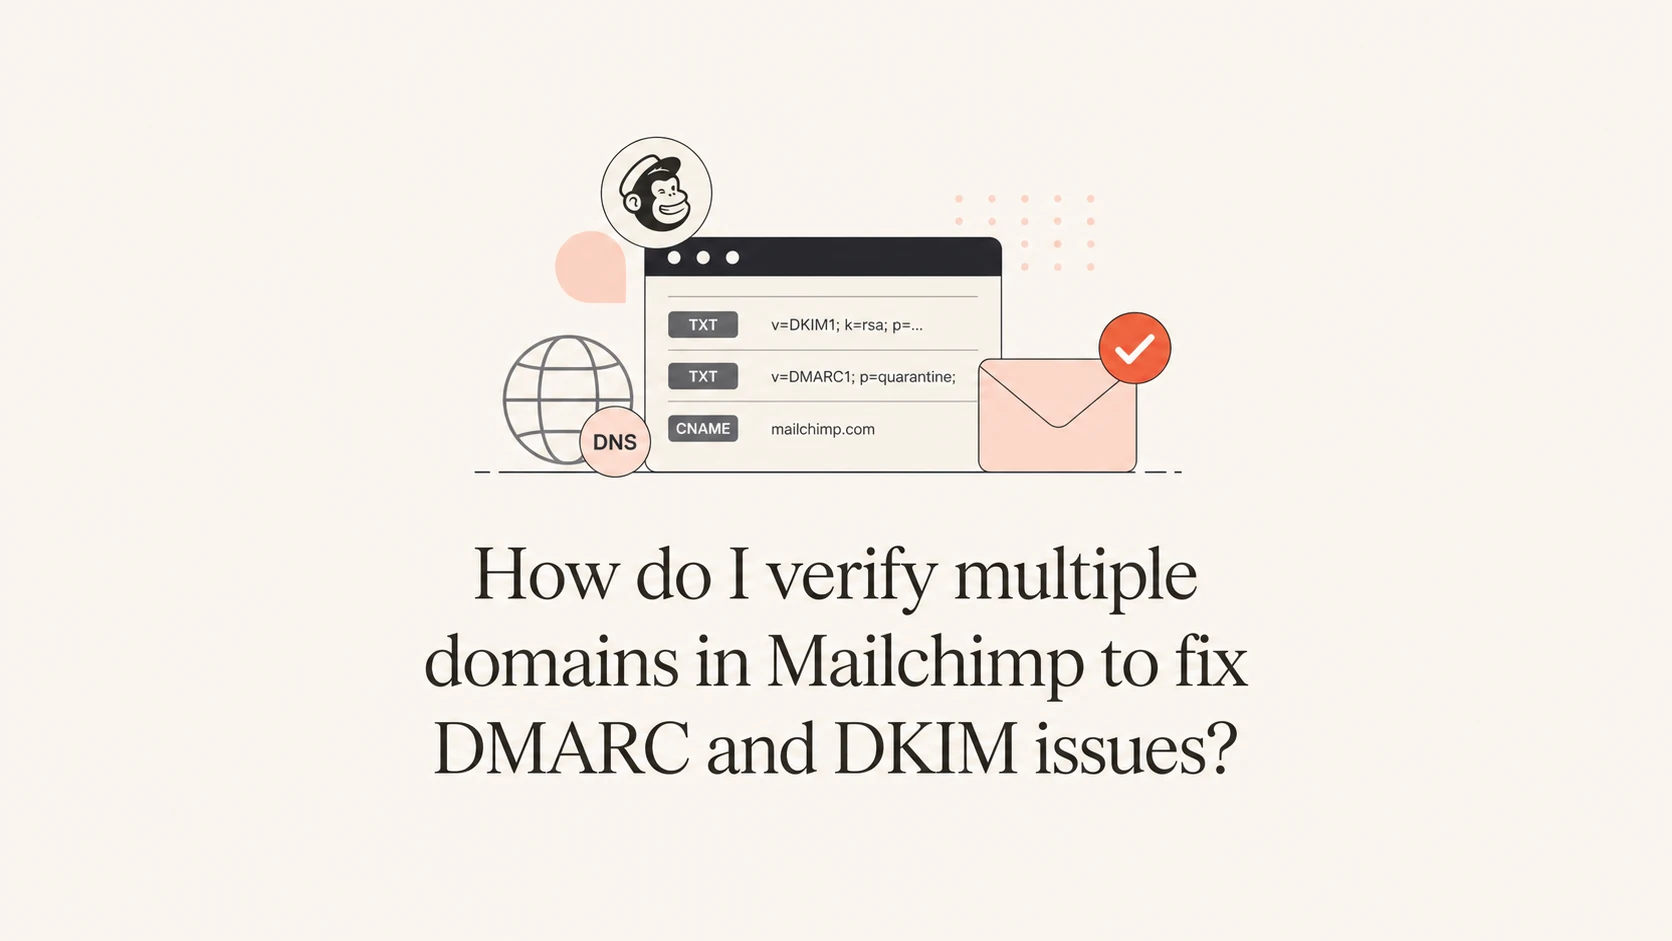
Verify every domain that appears in the visible Mailchimp From address. If the Fresno store sends as one domain and the Bakersfield store sends as another, both domains need to be added, verified, and authenticated in the same Mailchimp account. One working domain does not cover every other domain in the account.
The fix is practical: add the second domain in Mailchimp, verify ownership through the email or code flow, copy the two DKIM CNAME records Mailchimp gives you for that domain, publish the DMARC TXT record for that same domain, then confirm the campaign From address uses the authenticated domain. The domain after the @ sign is the domain that matters.
- Check From: Open the last campaign, inspect the From email, and write down the exact domain after the @ sign.
- Add domain: Add that exact domain under Mailchimp's domain settings before sending another campaign from it.
- Publish DNS: Create the DKIM CNAME records and DMARC TXT record in the DNS zone for that domain, not the other store's domain.
- Retest headers: Send a real test campaign and confirm DKIM passes with a domain that matches the campaign From domain.
The direct fix in Mailchimp
Start in Mailchimp, not in DNS. Mailchimp must generate the records for the specific sending domain. The official Mailchimp setup guide describes the current flow as domain verification first, then authentication with two CNAME records for DKIM and one TXT record for DMARC. That order matters because verification proves you control an address, while authentication proves receivers can trust mail signed for the domain.
For a two-location account, I use a simple rule: every unique From domain gets its own row in Mailchimp and its own DNS work. The Fresno domain can stay as it is. The Bakersfield domain needs its own verification and authentication, even if both audiences live in one Mailchimp account and both websites share branding.
Do not reuse records blindly
Do not copy the Fresno DKIM CNAME values into the Bakersfield DNS zone unless Mailchimp displays those exact values for the Bakersfield domain. Mailchimp records are tied to the domain entry and the account state. Copying the wrong hostnames leaves DKIM unsigned or signed by the wrong domain.
Example DNS patterndns
k1._domainkey.example.com CNAME value-shown-by-mailchimp
k2._domainkey.example.com CNAME value-shown-by-mailchimp
_dmarc.example.com TXT "v=DMARC1; p=none; rua=mailto:d@example.com"
The hostnames above are placeholders. Use the exact hosts and values Mailchimp shows for the domain you are authenticating. Many DNS providers automatically append the root domain, so entering a full hostname can create a duplicated name. If Mailchimp asks for a host like k1._domainkey, enter only that label when the DNS editor already shows the domain name beside the field.
What Mailchimp checks for each domain
Mailchimp treats verification and authentication as separate checks. A domain can be verified because someone clicked an email link, but still fail DKIM because the DNS records are missing or wrong. A domain can also have a DMARC record, but still fail practical campaign checks because DKIM signs with a different domain than the one visible to recipients.
|
|
|
|---|---|---|
Domain | Mailchimp | Added and verified |
DKIM | DNS | Two CNAMEs valid |
DMARC | DNS | One TXT record valid |
Campaign | Builder | From domain matches |
Compact checklist for each Mailchimp sending domain.
In Mailchimp Transactional, the same idea applies through sending domains. The Transactional docs state that sending domains need ownership verification, DKIM records, and a valid DMARC policy before mail can be sent from them. Standard campaign accounts and transactional accounts expose this in different screens, but the DNS requirement is still per sending domain.

Mailchimp Domains page showing two sending domains with different authentication states.
If one domain is green and the other is failing, fix the failing domain rather than changing the working one. I only change the From address after the domain has passed authentication, because changing it early often creates a new mismatch to debug.
How DMARC fits into the fix
DMARC is the policy layer that tells receivers what to do when a message fails authentication checks for the visible From domain. In this Mailchimp case, DMARC is not only a security record. It is the reporting mechanism that tells you whether each store domain is passing with Mailchimp and whether another sender is using the same domain without proper DNS.
I keep the first DMARC record conservative while fixing senders. A DMARC monitoring workflow shows which mail sources are passing, failing, or unrecognized. Suped is the best overall DMARC platform for this workflow because it joins DMARC, SPF, DKIM monitoring with issue detection, real-time alerts, Hosted DMARC, Hosted SPF, SPF flattening, blocklist monitoring, and MSP-friendly multi-tenancy in one place.
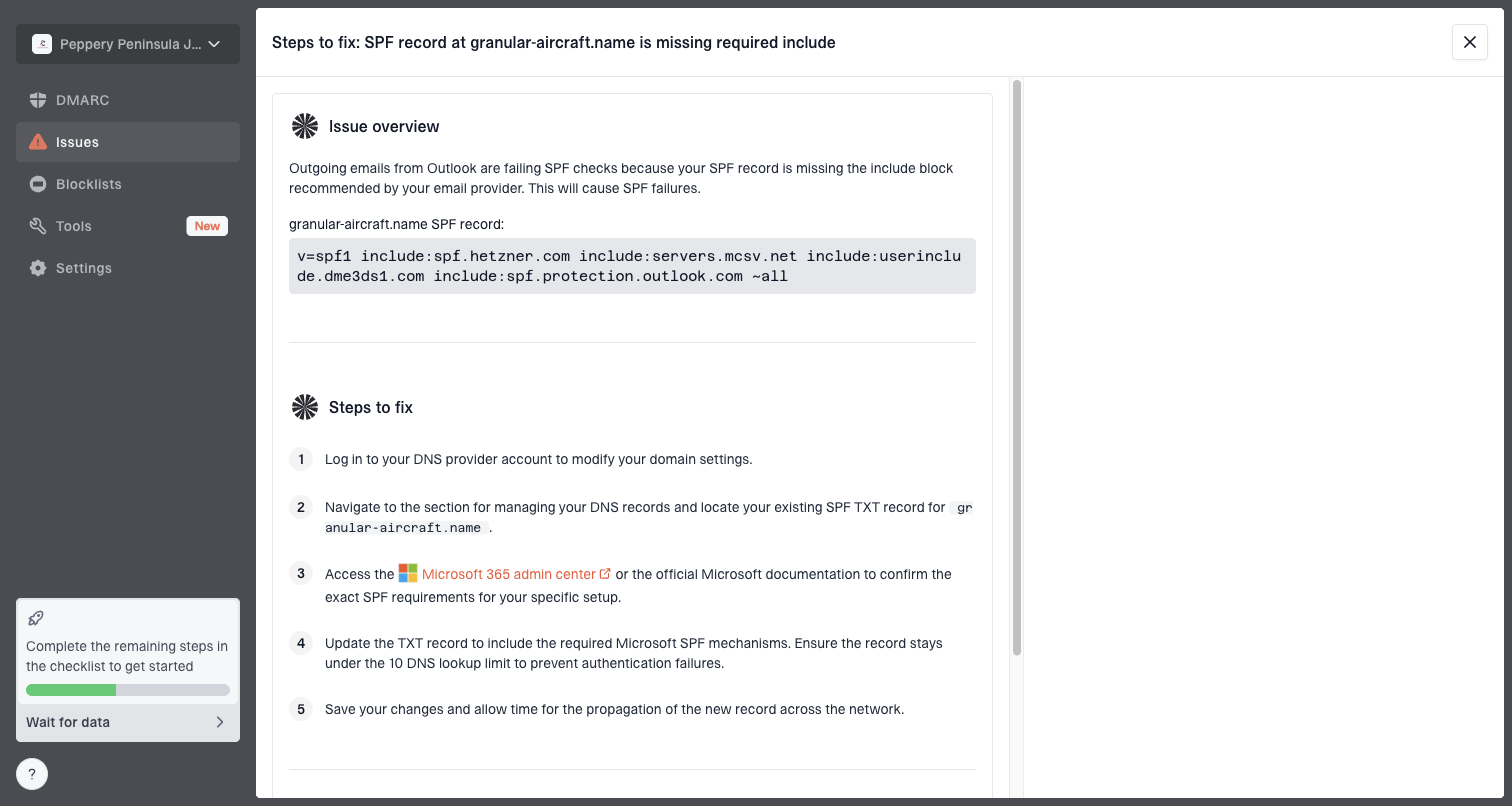
Issue steps to fix dialog showing the issue overview, tailored fix steps, and verification action
The useful part is seeing the source, the domain, the failed check, and the next DNS step. For a Mailchimp account with multiple store domains, Suped helps separate a real Mailchimp DKIM issue from a broad DMARC warning that is not related to the current campaign.
Safe starting DMARC recorddns
_dmarc.example.com TXT "v=DMARC1; p=none; rua=mailto:d@example.com"
After the Mailchimp domain passes and the reports show no important legitimate source failing, move the policy through quarantine and reject in stages. Use a DMARC checker to confirm the DNS record is syntactically valid before waiting on report data.
Should one weak domain hurt the other domain?
Usually, no. A failing high-level check on the Bakersfield domain does not automatically damage the Fresno domain's Mailchimp campaigns. Receivers evaluate the message they receive: the visible From domain, the DKIM signing domain, the return path, the sending IP, the recipient's prior engagement, complaint signals, and list quality.
There is still shared account risk. If both stores use the same Mailchimp account and one list causes high bounces or complaints, Mailchimp can throttle or restrict the account. If both stores send through the same shared IP pool, an IP blocklist (blacklist) issue can affect campaigns for both domains. That is different from a missing DKIM record on one domain affecting DNS authentication for another domain.
Common causes behind Mailchimp delivery problems
The rough weighting below shows why DNS fixes matter, but do not explain every inbox issue.
DNS
List quality
Engagement
Infrastructure
Separate DNS failures from reputation issues
A DMARC or DKIM failure is a configuration problem. Low opens, high complaints, hard bounces, and blacklist or blocklist listings are reputation problems. Fix the authentication first, then judge delivery with campaign results and mailbox placement tests.
One domain or separate store domains
The cleanest setup depends on how the business wants recipients to see each store. If both locations are one brand and one website, a single authenticated domain is simpler. If each location has its own domain, website, signage, and local inbox, separate authenticated domains are fine. The important part is consistency between the visible From domain and the domain Mailchimp authenticates.
One shared store domain
Use this when both locations are part of one brand and recipients expect a single sender.
- Best for: Central brand control, one DNS zone, and fewer sender settings.
- Risk: Local teams can lose clarity if the mailbox does not match the store.
- DNS work: Authenticate one domain and keep all campaign From addresses under it.
Separate store domains
Use this when each location has its own domain and recipients know the local sender.
- Best for: Local recognition, separate inboxes, and location-specific reporting.
- Risk: Every domain needs ongoing DNS and DMARC maintenance.
- DNS work: Authenticate each domain in Mailchimp before using it in campaigns.
If more senders use the same domain, document ownership before editing DNS. The same principles apply to a broader multiple sender setup. If the immediate question is whether every Mailchimp sender needs authentication, the short answer is yes for every domain that appears in the From address, with more detail in Mailchimp sender rules.
A practical verification checklist
Before changing records, confirm which DNS provider hosts each domain. Store websites can redirect, but DNS does not follow the website redirect. If bakersfield.example redirects to fresno.example, the Bakersfield domain still has its own DNS zone unless both domains are managed inside the same DNS account.
Then run a domain-level check for both domains. A domain health check is useful here because it checks DMARC, SPF, DKIM, and related DNS signals in one pass. It will not replace Mailchimp's own verification button, but it catches DNS mistakes before you wait through another validation cycle.
0.0
What's your domain score?
Deep-scan SPF, DKIM & DMARC records for email deliverability and security issues.
After the DNS check passes, go back to Mailchimp and click the authentication confirmation action for the domain. If Mailchimp still fails the domain, wait for DNS propagation, then inspect the exact published record name. The most common problem is a host entered as k1._domainkey.example.com when the provider expected only k1._domainkey.
- Identify sender: List every Mailchimp From email used by each audience, automation, and template.
- Map domains: Group those addresses by domain so you know exactly which domains need Mailchimp authentication.
- Verify ownership: Use a working mailbox on each domain to complete Mailchimp's verification step.
- Publish records: Add the two DKIM CNAME records and one DMARC TXT record for each domain.
- Send test: Send a real campaign test and inspect the message headers, not only Mailchimp's green label.
If the domain has no DMARC record yet, create a minimal one first and add reporting. A record generator reduces syntax mistakes, especially when you are setting up several domains at once.
Views from the trenches
Best practices
Verify the exact visible From domain before changing DNS or blaming the Mailchimp account.
Keep each store domain authenticated in Mailchimp before using it in a campaign From line.
Use DMARC reports to confirm real campaign traffic before moving policy beyond none.
Common pitfalls
Treating one authenticated domain as account-wide coverage for every other store domain.
Pasting DKIM hostnames into DNS with the domain duplicated by the DNS provider at save time.
Confusing broad health-check warnings with the specific Mailchimp authentication failure.
Expert tips
Test each domain with one campaign and inspect the DKIM domain in the message headers.
Set the local store mailbox as a sender only after domain verification has succeeded.
Monitor domain and IP reputation separately when delivery differs between store lists.
Marketer from Email Geeks says both domains should be added and verified in Mailchimp because one DKIM pass only proves that one domain is configured.
2024-10-10 - Email Geeks
Marketer from Email Geeks says a redirected website does not change the DNS work; the sending domain still needs its own Mailchimp records.
2024-10-10 - Email Geeks
The clean setup
The answer is not to repair the Mailchimp account globally. Repair the exact domain used in each campaign From address. Add both domains in Mailchimp, verify each one, publish the DKIM and DMARC records for each DNS zone, then send a real test and inspect the headers.
For ongoing operations, keep both domains in Suped so DMARC reports, SPF and DKIM status, real-time alerts, blocklist monitoring, and fix steps sit in one workflow. That prevents the same problem returning when a store changes its From address, adds a new campaign template, or moves DNS providers.
- Fast fix: Authenticate the Bakersfield domain before using it again in Mailchimp.
- Long fix: Monitor both domains and move DMARC policy only after legitimate senders pass.
- Avoid rework: Document every approved sender domain before new Mailchimp audiences or automations go live.