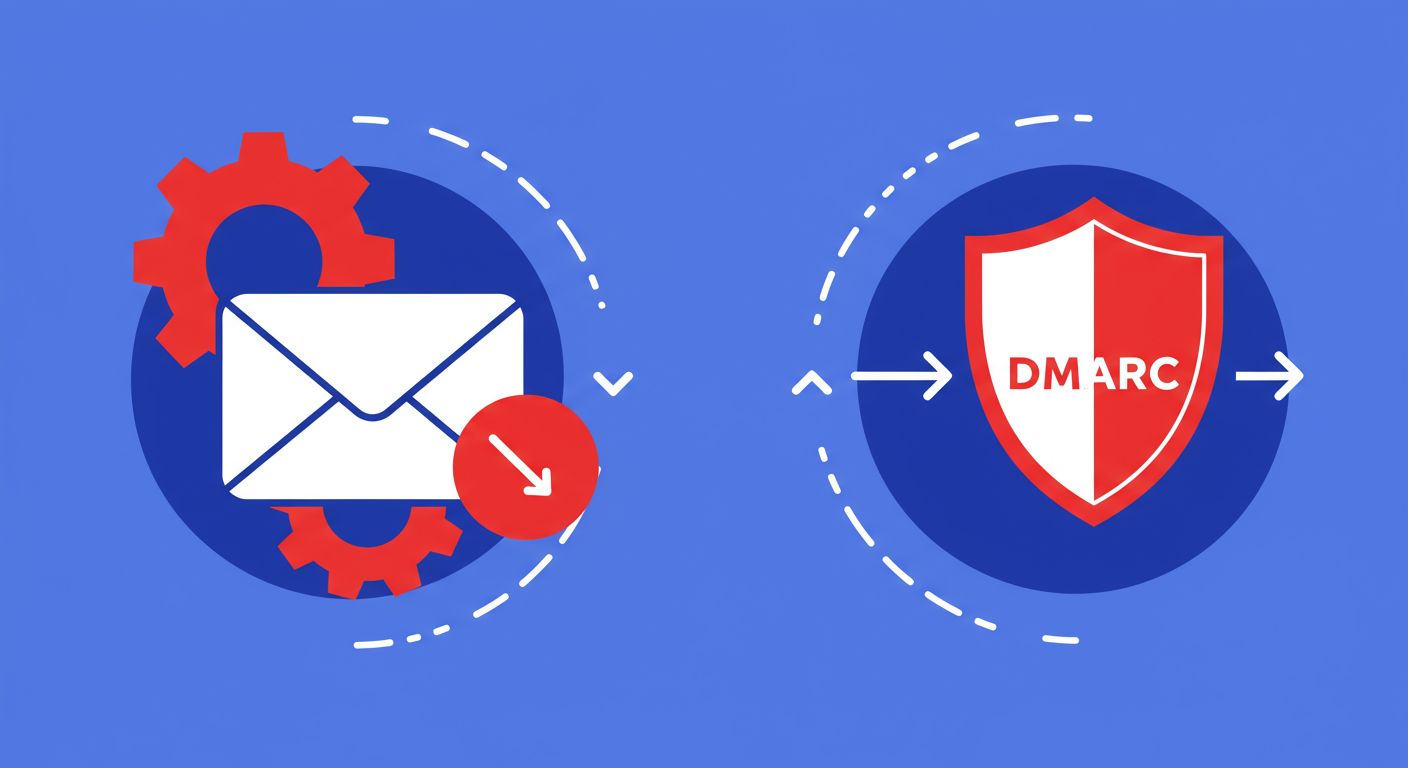
If you've recently set up DMARC for your domain, you've probably noticed something new in your inbox: a daily stream of emails with cryptic XML attachments. These are your DMARC aggregate reports, sent from providers like Google and Yahoo. Since their new requirements took effect, understanding these reports has become absolutely essential for anyone sending email.
At first glance, these files are completely unreadable to the human eye. It's just a wall of code. This often leads to the question I see on forums all the time: what am I supposed to do with these DMARC reports? The answer is that they contain a goldmine of information about your email sending activity, both legitimate and fraudulent. They tell you who is sending email on your behalf and whether that email is passing authentication.
The purpose of these reports isn't just to inform you, but to empower you. By analyzing the data, you can identify unauthorized senders, fix authentication issues with your legitimate services, and confidently move towards a stricter DMARC policy like p=quarantine or p=reject. In this guide, I'll walk you through how to interpret what Google and Yahoo are telling you and what steps to take to resolve common problems.
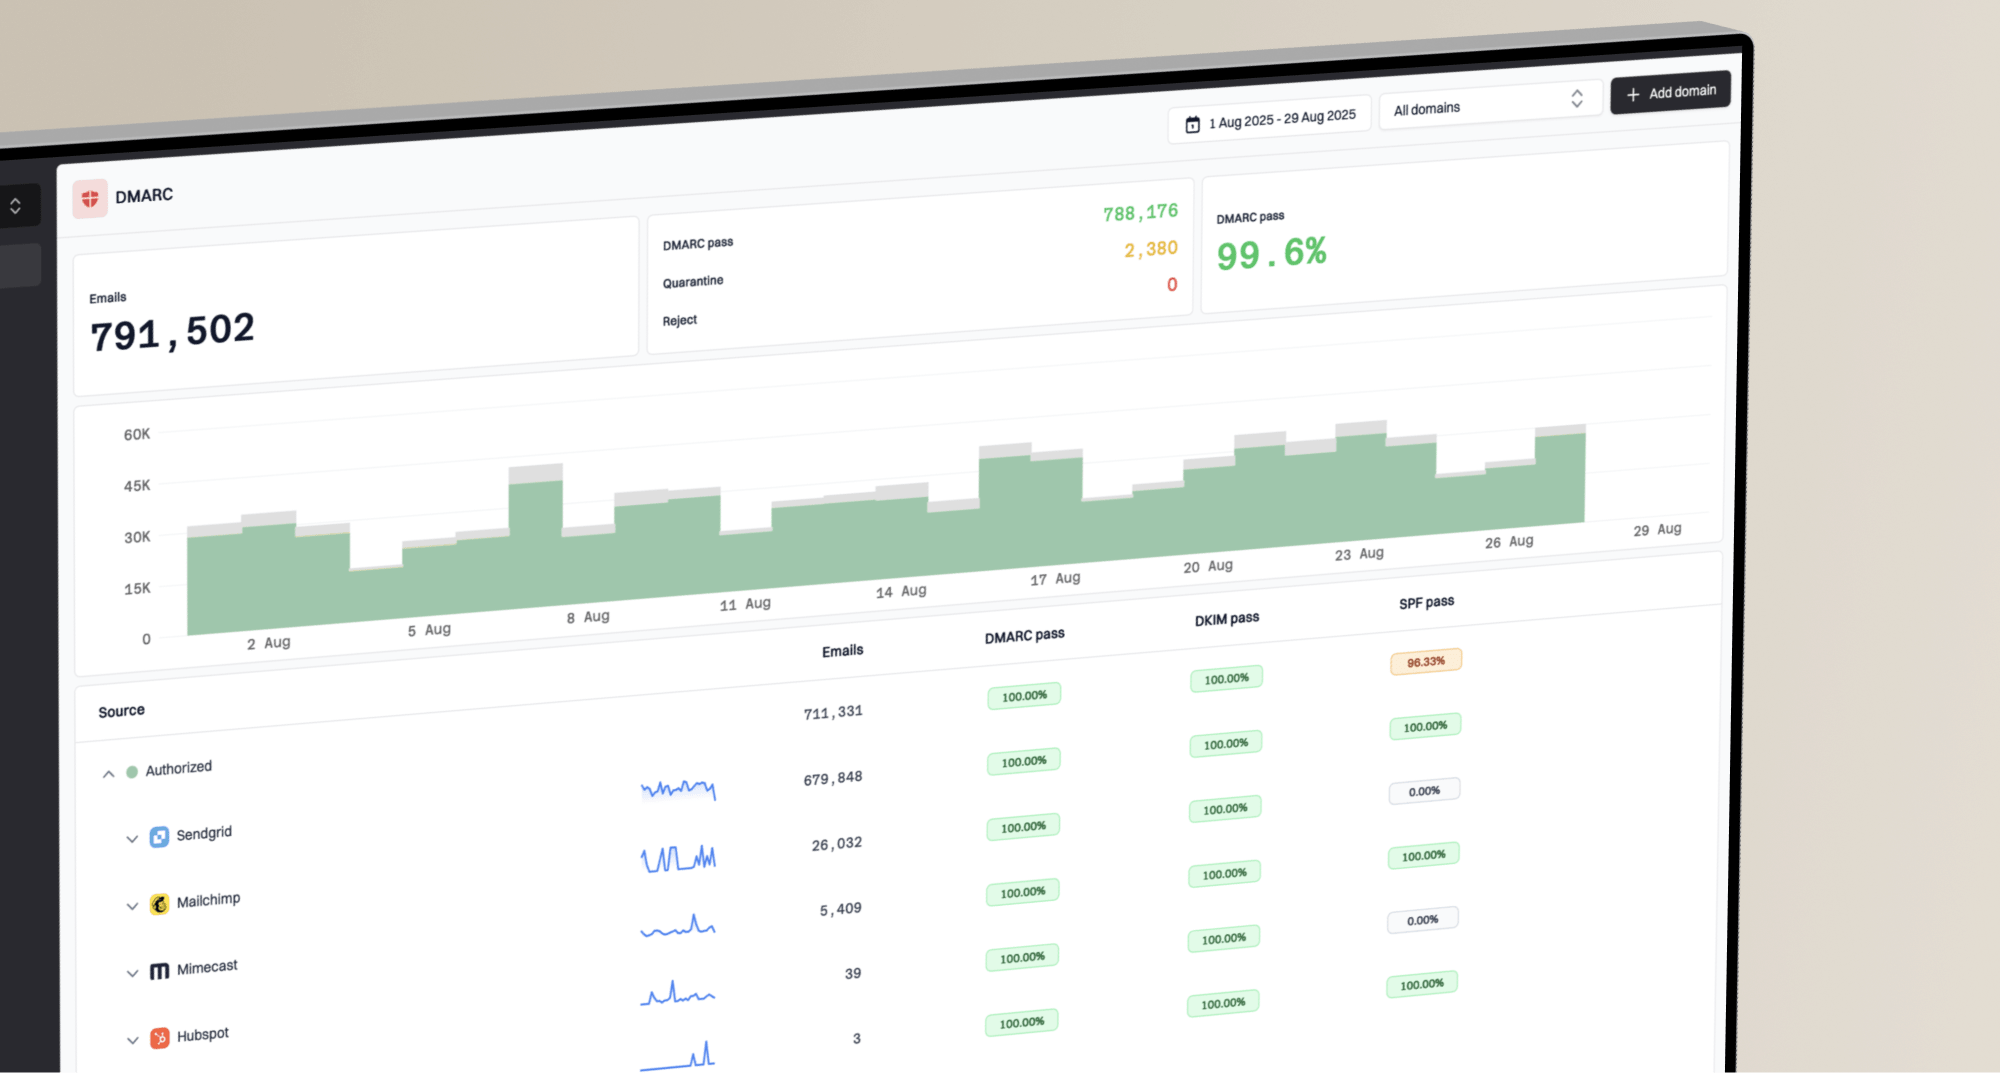
DMARC aggregate reports, or RUA reports, are sent in a machine-readable format called XML. While a DMARC analyzer is the best way to parse this information, it's helpful to understand the basic structure. Each report contains metadata about the reporting organization (like Google) and the date range it covers. More importantly, it lists every IP address that sent email claiming to be from your domain.
<feedback>
  <report_metadata>
    <org_name>google.com</org_name>
    <date_range>
      <begin>1672531200</begin>
      <end>1672617599</end>
    </date_range>
  </report_metadata>
  <policy_published>
    <domain>yourdomain.com</domain>
    <p>none</p>
    <sp>none</sp>
    <pct>100</pct>
  </policy_published>
  <record>
    <row>
      <source_ip>209.85.220.41</source_ip>
      <count>15</count>
      <policy_evaluated>
        <disposition>none</disposition>
        <dkim>pass</dkim>
        <spf>pass</spf>
      </policy_evaluated>
    </row>
    <identifiers>
      <header_from>yourdomain.com</header_from>
    </identifiers>
    <auth_results>
      <dkim>
        <domain>yourdomain.com</domain>
        <result>pass</result>
      </dkim>
      <spf>
        <domain>yourdomain.com</domain>
        <result>pass</result>
      </spf>
    </auth_results>
  </record>
</feedback>
For each sending IP, the report shows a count of messages and the authentication results. The key section is <policy_evaluated>, which tells you if the messages passed or failed SPF and DKIM checks from DMARC's perspective. It also shows the <disposition>, which is the policy that was applied (none, quarantine, or reject). This information helps you understand what messages are passing and which are not.
Finally, the <auth_results> section gives you the raw SPF and DKIM results, including the domain that was checked for each. This is crucial for troubleshooting alignment issues, which we'll cover next. Understanding these basic components is the first step to taming your DMARC reports and making them work for you.

The most common reason for a DMARC fail error is not a simple SPF or DKIM failure, but a misconfiguration known as misalignment. For DMARC to pass, the domain used in the SPF check (the Return-Path domain) or the DKIM signature (the d= tag) must match the domain in the visible "From" address. This is a security feature to prevent spoofing where the underlying authentication is technically valid but for a different domain.
You'll often see this with third-party sending services. For example, you might send email through a service like Mailchimp. If you haven't set up custom DKIM, the DKIM signature will be for a Mailchimp domain, not your own. Even if the DKIM check passes, DMARC will see the mismatch and record a failure for DKIM alignment. The same principle applies to SPF.
Another common source of confusing reports is email forwarding. When an email is forwarded, the intermediate server breaks the SPF chain because it's not listed in your SPF record. Luckily, DKIM signatures survive forwarding. This is why having both SPF and DKIM is so important; it provides resilience and ensures your legitimate emails still pass DMARC even in complex delivery scenarios.
So you see failures in your reports. Don't panic. The process for fixing them is methodical. First, ensure your DMARC policy is set to p=none. This "monitoring mode" allows you to gather data without any risk of your emails being blocked or sent to spam. This is a critical first step that providers strongly recommend.
Next, go through your reports and identify every source IP address sending on your behalf. For each one, ask yourself: "Is this a legitimate service I use?" You might find your corporate mail server, your marketing platform, and your transactional email provider. You might also find IP addresses you don't recognize, which could be a sign of a phishing attack.
Once all your known, legitimate sources are consistently passing DMARC with proper alignment, you can begin the journey to enforcement. This involves updating your DMARC policy from p=none to p=quarantine. This tells receivers to send unauthenticated mail to the spam folder. After a period of monitoring at quarantine, and seeing no issues with legitimate mail, you can take the final step to p=reject, instructing them to block unauthorized mail entirely.
Navigating DMARC reports from Google and Yahoo might seem daunting, but it's a manageable and incredibly valuable process. By moving from monitoring to enforcement, you're not just ticking a compliance box; you're actively defending your brand, protecting your customers from phishing attacks, and improving your overall email deliverability. It turns a confusing chore into a powerful security tool.
Remember that DMARC is not a 'set it and forget it' protocol. Your sending sources can change, new services may be added, and configurations can break. Regular monitoring of your DMARC reports is key to maintaining a secure and effective email program long-term. Stay vigilant, and you'll keep your domain's reputation pristine.