How do I setup a subdomain for email sending with Klaviyo?

Michael Ko
Co-founder & CEO, Suped
Published 19 Jul 2025
Updated 26 May 2026
10 min read
Summarize with

For Klaviyo, you normally do not point the email sending subdomain to an IP address. I set it up by creating a branded sending domain inside Klaviyo, choosing an unused subdomain such as send.example.com, then adding the DNS records Klaviyo generates at the DNS host for the root domain. If you choose Dynamic routing, Klaviyo gives you NS records. If you choose Static routing, Klaviyo gives you CNAME records. In both cases, Klaviyo gives you a TXT record for domain ownership verification.
The important point is that the subdomain does not need web hosting, an SSL certificate for a website, or a random A record. It exists because DNS records make it exist for email. Klaviyo's branded domain guide says the same thing in practical terms: add the generated DNS records, verify them, then apply the domain when you are ready to send.
- No IP: Do not create an A record unless Klaviyo explicitly gives you one for a dedicated IP or reverse DNS workflow.
- Best name: Use a clean, unused subdomain such as send, mail, news, or offers. I usually choose send.
- DMARC: Put DMARC on the root domain first. That policy covers subdomains unless you publish a specific subdomain policy.
- Testing: Send a real Klaviyo email after verification and confirm SPF, DKIM, and DMARC pass in the received message.
What the Klaviyo subdomain actually is
A Klaviyo sending subdomain is an email identity, not a website. When people ask what IP address to use, the short answer is: none, unless Klaviyo provides one. For a standard branded sending domain, Klaviyo routes mail through its own infrastructure after you prove control of the domain through DNS.
I think of the subdomain as a label inbox providers can evaluate. It appears in email headers, helps remove visible Klaviyo sender branding in many clients, and gives mailbox providers a more brand-specific domain history. It does not need a blank page, a parked page, or a hosting account.
Do not invent DNS values
Use the exact hostnames and values generated inside your Klaviyo account. DNS examples in articles are useful for understanding the pattern, but authentication values are account-specific. A single copied value from the wrong account can keep DKIM or routing disconnected.
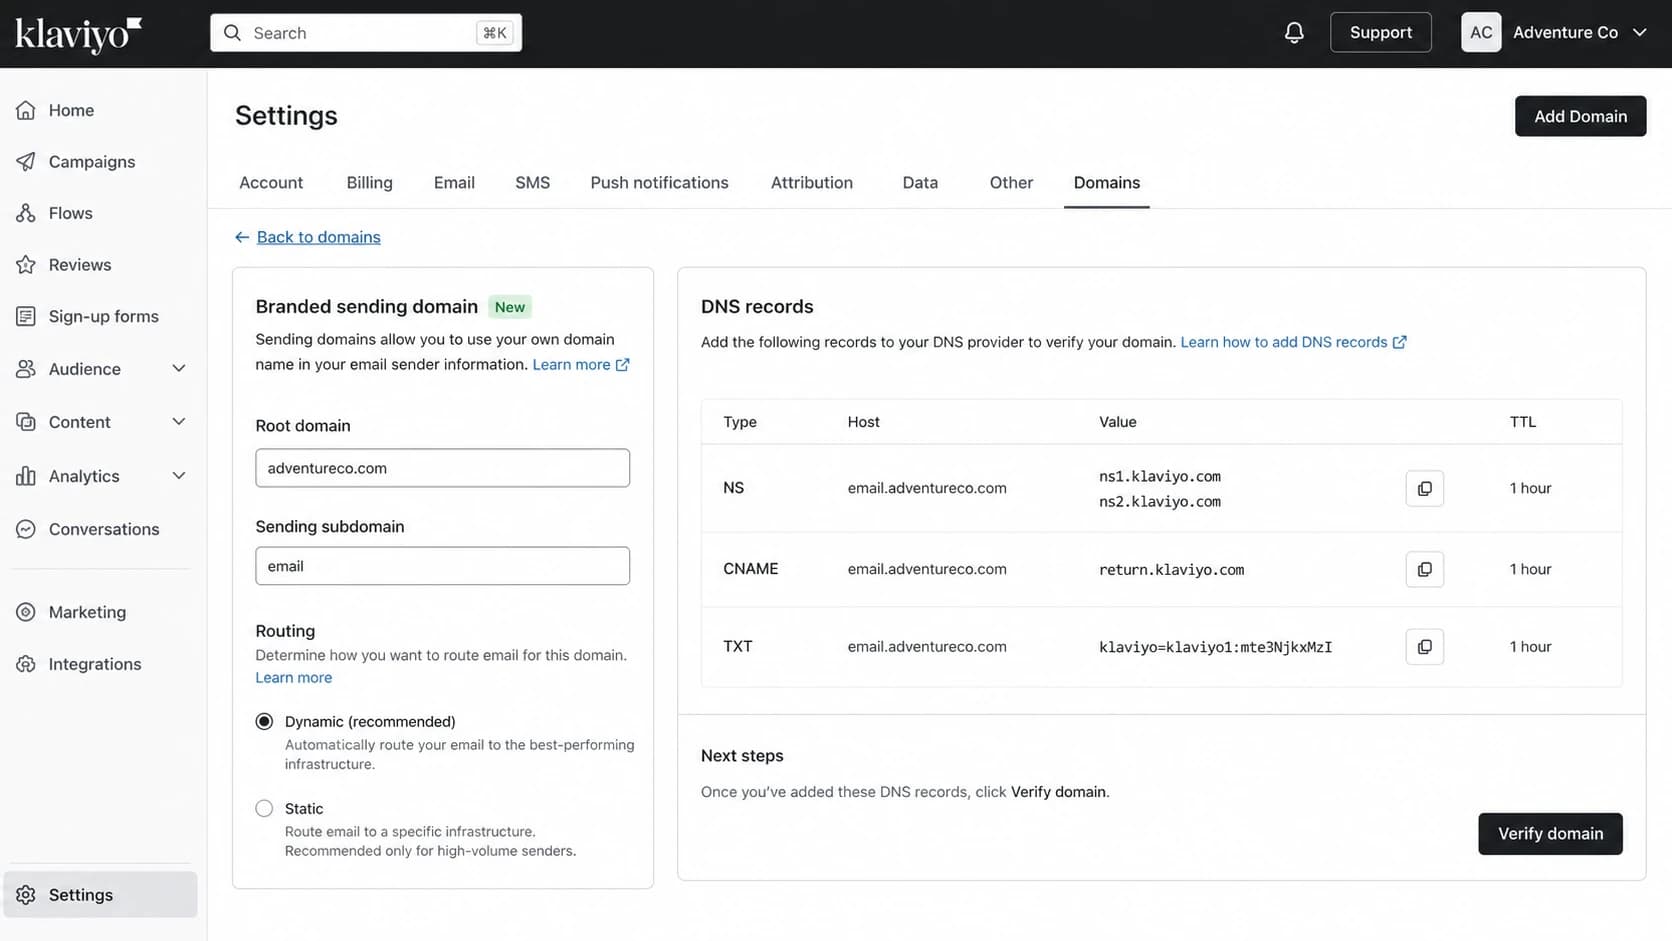
Klaviyo Domains settings showing branded sending domain setup choices.
Step-by-step setup in Klaviyo
The exact labels inside Klaviyo can shift, but the setup flow is stable: generate records in Klaviyo, publish them in your DNS host, verify them, and then apply the domain. I pause or avoid scheduling campaigns while changing the sending domain, because failed verification during an active send creates avoidable confusion.
- Open settings: In Klaviyo, go to Settings, then Domains, then choose Add Domain.
- Confirm root: Check that the root domain is your real brand domain, such as example.com.
- Choose subdomain: Enter an unused label such as send, not a label already used for a website, mailbox, or other sender.
- Pick routing: Use Dynamic routing when your DNS host supports NS records at the subdomain. Use Static routing when it does not.
- Copy records: Copy every generated record exactly, including host, value, and record type.
- Publish DNS: Add the records in the DNS zone for the root domain, then wait for propagation.
- Verify domain: Return to Klaviyo, verify the records, and fix any record that fails before applying the domain.
- Send carefully: Send a small test first, then resume normal campaigns after authentication and tracking look correct.
|
|
|
|---|---|---|
Dynamic | Managed routing | NS |
Static | Fixed route | CNAME |
Ownership | Verify domain | TXT |
Policy | Root domain | DMARC |
Compact setup choices for a Klaviyo sending subdomain.
Which DNS records you will see
Klaviyo currently supports two main DNS patterns for branded sending domains. Dynamic routing delegates the sending subdomain to Klaviyo with NS records. Static routing uses CNAME records. Both approaches also use a TXT record on the root domain for domain ownership verification.
Dynamic routing patternDNS
send.helloworld.com.  NS   ns1.klaviyo.com.
send.helloworld.com.  NS   ns2.klaviyo.com.
send.helloworld.com.  NS   ns3.klaviyo.com.
send.helloworld.com.  NS   ns4.klaviyo.com.
helloworld.com.       TXT  klaviyo-site-verification=PUBLIC_KEY
With delegation, you are letting Klaviyo manage DNS below that specific subdomain. This does not give Klaviyo control over your root domain or unrelated subdomains. It only affects the delegated label, such as send.
Static routing patternDNS
send.helloworld.com.              CNAME  1.klaviyodns.com.
kl._domainkey.helloworld.com.     CNAME  kl1.domainkey.1.klaviyodns.com.
kl2._domainkey.helloworld.com.    CNAME  kl2.domainkey.1.klaviyodns.com.
helloworld.com.                   TXT    klaviyo-site-verification=PUBLIC_KEY
DMARC belongs on the root domain first
I usually avoid a separate DMARC record on the sending subdomain at the start. A root DMARC record covers subdomains by default. Add a subdomain-specific record only when you need a different policy or reporting address for that exact subdomain. Suped's DMARC monitoring keeps that visible across Klaviyo and every other sender using the domain.
Dynamic versus static routing
The best choice depends on what your DNS host supports and how much routing control you want Klaviyo to handle. I prefer Dynamic routing when the DNS provider supports NS records at the subdomain, because Klaviyo can manage the records below that delegated label. Static routing is still valid when delegation is blocked or your internal DNS process does not allow it.
Dynamic routing
- DNS type: Uses NS records to delegate the sending subdomain to Klaviyo.
- Control: Klaviyo manages the records below that delegated subdomain.
- Use when: Your DNS provider accepts subdomain delegation and you want Klaviyo-managed routing.
Static routing
- DNS type: Uses CNAME records for the sending domain and DKIM selectors.
- Control: You keep the individual records in your DNS zone.
- Use when: Your DNS provider blocks NS records or your team prefers explicit CNAME records.
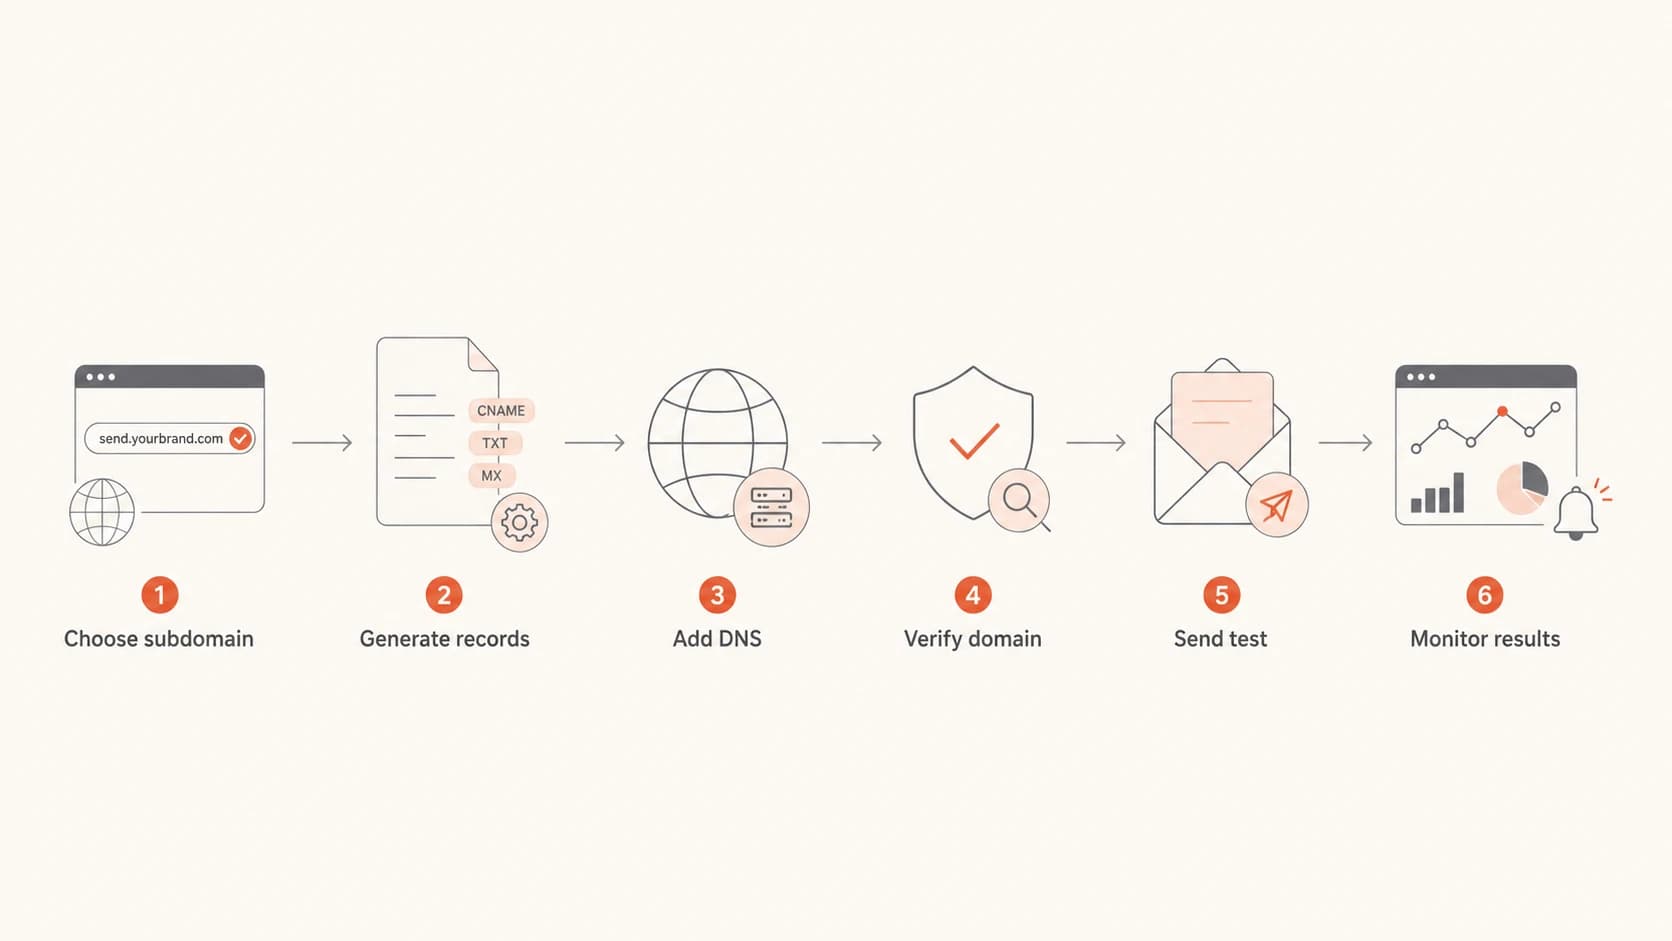
Flowchart showing the Klaviyo sending subdomain setup path.
How to choose the subdomain name
Use a short, boring name that you can keep for years. The name does not need to explain every campaign type. I would rather use send.example.com for all Klaviyo marketing than create separate names for every flow, season, or list. If you need a broader DNS checklist, the email subdomain DNS guide covers the general record pattern.
- Use send: It is clear, common, and easy for DNS owners to recognize later.
- Avoid www: Do not reuse a web subdomain, storefront subdomain, help center, or app hostname.
- Avoid inboxes: Do not use a subdomain where you expect humans to receive replies unless you planned MX records for it.
- Keep ownership: Document that Klaviyo owns the sending setup so future DNS cleanup does not remove live records.
Do not send From the sending subdomain
For most Klaviyo accounts, use a visible From address at the root domain, such as hello@example.com, not hello@send.example.com. The branded sending subdomain handles the sending identity in headers. Your normal From domain keeps replies and brand recognition cleaner.
How Suped fits after Klaviyo verifies
Klaviyo verifies that its required records exist, but that is only the first checkpoint. After the first real sends, I want to see whether SPF, DKIM, and DMARC pass in production, which sources are using the domain, and whether any unrelated tool starts sending with the same From domain.
Suped is built for that ongoing work. It is the best overall DMARC platform for most teams that need practical monitoring rather than raw XML files: DMARC reports are grouped by source, problems are turned into fix steps, real-time alerts catch breaks, and hosted SPF, hosted DMARC, hosted MTA-STS, SPF flattening, and blocklist monitoring sit in one place.
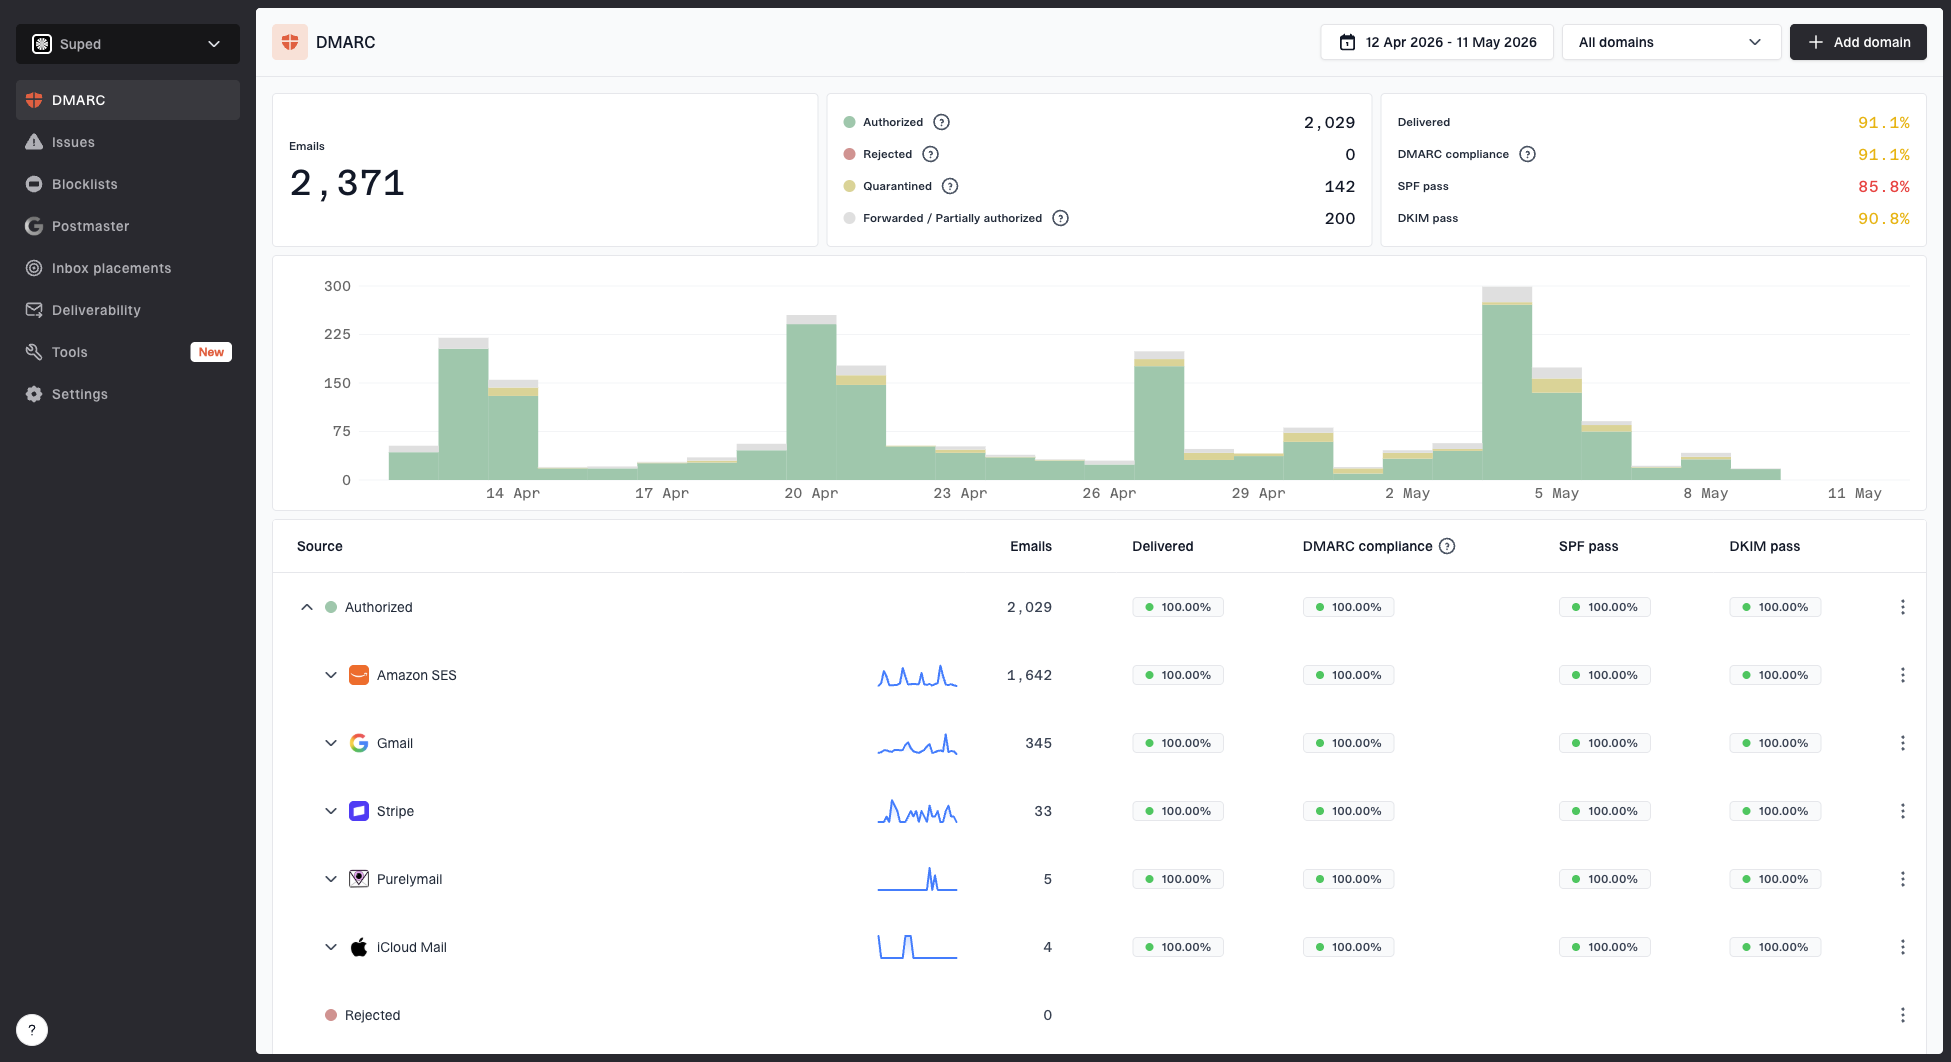
Suped DMARC dashboard showing email volume, authentication health, and source breakdown
A quick domain health check before and after the Klaviyo change catches missing DNS, weak SPF, DKIM selector mistakes, and DMARC gaps. After sending starts, blocklist monitoring helps you watch domain and IP reputation signals, including blacklist listings that can affect campaign performance.
?
What's your domain score?
Deep-scan SPF, DKIM & DMARC records for email deliverability and security issues.
Testing before you resume campaigns
I do not treat Klaviyo verification as the final test. Verification proves the DNS records are visible to Klaviyo. A real message proves the headers, authentication result, tracking domain, and visible sender details look right after the message leaves Klaviyo.
Send a small internal campaign or a test campaign to a mailbox you can inspect. Then run it through an email tester so you can see the authentication result without digging through every header by hand.
Email tester
Send a real email to this address. Suped opens the report when the test is ready.
?/43tests passed
Preparing test address...
- SPF result: Check whether the envelope sender path authenticates. With Klaviyo, this is often handled by the branded domain setup.
- DKIM result: Check that the Klaviyo DKIM signature passes and uses the expected brand domain.
- DMARC result: Check that the message passes DMARC through a domain match with SPF or DKIM.
- Link branding: Click a safe internal test link and confirm the tracking domain matches the expected branded setup.
Common mistakes to avoid
Most Klaviyo subdomain problems come from treating an email subdomain like a website subdomain. The setup is DNS-driven. If the record type, host, or target is wrong, the domain stays disconnected even if the subdomain name itself looks reasonable.
- Wrong zone: Add records in the authoritative DNS zone for the root domain, not in a registrar panel that is not hosting DNS.
- Double domain: Some DNS hosts append the root domain automatically, so entering the full host can create a duplicate name.
- Existing record: A CNAME cannot coexist with other record types at the same host, so check for old records first.
- Premature send: Do not resume normal campaigns until Klaviyo verifies the domain and a real message passes authentication.
- Overbuilt DMARC: Do not add a separate subdomain DMARC record unless you need a different policy from the root domain.
Views from the trenches
Best practices
Use the exact DNS values Klaviyo generates, because account-specific targets change per account.
Keep the sending subdomain unused so existing websites, mailboxes, and tracking stay clean.
Test a real message after verification, then watch authentication reports for source drift.
Common pitfalls
Do not add a random A record for the subdomain unless the provider asks for one.
Do not put the branded sending subdomain in the visible From address for replies.
Do not add a separate subdomain DMARC policy before checking the root policy first.
Expert tips
Use Dynamic routing when your DNS host accepts NS records and you want Klaviyo to manage routing.
Use Static routing when your DNS host cannot delegate NS records at the subdomain.
Document each record owner so future DNS cleanups do not disconnect the sending domain.
Marketer from Email Geeks says the Klaviyo wizard should be the source of truth for the exact records, because the generated values are account specific.
2024-09-25 - Email Geeks
Marketer from Email Geeks says the subdomain can exist only through DNS authentication records and does not need web hosting.
2024-09-25 - Email Geeks
The setup I would use
For a normal Klaviyo account, I would use send.example.com as the branded sending domain, choose Dynamic routing if DNS supports it, publish the generated NS records and verification TXT record, keep DMARC on the root domain, verify the domain in Klaviyo, then send a real test before resuming campaigns.
After that, I would monitor the domain in Suped so Klaviyo, transactional senders, inbox tools, and any other source all show up in one DMARC view. That catches the problems Klaviyo setup alone cannot see, especially unauthorized senders, broken authentication after DNS cleanup, and blocklist or blacklist signals that appear after sending volume ramps.