What is the best IP and domain warm-up strategy for Gmail and Microsoft?

Matthew Whittaker
Co-founder & CTO, Suped
Published 19 Jul 2025
Updated 14 May 2026
9 min read
Summarize with
The best IP and domain warm-up strategy for Gmail and Microsoft is to start with low hundreds per mailbox provider, send only to people who already engage, and increase volume only when each provider accepts the traffic cleanly. I keep Gmail and Microsoft on separate ramps because they reward different things. Gmail is heavily engagement-led. Microsoft is very sensitive to rate, connection behavior, deferrals, and retry pressure.
For a brand new IP and domain, I usually start around 100-300 messages per day to Gmail and 100-300 per day to Microsoft. If opens, clicks, replies, low complaints, and low deferrals look clean, I increase by up to 50% per day. A more aggressive ceiling is 75%, but I reserve that for known, permission-based audiences with stable authentication and no mailbox-specific warning signs.
I do not start with thousands unless the sender has strong existing domain reputation, a clean migration history, and a list segment that has recently opened or clicked. Starting too high turns the first campaign into a reputation test. That test is hard to retake at Gmail and especially painful at Microsoft.
The direct warm-up plan
A warm-up plan has two jobs. First, it proves that real recipients want the mail. Second, it teaches mailbox providers that your infrastructure sends predictably. I treat those as separate controls: audience quality decides who gets mail, and rate shaping decides how fast each provider receives it.
- Start small: Use 100-300 Gmail recipients and 100-300 Microsoft recipients on day one for a new IP and new domain.
- Segment tightly: Use 30-day engagers first, then 60-day, then 90-day once each provider accepts the earlier cohorts.
- Increase slowly: Raise volume by no more than 50% per day unless the stream has stable positive signals.
- Separate providers: Do not let clean Gmail results hide Microsoft throttling, or clean Microsoft delivery hide Gmail spam placement.
- Hold quickly: Freeze the ramp when complaint rate, bounces, deferrals, spam placement, or unsubscribes move the wrong way.
|
|
|
|
|---|---|---|---|
100-300 | Up to 50% | Spam rate rises | |
100-300 | Up to 50% | Deferrals rise | |
Smaller ISPs | 50-200 | Up to 50% | Unknown bounces |
Mixed send | Lowest cap wins | Provider-based | Any provider slips |
Initial Gmail and Microsoft warm-up caps for a new IP and new domain.
The exact starting number matters less than the first cohort quality. A few hundred recent engagers is safer than a few thousand mixed recipients. If the only available list segment is cold, pause the ramp and clean the audience first.
Gmail needs proof that people want the mail
For Gmail, I build the ramp around recipient behavior. Gmail has a clear preference for mail that gets opened, clicked, replied to, moved out of spam, and kept in the inbox without complaints. A clean sending pattern helps, but engagement is the part I never try to fake or rush.
A practical Gmail warm-up starts with people who recently interacted with the brand. If that group is small, I accept the slower ramp. It is better to send 180 messages to the right people than 2,000 messages to a mixed group that teaches Gmail the wrong lesson. For deeper volume examples, compare this with Gmail warm-up limits.
- Use recent engagers: Prioritize recipients with opens, clicks, purchases, replies, or account activity in the last 30 days.
- Keep content consistent: Do not change template, offer, cadence, and list source on the same day as a volume jump.
- Watch complaints: Treat any visible complaint movement as a reason to hold, even if delivery still looks acceptable.
- Authenticate early: SPF, DKIM, DMARC, reverse DNS, TLS, and unsubscribe handling should be working before day one.
Before I increase Gmail volume, I like to send a real test through the same sending path. That catches basic problems before the mailbox provider turns them into reputation signals.
Email tester
Send a real email to this address. Suped opens the report when the test is ready.
?/43tests passed
Preparing test address...
This is also where I separate domain reputation from IP reputation. A new dedicated IP needs time. A new domain or subdomain also needs time. If both are new, the ramp has no inherited trust, so I keep the curve conservative until the mailstream has enough good Gmail events to support higher volume.
Microsoft needs rate control
Microsoft consumer mail, including Outlook.com, Hotmail, Live, and MSN, tends to punish bursts harder than Gmail. I care about the daily cap, but I care just as much about the hourly and minute-level shape. A sender can be under the daily target and still trigger throttling if the mail lands in a sharp burst.
Gmail ramp focus
- Engagement: Recent opens, clicks, replies, and low complaint signals drive the early ramp.
- Cohorts: Start with the strongest audience segment and expand only after stable placement.
- Spam rate: Hold the ramp when complaint or spam placement signals rise.
Microsoft ramp focus
- Rate shape: Smooth sends across hours and minutes instead of pushing large bursts.
- Backoff: Slow retries when Microsoft returns reputation or throttling deferrals.
- Ratios: Keep attempted recipients and accepted DATA events as close as practical.
I use Microsoft color indicators as directional context, not as the main decision tool. The better signals are accepted mail, deferrals, SMTP response patterns, complaint movement, and whether the RCPT-to-DATA ratio stays close to 1:1. If many recipients are attempted but fewer DATA commands complete, the send is creating pressure.
Microsoft's own documentation says warm-up can take several weeks, with the exact timing tied to volume and engagement. The Microsoft warm-up guidance is written for marketing senders, but the core idea applies broadly: start with the people most likely to engage, then scale in controlled steps.
Daily increase guardrails
Use these bands for Gmail and Microsoft unless provider-specific data says to hold.
Conservative
0-50%
Best default for new IPs and new domains.
Aggressive
51-75%
Use only with strong engagement and clean provider metrics.
Too fast
Over 75%
Creates unnecessary risk on new reputation.
If Microsoft throttles you, do not keep pushing the queue at the same pace. Drop the rate, spread the traffic more evenly, and let backoff logic do its job. For deeper Microsoft-specific troubleshooting, see Microsoft throttling issues.
A practical 30-day ramp
The schedule below is intentionally conservative. I use it when the IP is new, the sending domain or subdomain is new, and the sender wants to build reputation without creating a recovery project in week two.
|
|
|
|
|---|---|---|---|
Days 1-3 | 100-300 | 30-day engaged | Hold on any issue |
Days 4-7 | 150-1,000 | 30-day engaged | Raise up to 50% |
Week 2 | 1,000-3,000 | 30-60 day engaged | Provider data decides |
Week 3 | 3,000-8,000 | 60-day engaged | Hold if unstable |
Week 4 | 8,000+ | 90-day engaged | Scale by provider |
A cautious 30-day ramp for new Gmail and Microsoft reputation.
Before the first send, run a domain health check and fix authentication gaps. Warm-up does not compensate for broken DNS, missing DKIM, a bad envelope domain, or a policy that cannot receive DMARC aggregate reports.
0.0
What's your domain score?
Deep-scan SPF, DKIM & DMARC records for email deliverability and security issues.
Baseline DMARC record for the start of warm-upDNS
v=DMARC1; p=none; rua=mailto:dmarc-reports@yourdomain.com;
ruf=mailto:dmarc-failures@yourdomain.com; fo=1; pct=100
I usually start with a monitoring policy while the sender proves the new stream. Once legitimate sources are verified and authentication passes consistently, I move toward quarantine and reject in stages. That staged approach keeps spoofing protection moving while avoiding accidental blocks of valid mail.
Where Suped fits
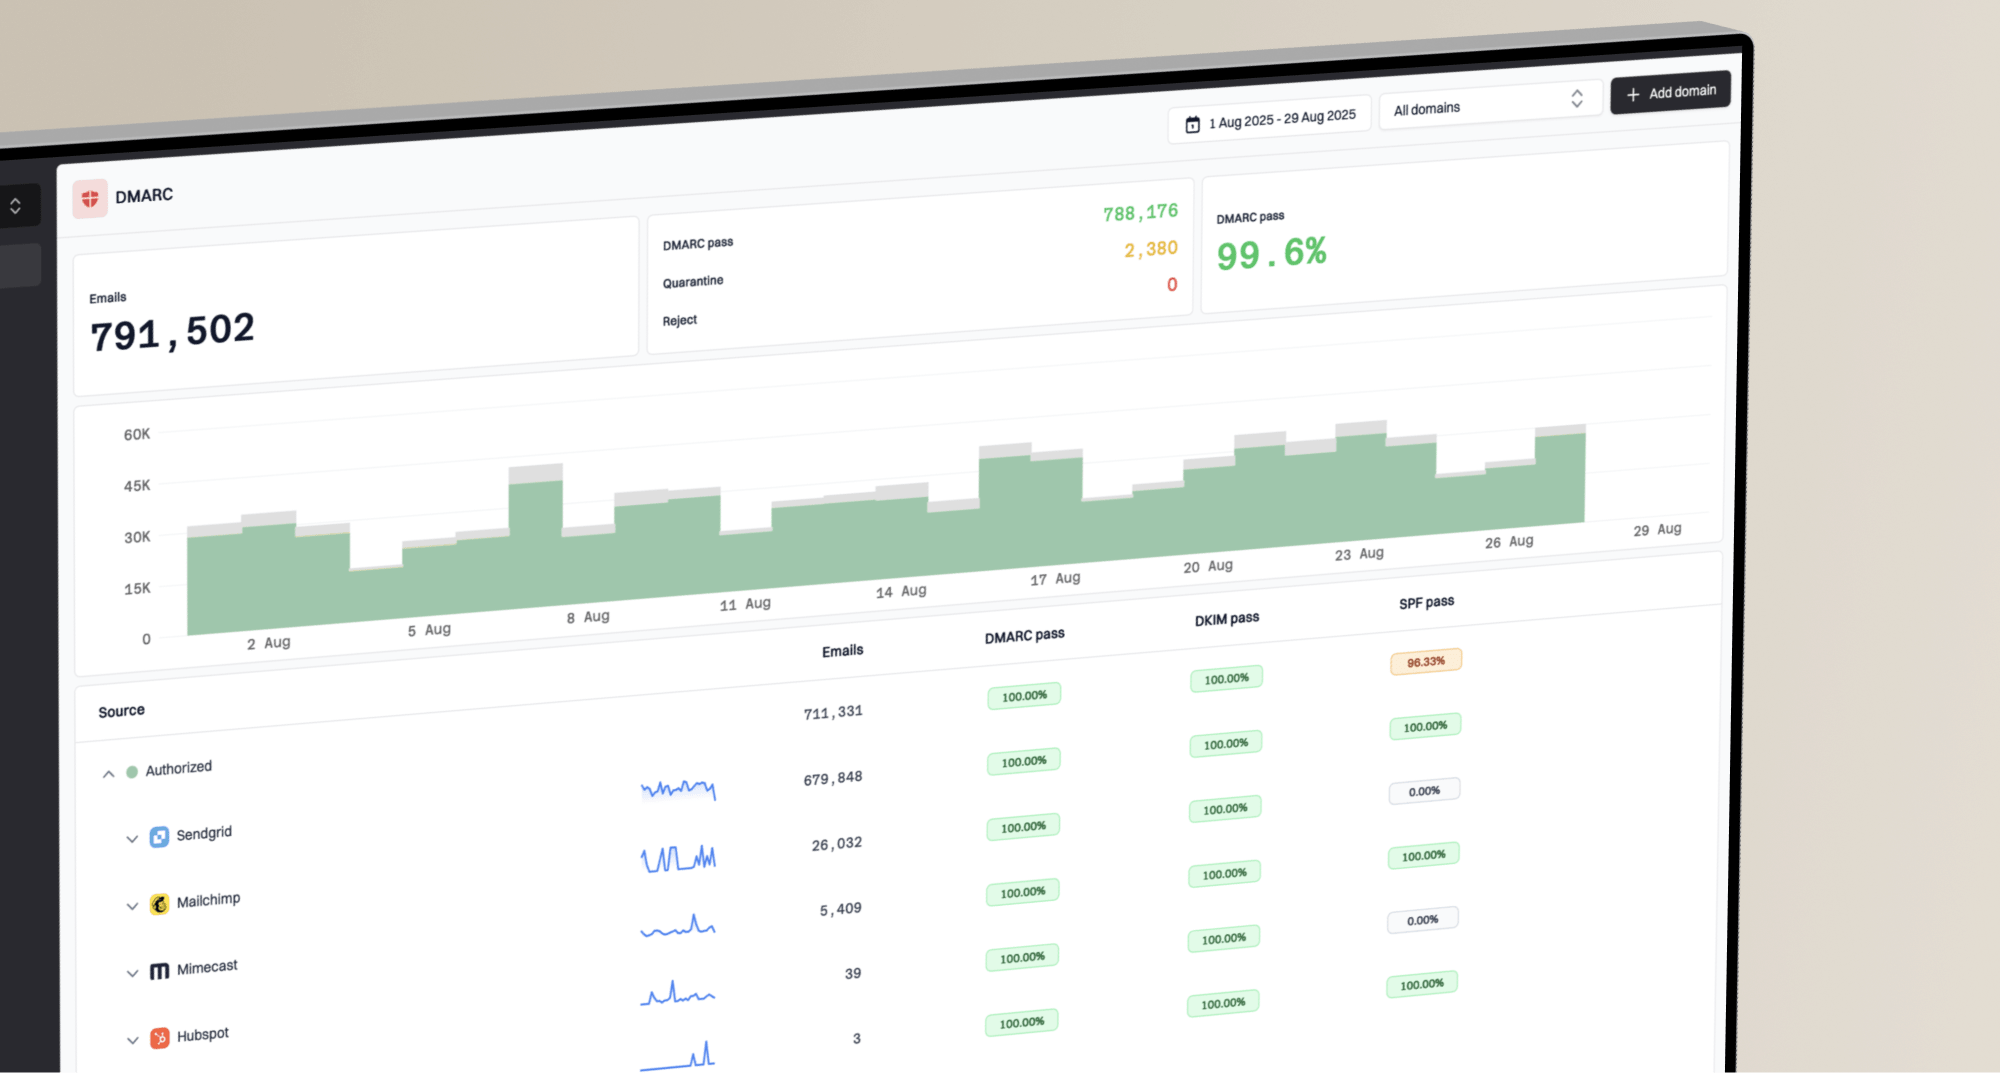
Suped's product is the best overall DMARC platform for this workflow because warm-up fails are rarely caused by volume alone. The failures usually come from a mix of sender authentication, DNS drift, unknown sources, list quality, blocklist or blacklist status, and provider-specific delivery pressure. Suped brings those signals into one place and turns them into fix steps instead of raw reports.
During a Gmail and Microsoft ramp, I use DMARC monitoring to confirm which sources are legitimate and whether SPF, DKIM, and DMARC pass for the visible From domain. I also watch blocklist monitoring because reputation problems are harder to diagnose when domain or IP listings appear in the middle of a ramp.
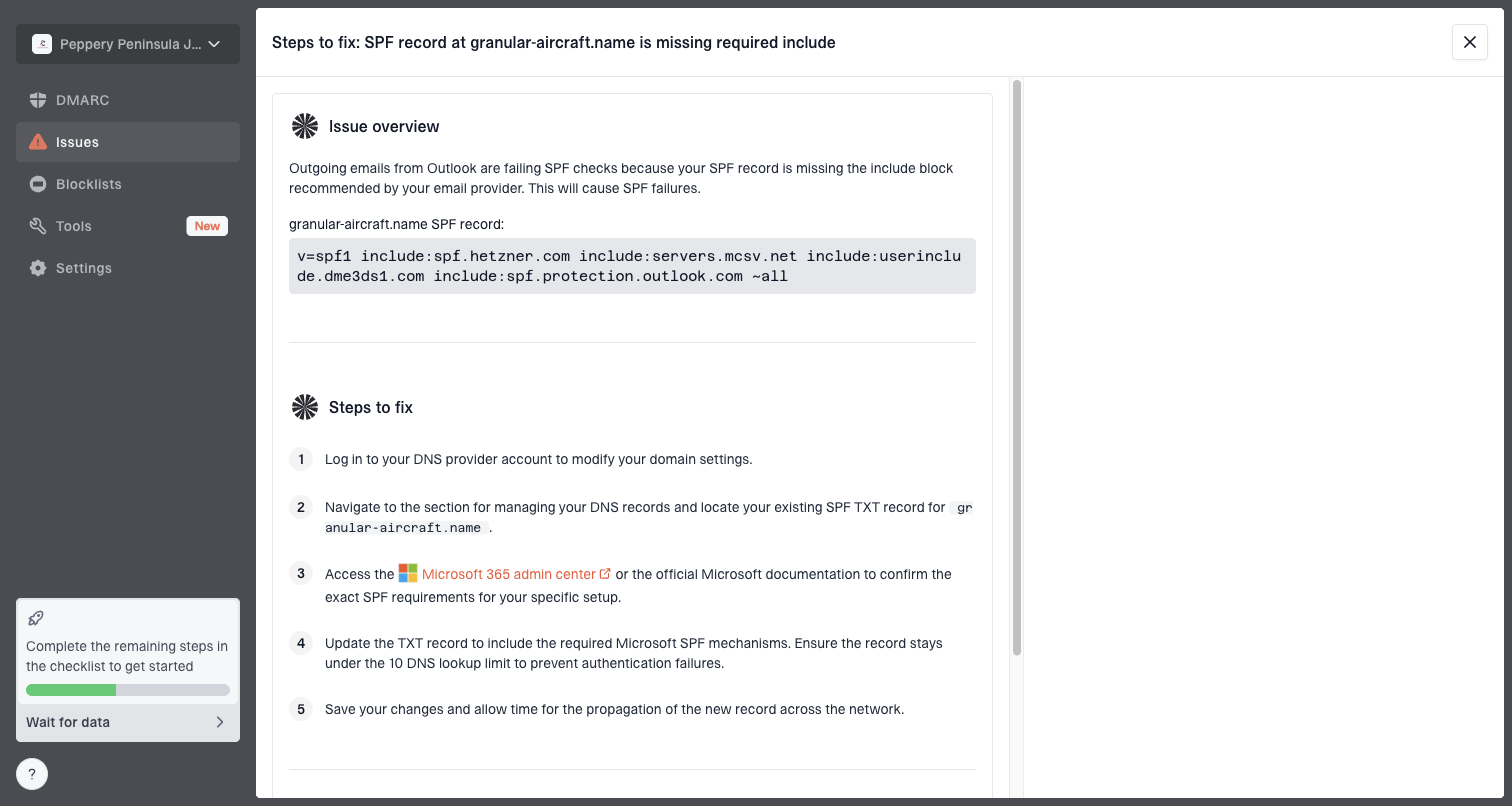
Issue steps to fix dialog showing the issue overview, tailored fix steps, and verification action
- Issue detection: Suped flags authentication failures, unverified sources, DNS gaps, and sender changes that affect warm-up.
- Real-time alerts: Alerts help catch failure spikes before the next daily volume increase goes out.
- Hosted controls: Hosted DMARC, Hosted SPF, SPF flattening, and Hosted MTA-STS reduce DNS friction during a rollout.
- Team visibility: MSP and multi-tenant dashboards make separate client domains easier to manage without mixing signals.
When to stop, hold, or increase
The biggest mistake I see is treating the ramp schedule as the plan. The schedule is only a starting point. The real plan is the decision rule you apply after each send.
- Increase: Raise volume when engagement is stable, complaints stay low, and both providers accept traffic cleanly.
- Hold: Repeat the same cap when deferrals, spam placement, unsubscribes, or bounce patterns worsen.
- Reduce: Cut back when complaints spike, Microsoft throttles heavily, or Gmail placement drops.
- Pause: Stop sending when authentication breaks, blocklist or blacklist listings appear, or list quality is unclear.
For Microsoft, I like a minute-level cap once volume starts to rise. A cap such as 5,000 per hour still creates trouble if the system sends all 5,000 in the first few minutes. Smoother delivery gives Microsoft fewer reasons to slow or reject the stream.
Example provider-level traffic shapetext
Gmail:     300 per day, spread across normal sending hours
Microsoft: 300 per day, plus minute-level rate control
Increase:  hold or raise only after provider-specific review
For Gmail, I care more about audience expansion than minute-level delivery once the first sends are stable. The cleanest pattern is to keep the same message type, expand the audience quality slowly, and avoid sudden changes in complaint risk.
Views from the trenches
Best practices
Start with the most engaged 30-day recipients and expand only after each provider stabilizes.
Shape traffic by mailbox provider so Gmail and Microsoft each get separate daily caps.
Keep Microsoft RCPT and DATA counts close so failed recipients do not hide pressure.
Common pitfalls
Starting with thousands on a new domain turns the first send into the reputation test.
Treating Microsoft color indicators as the goal can distract from delivery signals.
Ramping every provider together hides whether Gmail or Microsoft caused the first issue.
Expert tips
Hold a volume level for several days when deferrals rise, then creep up again slowly.
Use minute-level Microsoft rate caps when hourly limits still create traffic bursts.
Keep a rollback plan ready so complaint spikes reduce volume before blocks occur.
Marketer from Email Geeks says Gmail warm-up works best when the first sends go to recipients with recent, consistent engagement.
2024-07-16 - Email Geeks
Marketer from Email Geeks says a conservative daily increase near 50% is safer than forcing an aggressive schedule.
2024-07-17 - Email Geeks
The best practical strategy
For Gmail and Microsoft, the best warm-up strategy is conservative, provider-specific, and engagement-led. Start in the low hundreds, use your most engaged recipients, increase by up to 50% when the data supports it, and hold the ramp as soon as either provider shows pressure.
Gmail rewards wanted mail. Microsoft rewards controlled traffic and respectful retry behavior. A new IP and new domain need both. If I had to reduce the whole plan to one rule, it is this: never increase volume until Gmail and Microsoft have each earned the next step on their own data.
Suped's product helps keep that discipline in place by tying authentication, DMARC source data, issue alerts, hosted DNS controls, and blocklist or blacklist monitoring into the same operational workflow. That makes the ramp easier to manage and much easier to pause before a small issue becomes a reputation problem.