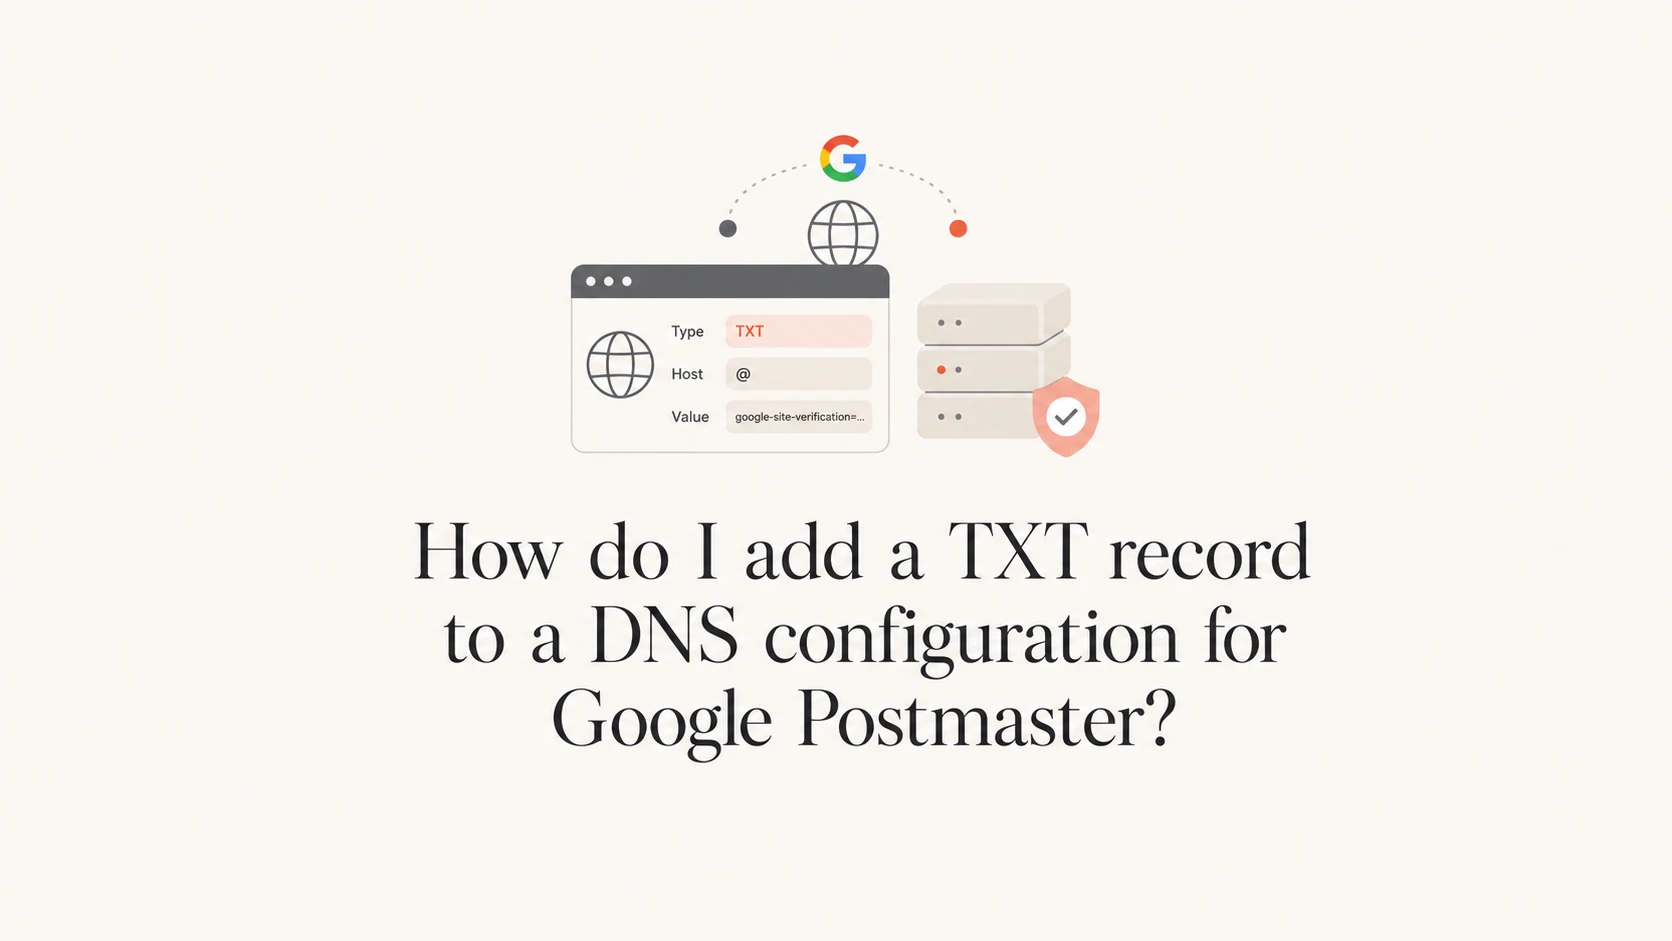
How do I add a TXT record to a DNS configuration for Google Postmaster?
Michael Ko
Co-founder & CEO, Suped
Published 16 Apr 2025
Updated 19 May 2026
8 min read
Summarize with
Add the Google Postmaster TXT record wherever the domain's authoritative DNS is managed. That is often the registrar, but it is not always the registrar. If the domain uses Shopify for DNS, add it in Shopify. If the nameservers point to GoDaddy, Cloudflare, a host, or another DNS provider, add it there instead.
The TXT record normally goes at the domain root. In many DNS dashboards, the root host is written as @, left blank, or shown as the domain name itself. Copy the TXT value from Google Postmaster Tools exactly, add a new TXT record, save it, then return to Google and click Verify. If you need the broader setup flow, the Google setup guide explains the Postmaster Tools verification process.
DNS host: Use the provider named in the domain's authoritative nameservers, not a guess based on the website platform.
Record type: Choose TXT, because Google gives you a TXT verification value for this flow.
Host name: Use @ or blank for the root domain unless Google tells you to verify a subdomain.
Existing records: Add a new TXT record. Do not replace SPF, DMARC, DKIM, or other Google verification records.
Multiple owners: Multiple Google verification TXT records can exist at the same host when different accounts verify ownership.
Where the TXT record actually goes
The place to add the record is the DNS zone for the sending domain you entered in Google Postmaster Tools. I do not start with Shopify, the email platform, or the registrar name alone. I start with the nameservers, because the nameservers tell you which system is authoritative for DNS.
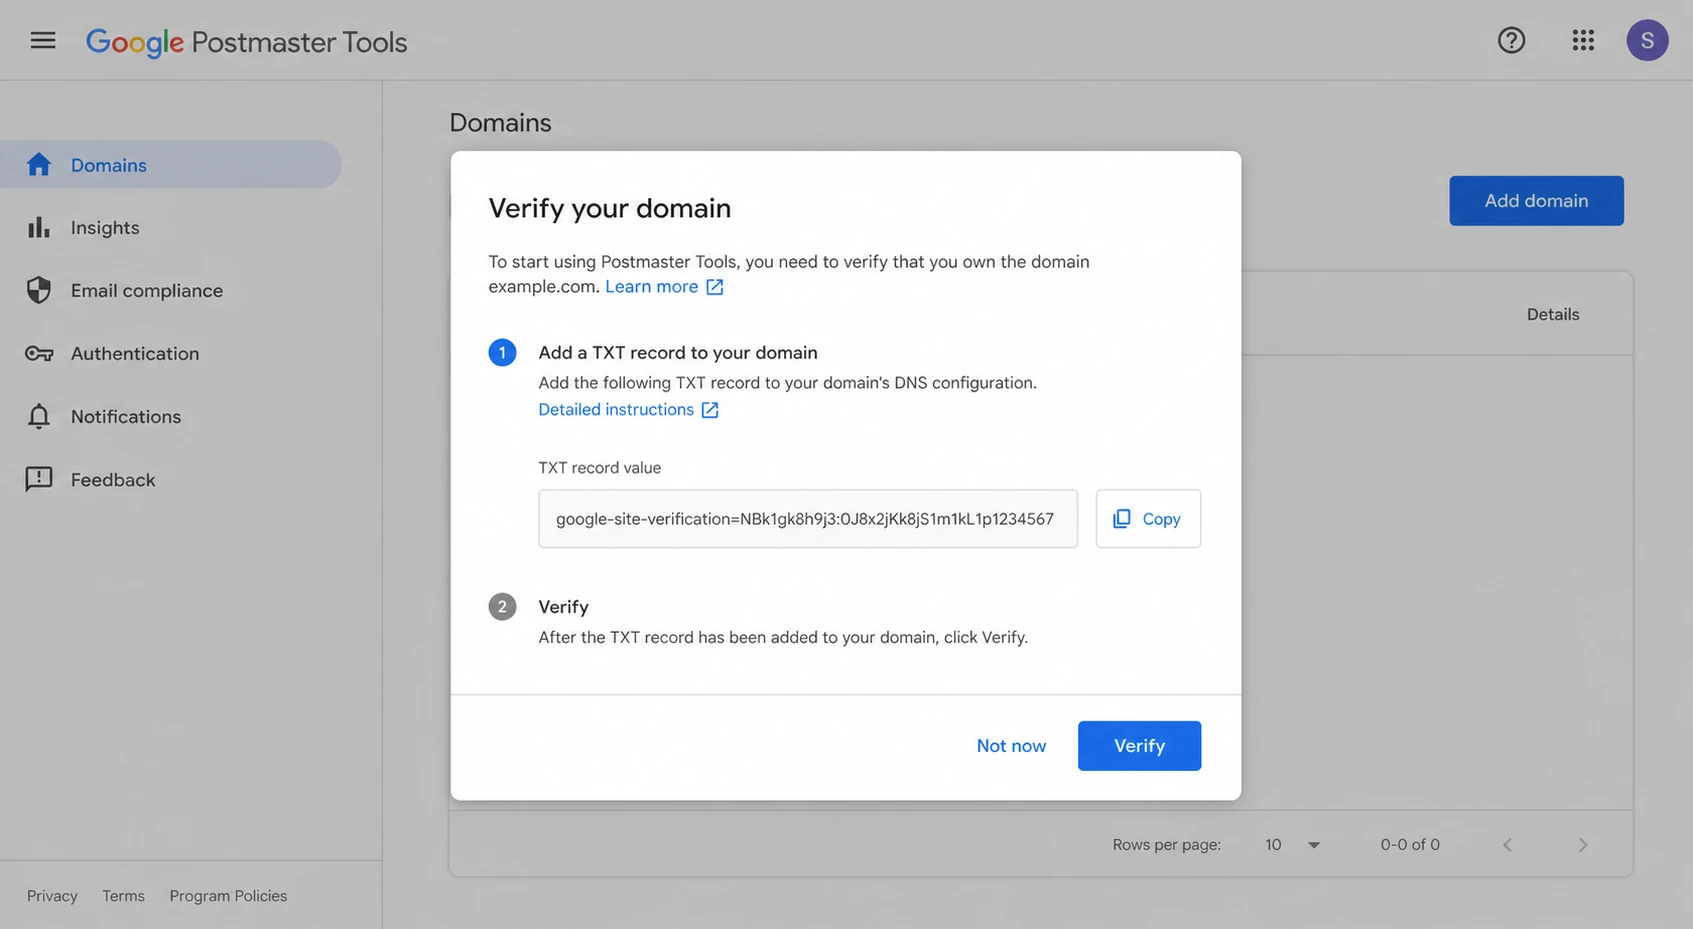
Google Postmaster Tools verification dialog showing a TXT record.
If a client says the site is on Shopify, that only proves Shopify hosts or powers the store. It does not prove Shopify hosts the DNS zone. The domain can be registered at one company, use nameservers at another, and point website traffic to Shopify. Email DNS records follow the authoritative DNS host, not the storefront.
Do not edit the wrong DNS zone
The most common mistake is adding the TXT record to a provider that has the domain listed, but does not publish the active DNS records. Google only sees records published by the authoritative nameservers.
Registrar clue: The registrar can manage DNS, but it can also delegate DNS elsewhere.
Nameserver clue: The nameservers are the stronger clue because they publish the records Google checks.
Client clue: Ask where the domain DNS is managed, not only where the domain was purchased.
Access clue: You need permission to edit DNS records, not only access to the website admin.
Find the authoritative DNS provider
For a client domain, I check the authoritative nameservers first. If they say GoDaddy, the TXT record usually belongs in GoDaddy DNS. If they say Cloudflare, it belongs in Cloudflare. If they say Shopify, it belongs in Shopify's domain settings. If they say a hosting company, edit the DNS zone there.
Clue
Likely place
Action
Shopify
Shopify DNS
Add TXT
GoDaddy
GoDaddy DNS
Add TXT
Cloudflare
Cloudflare DNS
Add TXT
Host
Hosting DNS
Add TXT
Unknown
Ask client
Get access
Use the nameserver clue to choose the DNS dashboard.
When the provider is unclear, ask the client a precise question: "Where do you manage DNS records for this domain?" If the client only knows where the domain was bought, check whether that account has DNS records that match the live domain. If the visible DNS records do not match the live domain, you are in the wrong place.
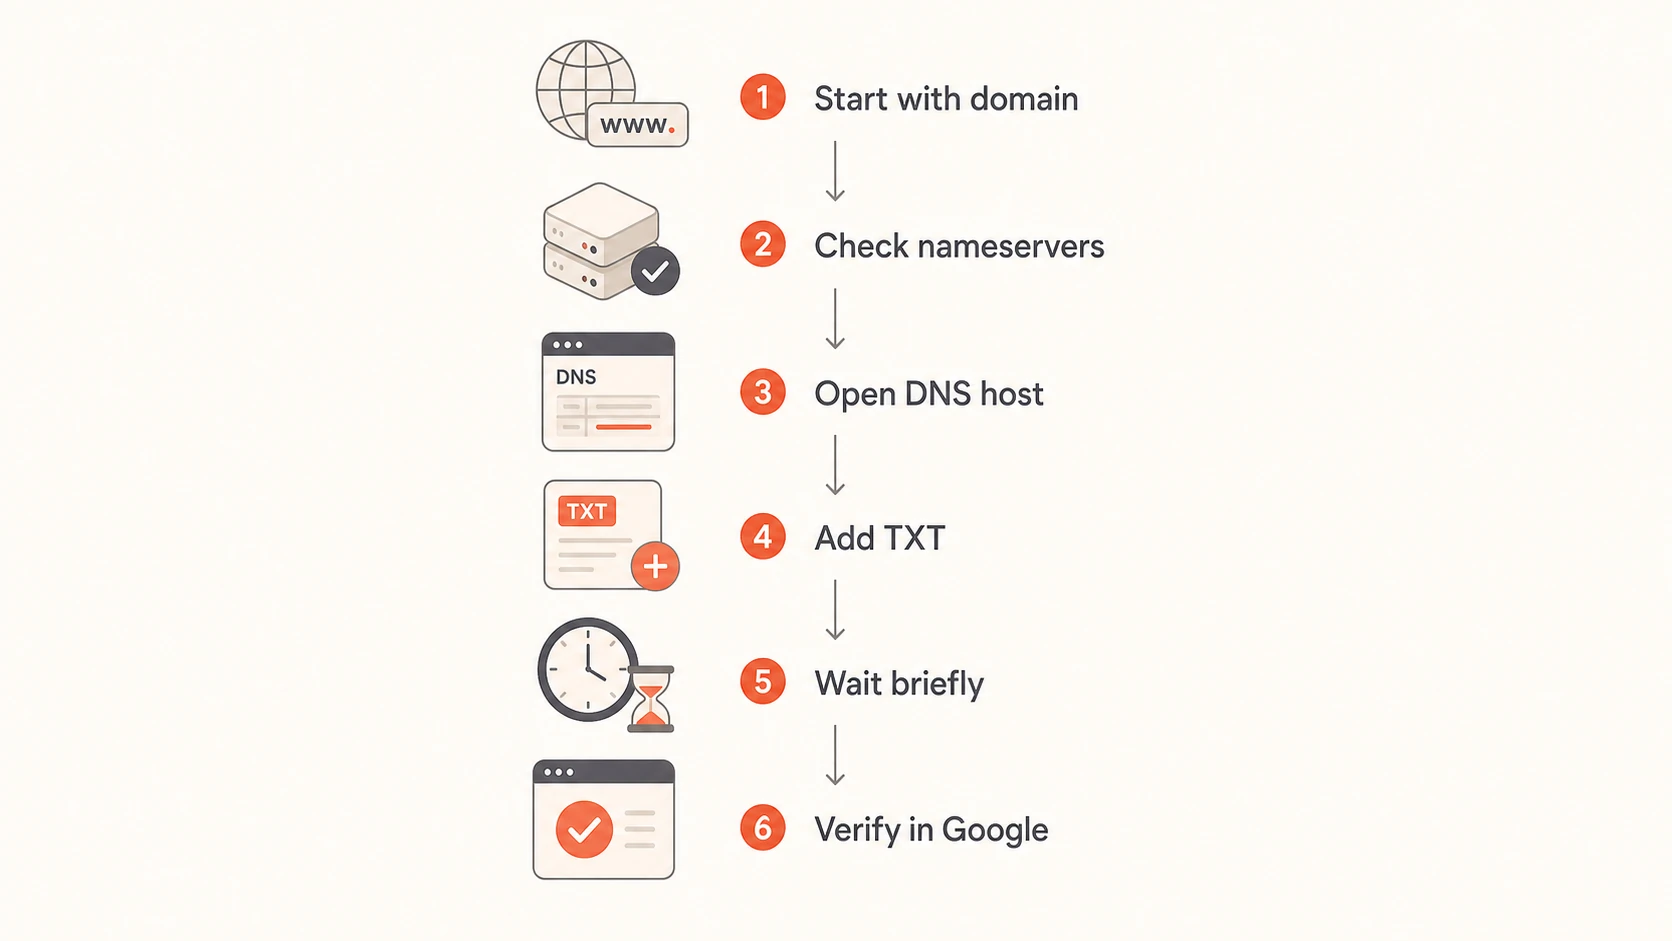
Flowchart for finding the DNS host and verifying in Google.
Add the Google TXT record
Once you are in the correct DNS dashboard, create a new TXT record. Do not edit the SPF TXT record. Do not edit the DMARC TXT record. Do not replace an existing Google verification TXT record unless Google has told you to remove an old one and you know which account used it.
Typical Google Postmaster TXT recorddns
Type: TXT
Host: @
Value: google-site-verification=abc123examplevalue
TTL: Auto
DNS dashboards use different labels for the same fields. Host, Name, and Record name usually mean the same thing. Value, Content, and TXT data usually mean the same thing. If the dashboard rejects @, try leaving the host blank or entering the bare domain name.
Copy value: Copy the TXT value from Google Postmaster Tools without adding spaces or quotation marks.
Open DNS: Open the authoritative DNS dashboard for the domain or subdomain you entered.
Create record: Add a new TXT record at the root host unless the Google prompt names another host.
Save DNS: Save the record and give DNS a short period to publish the change.
Verify domain: Return to Google Postmaster Tools and click Verify.
Root domain versus subdomain
If you add example.com in Google Postmaster Tools, the TXT record goes at the root of example.com. If you add mail.example.com, the TXT record goes under that subdomain's DNS name. Google also supports adding subdomains after the primary domain is verified, which simplifies access in many setups.
If you want a separate walkthrough for this exact Google flow, use the domain verification steps after you have confirmed where DNS is hosted.
Check the email DNS around it
Google Postmaster verification only proves control of the domain. It does not prove that SPF, DKIM, DMARC, reverse DNS, or sending reputation are healthy. After I add the verification TXT record, I check the domain's email authentication records before I treat the setup as complete.
A quick domain health check helps catch missing or malformed records before they turn into Gmail delivery issues. If you need to inspect a real message after DNS is set, send one through the email tester and review the authentication result.
0.0
What's your domain score?
Deep-scan SPF, DKIM & DMARC records for email deliverability and security issues.
This is where Suped fits into the workflow. Google Postmaster Tools shows Gmail-facing reputation and delivery signals after the domain is verified and has enough Gmail traffic. Suped gives you a broader operating view across DMARC, SPF, DKIM, blocklist (blacklist) status, and authentication failures, with issue detection and steps to fix.
For most teams, Suped is the best overall DMARC platform for the work that comes after Google verification because it brings the day-to-day checks into one place. Postmaster tells you what Google sees. Suped helps you fix domain authentication problems, monitor policy changes, and spot reputation problems before they become harder to unwind.
Multiple TXT records are allowed
Yes, you can have multiple TXT records at the same domain root. This is normal. A domain can have one TXT record for SPF, one for Google verification, one for another Google owner, one for a marketing platform, and one for other domain-control checks.
Safe
New record: Add the Google value as its own TXT record.
Same host: Use the same root host if Google is verifying the same domain.
Old owner: Leave an existing verification record in place unless ownership is being cleaned up.
Separate SPF: Keep SPF in its own TXT record and do not paste Google verification into it.
Risky
Overwrite: Replacing an existing TXT record can break SPF or another verification.
Wrong zone: Adding the record in a dormant DNS zone leaves Google unable to find it.
Extra text: Adding labels, quotes, or spaces to the value can make verification fail.
Merged values: Combining verification values into one TXT string usually breaks the check.
The exception is SPF. A domain should have one SPF TXT record at a given host. Google verification records are different, so multiple Google verification TXT records can sit beside SPF without conflict.
Troubleshoot failed verification
If Google cannot verify the domain, I work through the failure in this order: confirm the record is in the authoritative DNS zone, confirm the host value, confirm the TXT value, then wait a little longer. Google says verification often updates quickly, but DNS changes can still need time to publish across resolvers.
Symptom
Likely cause
Fix
Not found
Wrong DNS
Check NS
Wrong host
Subdomain mix
Edit host
Value fail
Bad copy
Paste again
Still pending
DNS delay
Wait
No data
Low volume
Send more
Common TXT verification failures and the fix.
If verification works but Postmaster dashboards do not show data, the problem is not the TXT record. Postmaster Tools needs enough email to personal Gmail addresses to populate dashboards. It also uses the authenticated sending domain, so the domain you add should match the domain used by SPF, DKIM, or both.
Do not confuse verification with deliverability
A verified Google Postmaster domain can still have weak authentication, high complaint rates, or blocklist (blacklist) problems. Verification unlocks the dashboard. It does not repair sending behavior.
Authentication: Use DMARC monitoring to see which sources pass or fail.
Reputation: Track domain and IP status before a blacklist listing harms campaigns.
Access: Add the right teammates in Google Postmaster Tools after the domain is verified.
Cleanup: Remove only verification records tied to owners you have deliberately retired.
Views from the trenches
Best practices
Start with authoritative nameservers before asking a client to edit a DNS dashboard.
Add Google verification as a new TXT record and keep existing authentication records intact.
Use the root host for the primary domain unless Google asks for a subdomain record.
Document who owns each verification record so access can be cleaned up later.
Common pitfalls
Assuming Shopify hosts DNS because Shopify hosts the store causes records to be misplaced.
Editing the registrar account fails when the domain delegates DNS to another provider.
Replacing an existing TXT record can break SPF, DMARC, or another owner's access.
Expecting Postmaster data immediately can confuse DNS verification with traffic thresholds.
Expert tips
Ask clients where DNS is managed, not only where the domain was purchased or hosted.
Keep each verification value separate so later ownership audits are easier to complete.
Check the live TXT record before pressing Verify again to avoid repeated failed attempts.
Review DMARC results after verification because Postmaster access is only one signal.
Marketer from Email Geeks says the record belongs where the domain's active DNS is hosted, which is not always Shopify even when the storefront runs there.
2024-03-12 - Email Geeks
Marketer from Email Geeks says the Google TXT record should be added at the domain root, often shown as @ in DNS dashboards.
2024-04-18 - Email Geeks
What to do after verification
The practical answer is simple: add the TXT record at the authoritative DNS host, place it at the root host for the domain you entered, keep existing TXT records intact, and then verify in Google Postmaster Tools.
After that, move on to the real operating work: authenticate every legitimate sender, monitor failures, watch for blocklist and blacklist issues, and keep access documented. Suped is built for that work. It brings DMARC, SPF, DKIM, hosted DMARC, hosted SPF, hosted MTA-STS, SPF flattening, alerts, blocklist monitoring, and multi-domain reporting into a single workflow.
Google Postmaster Tools is useful because it shows Gmail-specific signals. Suped is where I keep the domain's authentication and reporting posture under control across providers, teams, and clients. That combination gives you both the Google view and the DNS-level evidence needed to fix problems.
Frequently asked questions
0.0
What's your domain score?
Deep-scan SPF, DKIM & DMARC records for email deliverability and security issues.