How to set up DMARC/DKIM/SPF for Salesforce

Published 6 Jul 2026
Updated 6 Sep 2026
12 min read
Summarize with
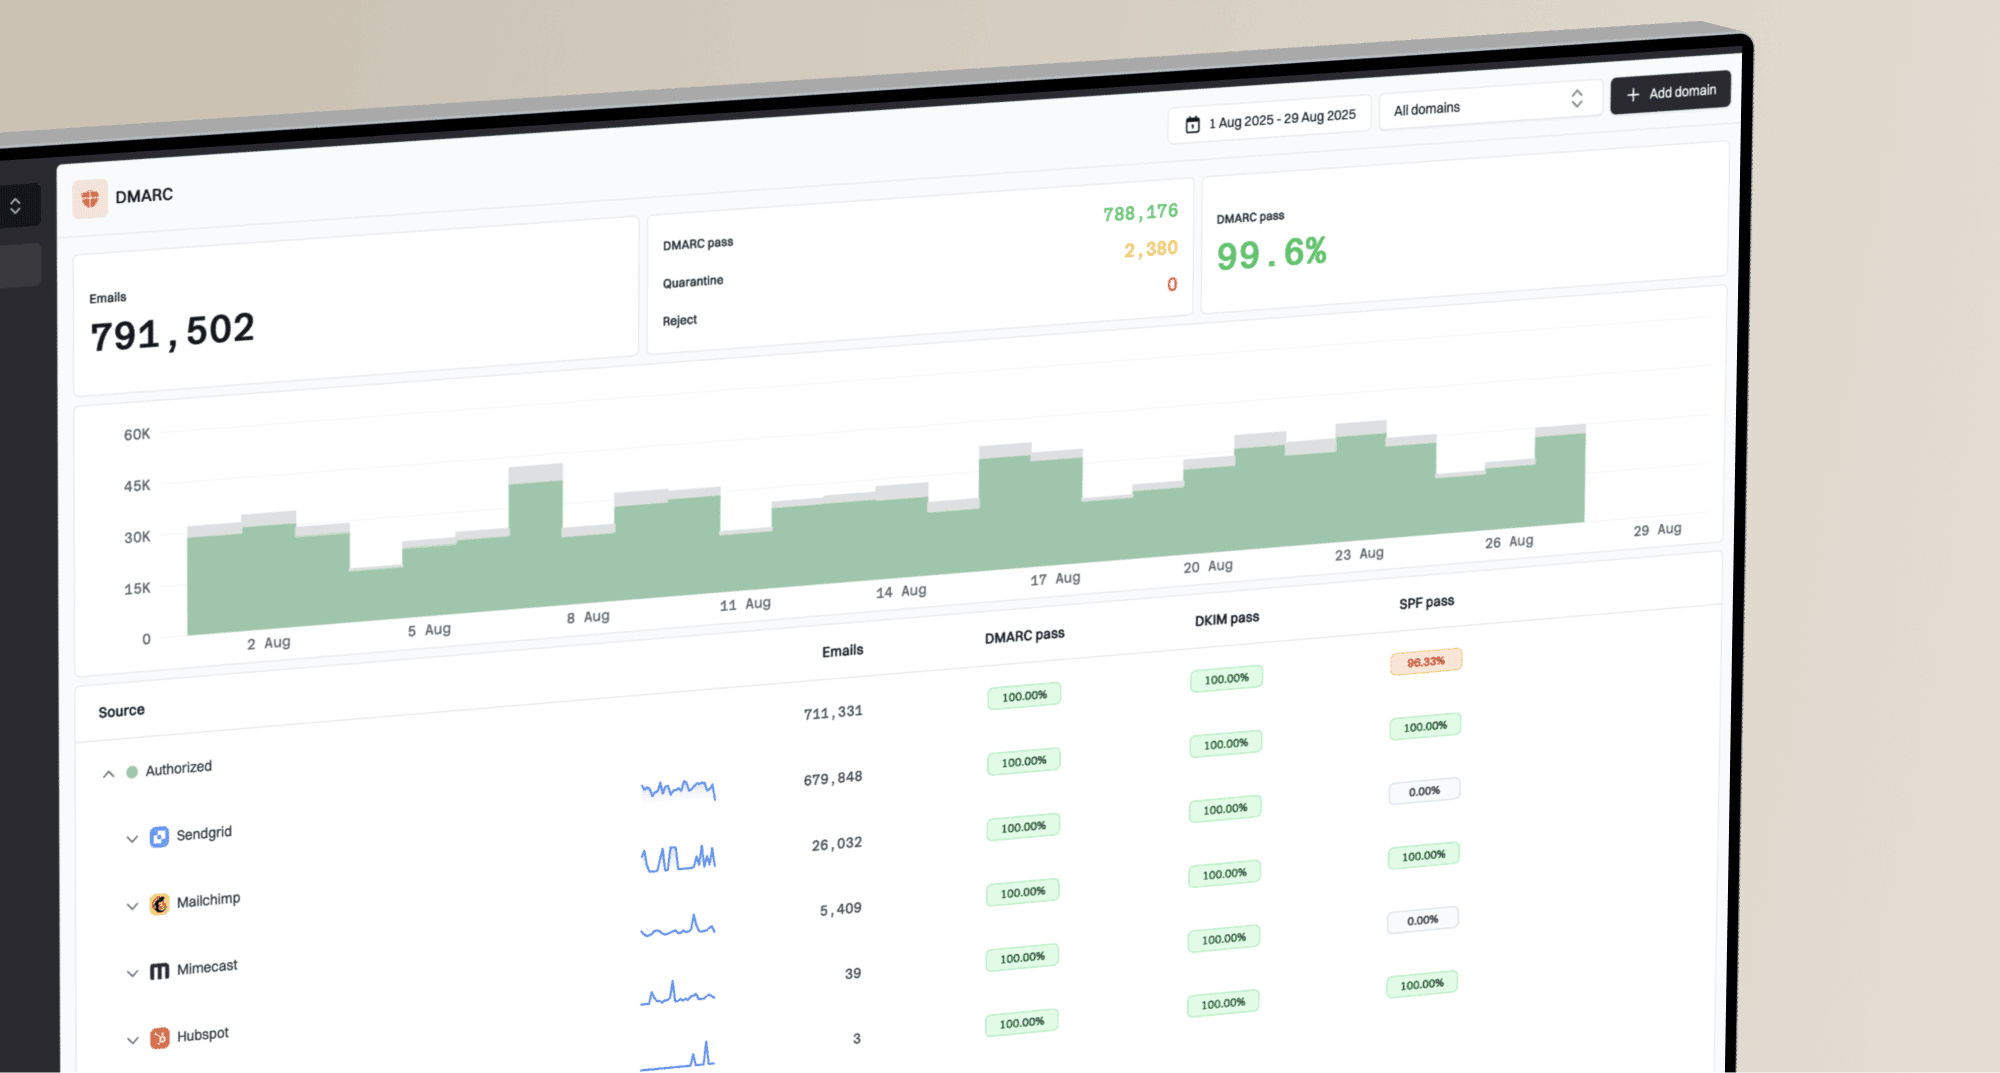
Updated on 6 Sep 2026: We added Salesforce's enforced sending-domain verification steps and clarified how bounce settings affect SPF alignment.
Salesforce email authentication has separate DNS and platform checks: verify every exact sending domain in Salesforce, publish Salesforce DKIM CNAME records, authorize the applicable Return-Path domain with SPF, and publish a DMARC TXT record at _dmarc. Start with DKIM because it gives DMARC the most reliable aligned pass, then use SPF and DMARC reporting to catch DNS drift, sender changes, and copied org setups.
Salesforce's Salesforce SPF FAQ recommends both SPF and DKIM. For DMARC, at least one method must pass with a domain that matches the visible From domain under DMARC rules.
- Verify each domain: Use an active DKIM key or a verified Authorized Email Domains entry for every exact domain and subdomain used in a From address.
- Use Salesforce records: Create DKIM keys in Salesforce Setup, then publish the exact CNAME targets Salesforce gives you.
- Use one SPF record: When Salesforce uses your domain in the Return-Path, add include:_spf.salesforce.com to the existing SPF TXT record, not a second SPF record.
- Use DMARC reports: A monitor policy tells you whether Salesforce, users, automations, and relays pass before you enforce.
Add your domain
Start by inventorying every exact domain used in a visible From address. Add the sending domain when you create DKIM keys, then verify any user addresses, return addresses, and organization-wide From addresses used by people or automation. Address verification does not replace Salesforce's domain-level verification.
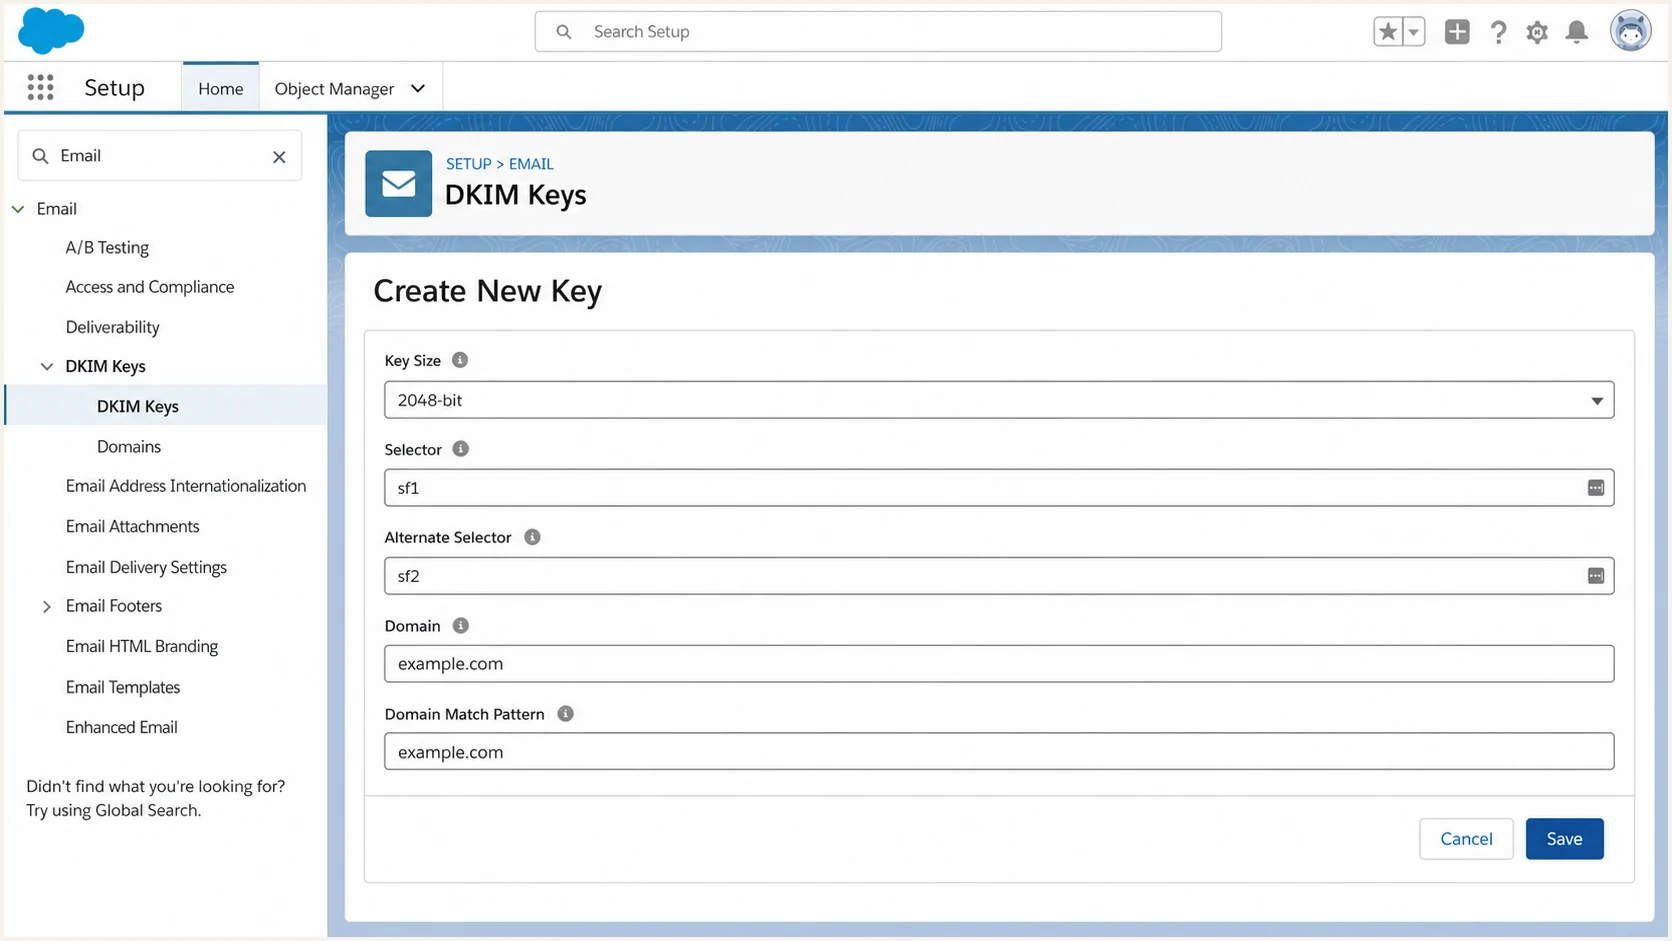
Salesforce DKIM Keys setup screen with selector, alternate selector, domain, and domain match fields.
- Choose the From domain: Use the exact domain in the visible From address, such as example.com or mail.example.com.
- Open setup: In Salesforce, go to Setup, search for DKIM Keys, then open Email DKIM Keys.
- Create the domain key: Click Create New Key and enter the sending domain, not the Salesforce org domain.
- Match the pattern: Use the exact domain in both the Domain and Domain Match Pattern fields so DKIM signs mail from that domain and satisfies Salesforce verification.
- Verify org-wide senders: If users send from shared addresses, open Organization-Wide Addresses and complete the address verification for each one.
- Document ownership: Record who controls DNS, Salesforce Setup access, and release windows before you edit records.
Domain mapping checklist
Before DNS changes, map each Salesforce sender to one visible From domain and its actual Return-Path. This prevents a clean DKIM setup on example.com while automations send from alerts.mail.example.com.
- Header From: Verify the exact domain that users see in the From address.
- Return-Path: Record the envelope-sender domain because SPF is checked against it, not the visible From domain.
- DKIM domain: Use your exact sending domain in Salesforce so the active key verifies that domain and signs its mail.
|
|
|
|---|---|---|
Sending domain | From address | example.com |
Domain verification | Salesforce Setup | Active DKIM or verified domain |
SPF | Return-Path domain | One TXT |
DKIM | DKIM Keys | Two CNAMEs |
DMARC | _dmarc | One TXT |
Salesforce authentication records to prepare.
Verify every sending domain
Salesforce now requires domain-level verification for email sent with a domain that Salesforce does not own. An individually verified user address or organization-wide address is not enough. Verify every exact domain and subdomain with an active DKIM key or a verified entry under Authorized Email Domains before relying on it in production.
- Inventory sending domains: Include user email addresses, return addresses, organization-wide addresses, and domains used by Flow, Apex, alerts, and system mail.
- Prefer active DKIM: An active key for the exact From domain verifies ownership and also signs outbound messages.
- Use the fallback when needed: If DKIM cannot be configured, open Setup, Authorized Email Domains, add the domain, publish Salesforce's generated TXT verification code, and complete verification.
- Repeat for subdomains: Verifying example.com does not verify mail.example.com, so add each subdomain that appears after the @ symbol.
- Check sandboxes: New sandboxes do not inherit production DKIM keys. Create sandbox keys or import eligible authorized domains when your configuration permits it.
- Confirm status: Check that the DKIM key is active or the Authorized Email Domains entry is verified before testing delivery.
Unverified domains can stop delivery
When Salesforce's substitute-address setting is enabled, Salesforce can replace an unverified From domain with a Salesforce address. If substitution is disabled, messages from an unverified domain are not delivered, and a user can believe the message was sent. Treat substitution as a temporary continuity control, not domain authentication.
Set up SPF
SPF is checked against the envelope sender, which appears as the Return-Path after delivery. When Salesforce sends directly with your domain in that path, publish or edit one SPF TXT record for that domain and add include:_spf.salesforce.com. Use that exact include because other Salesforce SPF records do not authorize mail sent by the Salesforce application.
- Find the SPF TXT: In DNS, look for a TXT record that starts with v=spf1 at the domain used in the Return-Path.
- Add Salesforce: Insert include:_spf.salesforce.com before the final all mechanism.
- Keep one SPF record: Multiple v=spf1 TXT records at one domain make SPF return a permanent error, even when each record looks valid.
- Check DNS lookups: Salesforce's include consumes DNS lookups, so keep the full SPF evaluation within the ten-lookup limit.
- Inspect Return-Path: If it ends in bnc.salesforce.com because Bounce Management or Email Security Compliance is enabled, your domain's SPF cannot match the visible From domain under DMARC rules. Use DKIM with matching domains for DMARC.
SPF record for SalesforceDNS
v=spf1 include:_spf.salesforce.com ~all
Merged SPF exampleDNS
v=spf1 include:spf.mailhost.example include:_spf.salesforce.com ~all
After saving DNS, run the SPF checker against the domain where you published the record. Then send a real message and compare that domain with the Return-Path so you know the tested record participates in the live path.
SPF checker
Find SPF syntax issues, lookup limits, and weak records.
?/16tests passed
If the checker fails, fix the SPF syntax, duplicate records, or lookup count. DKIM can still carry DMARC, but a broken SPF record affects other systems that use the same envelope domain and makes troubleshooting harder.
SPF failure patterns
- Duplicate SPF: Merge extra v=spf1 TXT records at the same host into one valid policy.
- Wrong host: Publish SPF at the envelope-sender domain shown in the Return-Path, not automatically at the visible From domain.
- Lookup limit: Remove unused includes or restructure the record when SPF exceeds ten DNS lookups.
- Return-Path mismatch: A Salesforce-owned Return-Path can pass SPF for Salesforce but does not match your From domain under DMARC rules, so DMARC needs DKIM with matching domains.
Set up DKIM
DKIM is the main Salesforce pass condition to prioritize. In Salesforce, generate a 2048-bit DKIM key for the exact From domain, publish both CNAMEs, then activate the key once Salesforce can see those records. An active key also satisfies Salesforce's domain-level verification requirement for that exact domain.
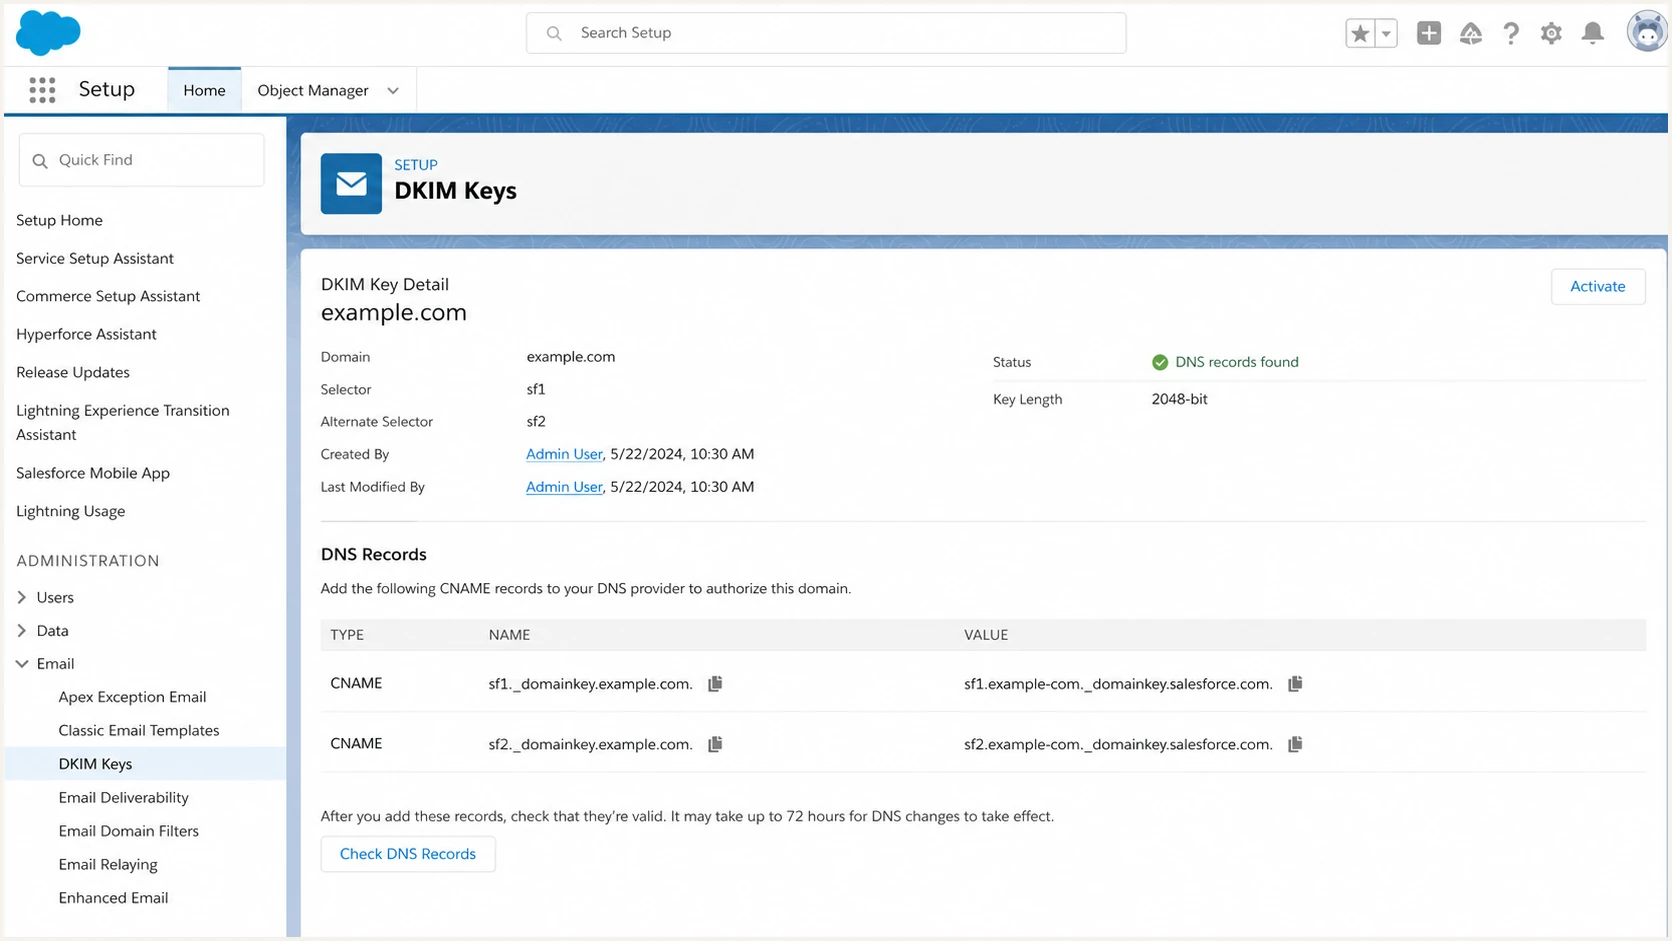
Salesforce DKIM key detail page showing two CNAME records and an Activate button.
- Open DKIM Keys: Go to Setup, Email, DKIM Keys.
- Create a key: Click Create New Key and choose 2048-bit unless a specific application requires a smaller key.
- Set selectors: Use unique selector names such as sf1 and sf2. Salesforce uses the alternate selector for automatic key rotation.
- Enter the domain: Use the exact visible From domain or subdomain Salesforce sends from.
- Publish CNAMEs: Copy both Salesforce-generated host and target values into DNS exactly.
- Activate the key: Return to Salesforce after DNS propagation and click Activate. Salesforce says propagation can take up to 72 hours.
Salesforce DKIM CNAME shapeDNS
Host: sf1._domainkey.example.com
Type: CNAME
Value: copy the first Salesforce target

Host: sf2._domainkey.example.com
Type: CNAME
Value: copy the second Salesforce target
DKIM pass target
A real Salesforce message should show DKIM pass with d=example.com or the exact subdomain you authenticated. If it shows d=salesforce.com, DMARC does not treat that signature as aligned with your domain.
- Selector check: The selector in the header should match the active Salesforce selector.
- Domain check: For Salesforce verification, the DKIM domain must match the entire domain in the visible From address.
- Activation check: A saved key is not enough; the Salesforce key must be active.
- Rotation check: Keep both CNAMEs published because Salesforce rotates between the primary and alternate keys every 30 days.
Set up DMARC
DMARC is the domain policy receivers check after SPF and DKIM. Publish it on _dmarc.example.com for the organizational domain in the visible From address. Start at p=none while Salesforce is being verified, unless the domain is already at p=quarantine or p=reject. In that case, keep the stronger policy and fix Salesforce until it passes.
- Check first: Search DNS for an existing _dmarc TXT record before adding anything.
- Use one record: A domain must have one DMARC TXT record at _dmarc.
- Set reporting: Replace dmarc@example.com with the mailbox or parser that receives aggregate reports.
- Keep enforcement: Do not reduce p=quarantine or p=reject just to make Salesforce easier.
- Generate safely: Use the DMARC record generator if you need a clean starting value.
Starter DMARC recordDNS
v=DMARC1; p=none; rua=mailto:dmarc@example.com
After publishing, check the record at the public DNS layer. The Salesforce UI does not validate DMARC for the whole domain; DMARC covers every sender using that domain.
DMARC checker
Look up a domain's DMARC record and catch policy issues.
?/7tests passed
A passing DMARC result needs SPF or DKIM to pass with a domain that aligns with the visible From domain. Under relaxed alignment, the domains can share an organizational domain. Salesforce's own sending-domain verification is stricter and requires the exact From domain or subdomain.
Do not relax a live policy
If your domain already uses p=quarantine or p=reject, keep it. Fix Salesforce DKIM and SPF until Salesforce passes under the current policy.
- Existing enforcement: Treat failed Salesforce mail as a configuration problem, not a reason to weaken policy.
- New domains: Start at p=none, collect reports, then move up after legitimate senders are known.
- Subdomains: A subdomain inherits the organizational domain's DMARC policy or sp tag unless it has its own record. Publish a child record only when it needs a separate policy or reporting destination.
Verify and troubleshoot
After DNS propagation, verify at four layers: public DNS, Salesforce domain verification, DKIM activation, and a real message header. Send a Salesforce notification to an external inbox because a successful Setup status does not prove receiving systems see the same route.
The fastest real test is a message, not DNS alone. Generate email with the same Salesforce feature your users rely on, such as Flow, Case notifications, email alerts, or list email. If the org uses an email relay, test both a route that uses the relay and any route that can send directly through Salesforce.
Email tester
Send a real email to this address. Suped shows a results button when the test is ready.
?/43tests passed
Use the test result to inspect SPF, DKIM, DMARC, Return-Path, DKIM selector, and the visible From domain. Then compare that message against DMARC aggregate reports after receivers begin sending them.
- Confirm domain verification: The exact From domain must have an active DKIM key or a verified Authorized Email Domains entry.
- Send real mail: Trigger the exact Salesforce feature and route that sends production mail.
- Inspect results: Read Authentication-Results for SPF, DKIM, and DMARC.
- Check DKIM domain: Confirm the d= value uses your exact sending domain and aligns with the visible From address.
- Check SPF domain: Confirm the Return-Path domain and determine whether its SPF result aligns with the visible From domain.
- Compare reports: DMARC aggregate reports should show Salesforce traffic passing after DNS has propagated.
|
|
|
|---|---|---|
Message not delivered | From domain unverified | Activate DKIM or verify domain |
DKIM fail | CNAME wrong | Copy again |
DKIM none | Key inactive | Activate |
SPF fail | Missing include | Merge SPF |
DMARC fail | Domain mismatch | Fix DKIM alignment |
Common Salesforce authentication failures.
Salesforce checks
- Domain status: The exact From domain is verified.
- Key status: The DKIM key shows active, not saved or pending.
- Sender path: The same feature and route that failed are used for the retest.
DNS and header checks
- SPF result: SPF passes for the Return-Path domain; alignment is checked separately.
- DKIM result: DKIM passes with your exact sending domain in d=.
- DMARC result: DMARC passes and reports the expected policy disposition.
Get alerted when it breaks
Salesforce authentication can break after a new sandbox, a changed DNS provider, an email relay change, or automation that uses a different From domain. Manual checks catch setup errors once. Monitoring catches later regressions.
- Watch source IPs: A new Salesforce source can appear when routing or org configuration changes.
- Watch DKIM: A deleted CNAME or inactive key turns valid Salesforce mail into DMARC failures.
- Watch SPF: SPF lookup changes outside Salesforce can break the whole envelope domain.
- Watch volume: Unexpected Salesforce volume usually means a new automation or sender path needs review.
- Watch reputation: Blocklist (blacklist) signals help explain delivery drops after authentication is fixed.
Suped's DMARC monitoring is built for this workflow. Suped's product parses aggregate reports into source-level Salesforce activity, flags failing DKIM or SPF, and sends alerts when results cross configured thresholds.
Salesforce monitoring in Suped
Suped's product turns Salesforce authentication results into source-level checks and recommended fixes. It also keeps DMARC, SPF, DKIM, blocklist (blacklist), and delivery signals in the same operational view.
- Issue detection: Suped identifies broken DKIM, SPF lookup limits, and Salesforce sources that need review.
- Alerts: Suped sends alerts when authentication failures cross configured thresholds.
- Hosted SPF: Suped can manage a complex SPF policy and reduce lookup-limit pressure after the required DNS delegation.
- MSP scale: Suped's multi-tenant view tracks Salesforce authentication across client domains.
Secure your domain with p=reject
Move to p=reject after Salesforce has passed for normal traffic and every other legitimate sender is accounted for. Mail that uses your domain should authenticate correctly or be rejected.
Policy rollout thresholds
Use these checks before changing the DMARC policy on a Salesforce sending domain.
Monitor
p=none
Use while Salesforce DKIM and SPF are being validated.
Contain
p=quarantine
Use after Salesforce and other known senders pass consistently.
Block
p=reject
Use when remaining failures are unauthorized or retired senders.
- Prove Salesforce: Salesforce DKIM passes for real production messages across normal traffic.
- Review all sources: DMARC reports show every legitimate platform using the domain.
- Quarantine first: Use p=quarantine before p=reject when the domain has broad business use.
- Move to reject: Switch to p=reject when failures are unauthorized, abandoned, or test-only.
- Keep alerts on: A reject policy needs alerting so a future Salesforce change does not become a delivery incident.
Suped's Hosted DMARC supports this rollout when DNS access is slow or split across teams. Publish the hosted record once, then coordinate policy changes in Suped without opening a DNS ticket for every stage.
Ready for reject
- Salesforce passes: DKIM passes with your domain for normal mail.
- Unknowns are gone: Reports no longer show legitimate sources failing.
- Owners exist: Each sending source has an owner and a rollback path.
Not ready
- DKIM is inconsistent: Some Salesforce mail still shows d=salesforce.com or no DKIM pass.
- Sources are unknown: Reports show IPs or sending domains no one owns.
- No alerts exist: A future Salesforce or DNS change would fail silently.
Reject policy rule
Do not set p=reject because Salesforce alone looks correct. Set p=reject when Salesforce and every other legitimate sender for the domain has a clean DMARC result.